The 30-Second Read
This complete bathroom refurbishment in Thornaby centred around one main requirement from the customer: finding a way to introduce a full-size bath without making the room awkward to use or sacrificing the separate shower, basin and WC.
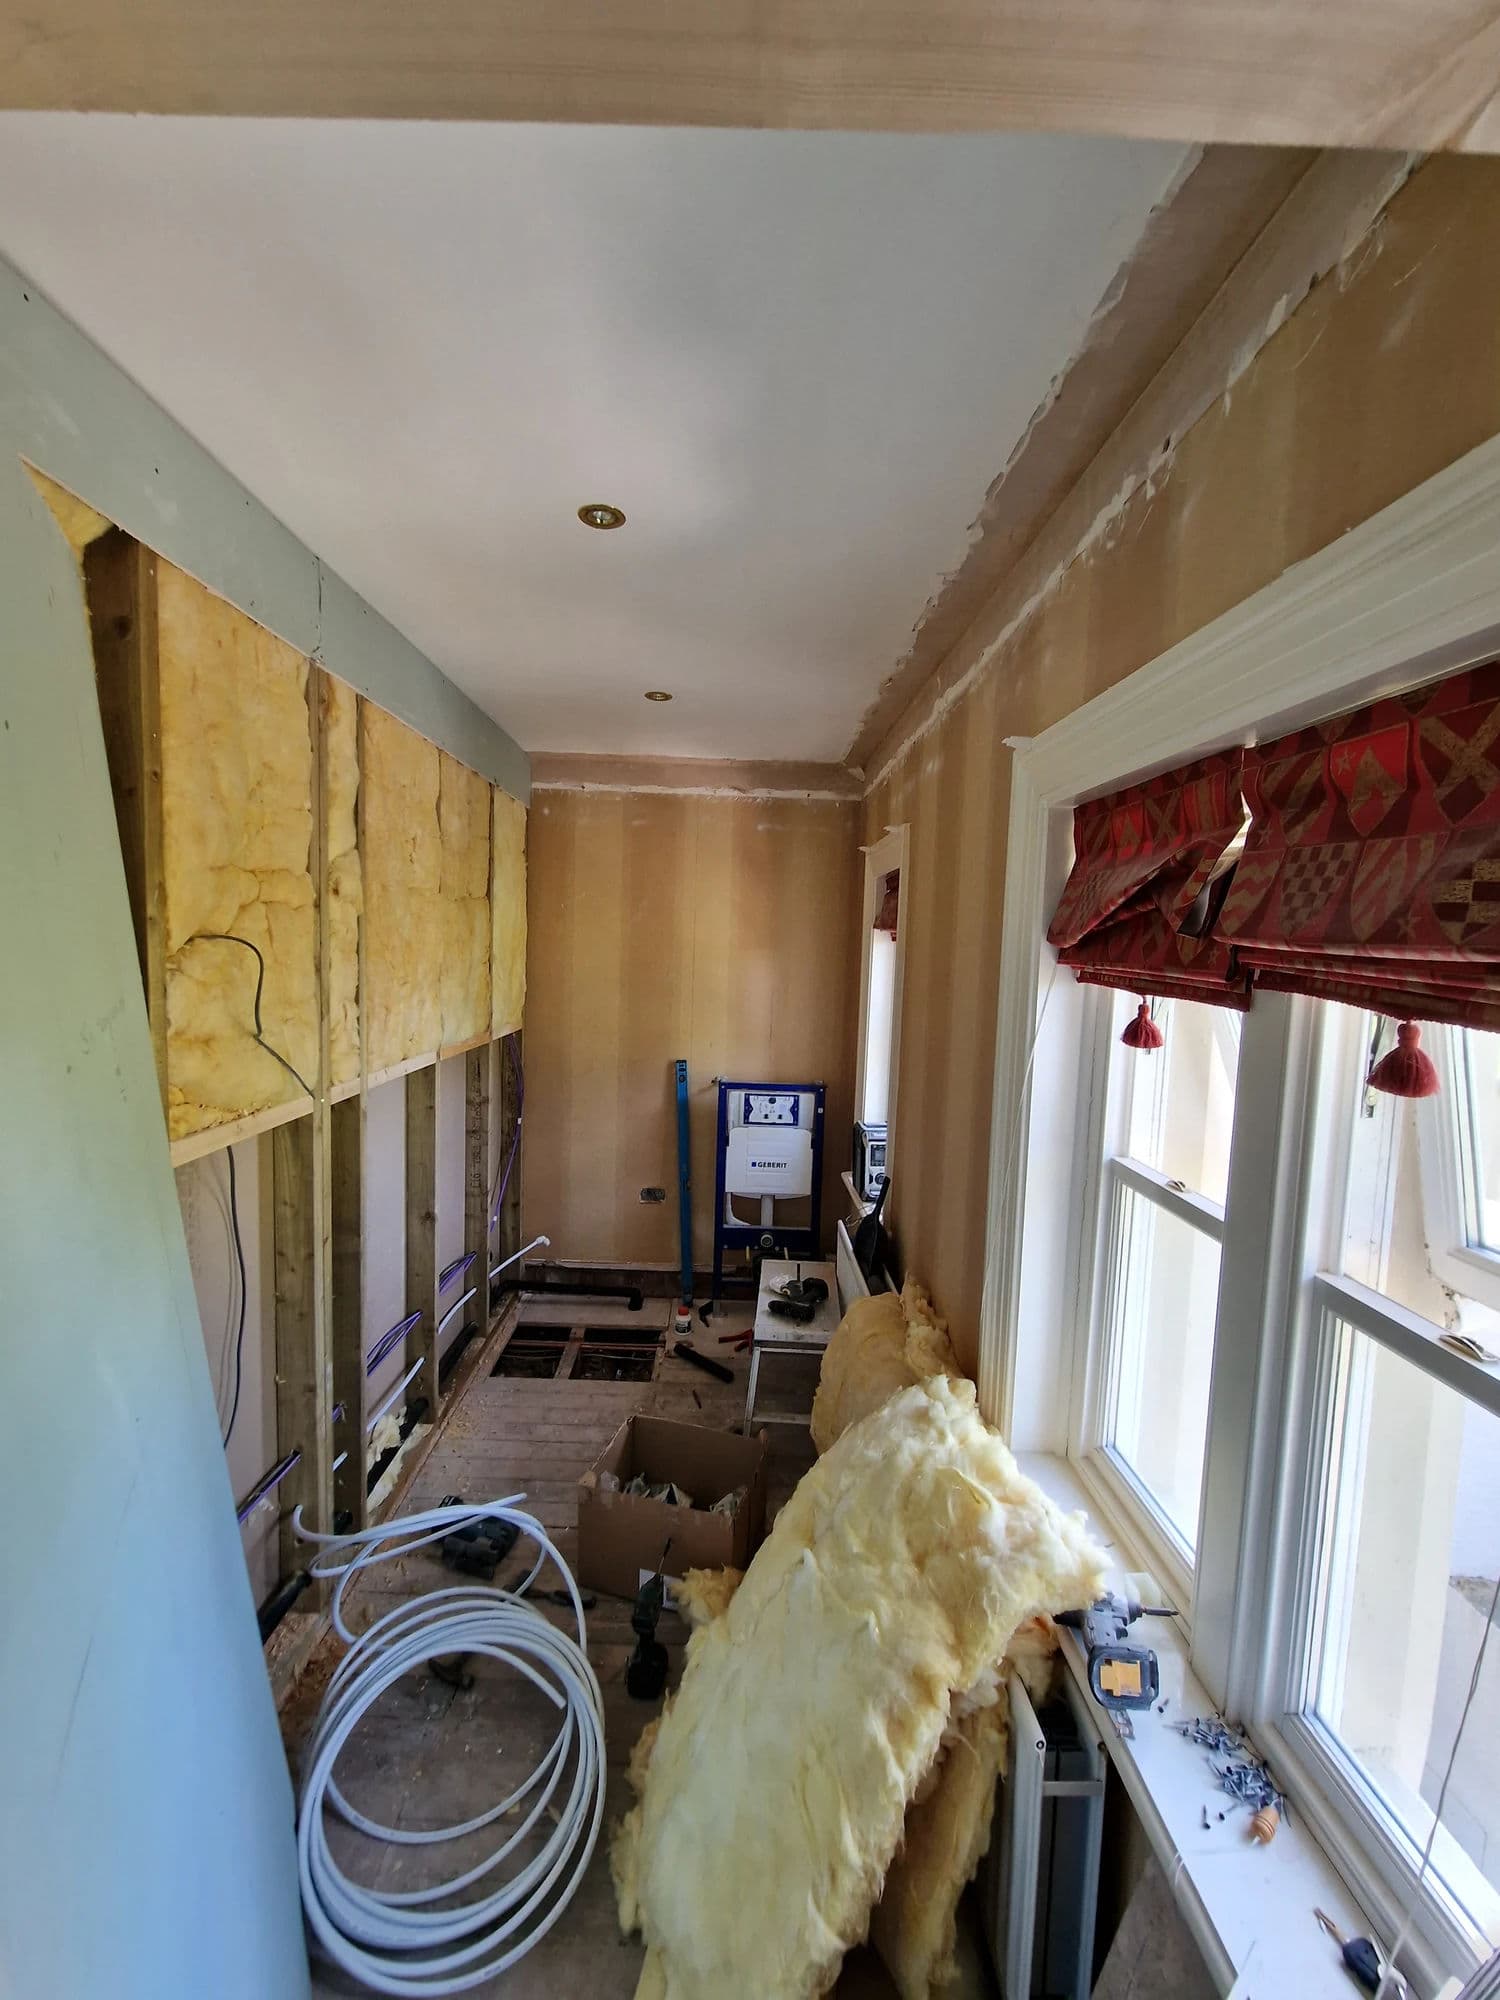
The existing bathroom had no bath. A washbasin occupied the area where the new bath needed to go, the shower was fitted on a raised tray at the far end of the room, and the radiator sat beneath one of the windows. The existing tiled shower area was also leaking and needed to be stripped back and replaced.
We redesigned the layout, moved the basin, introduced a 1700 × 800 mm bath, installed a new 1800 × 800 mm shower tray down at floor level, relocated the radiator between the two windows and extensively altered the plumbing and wastes beneath the floor.
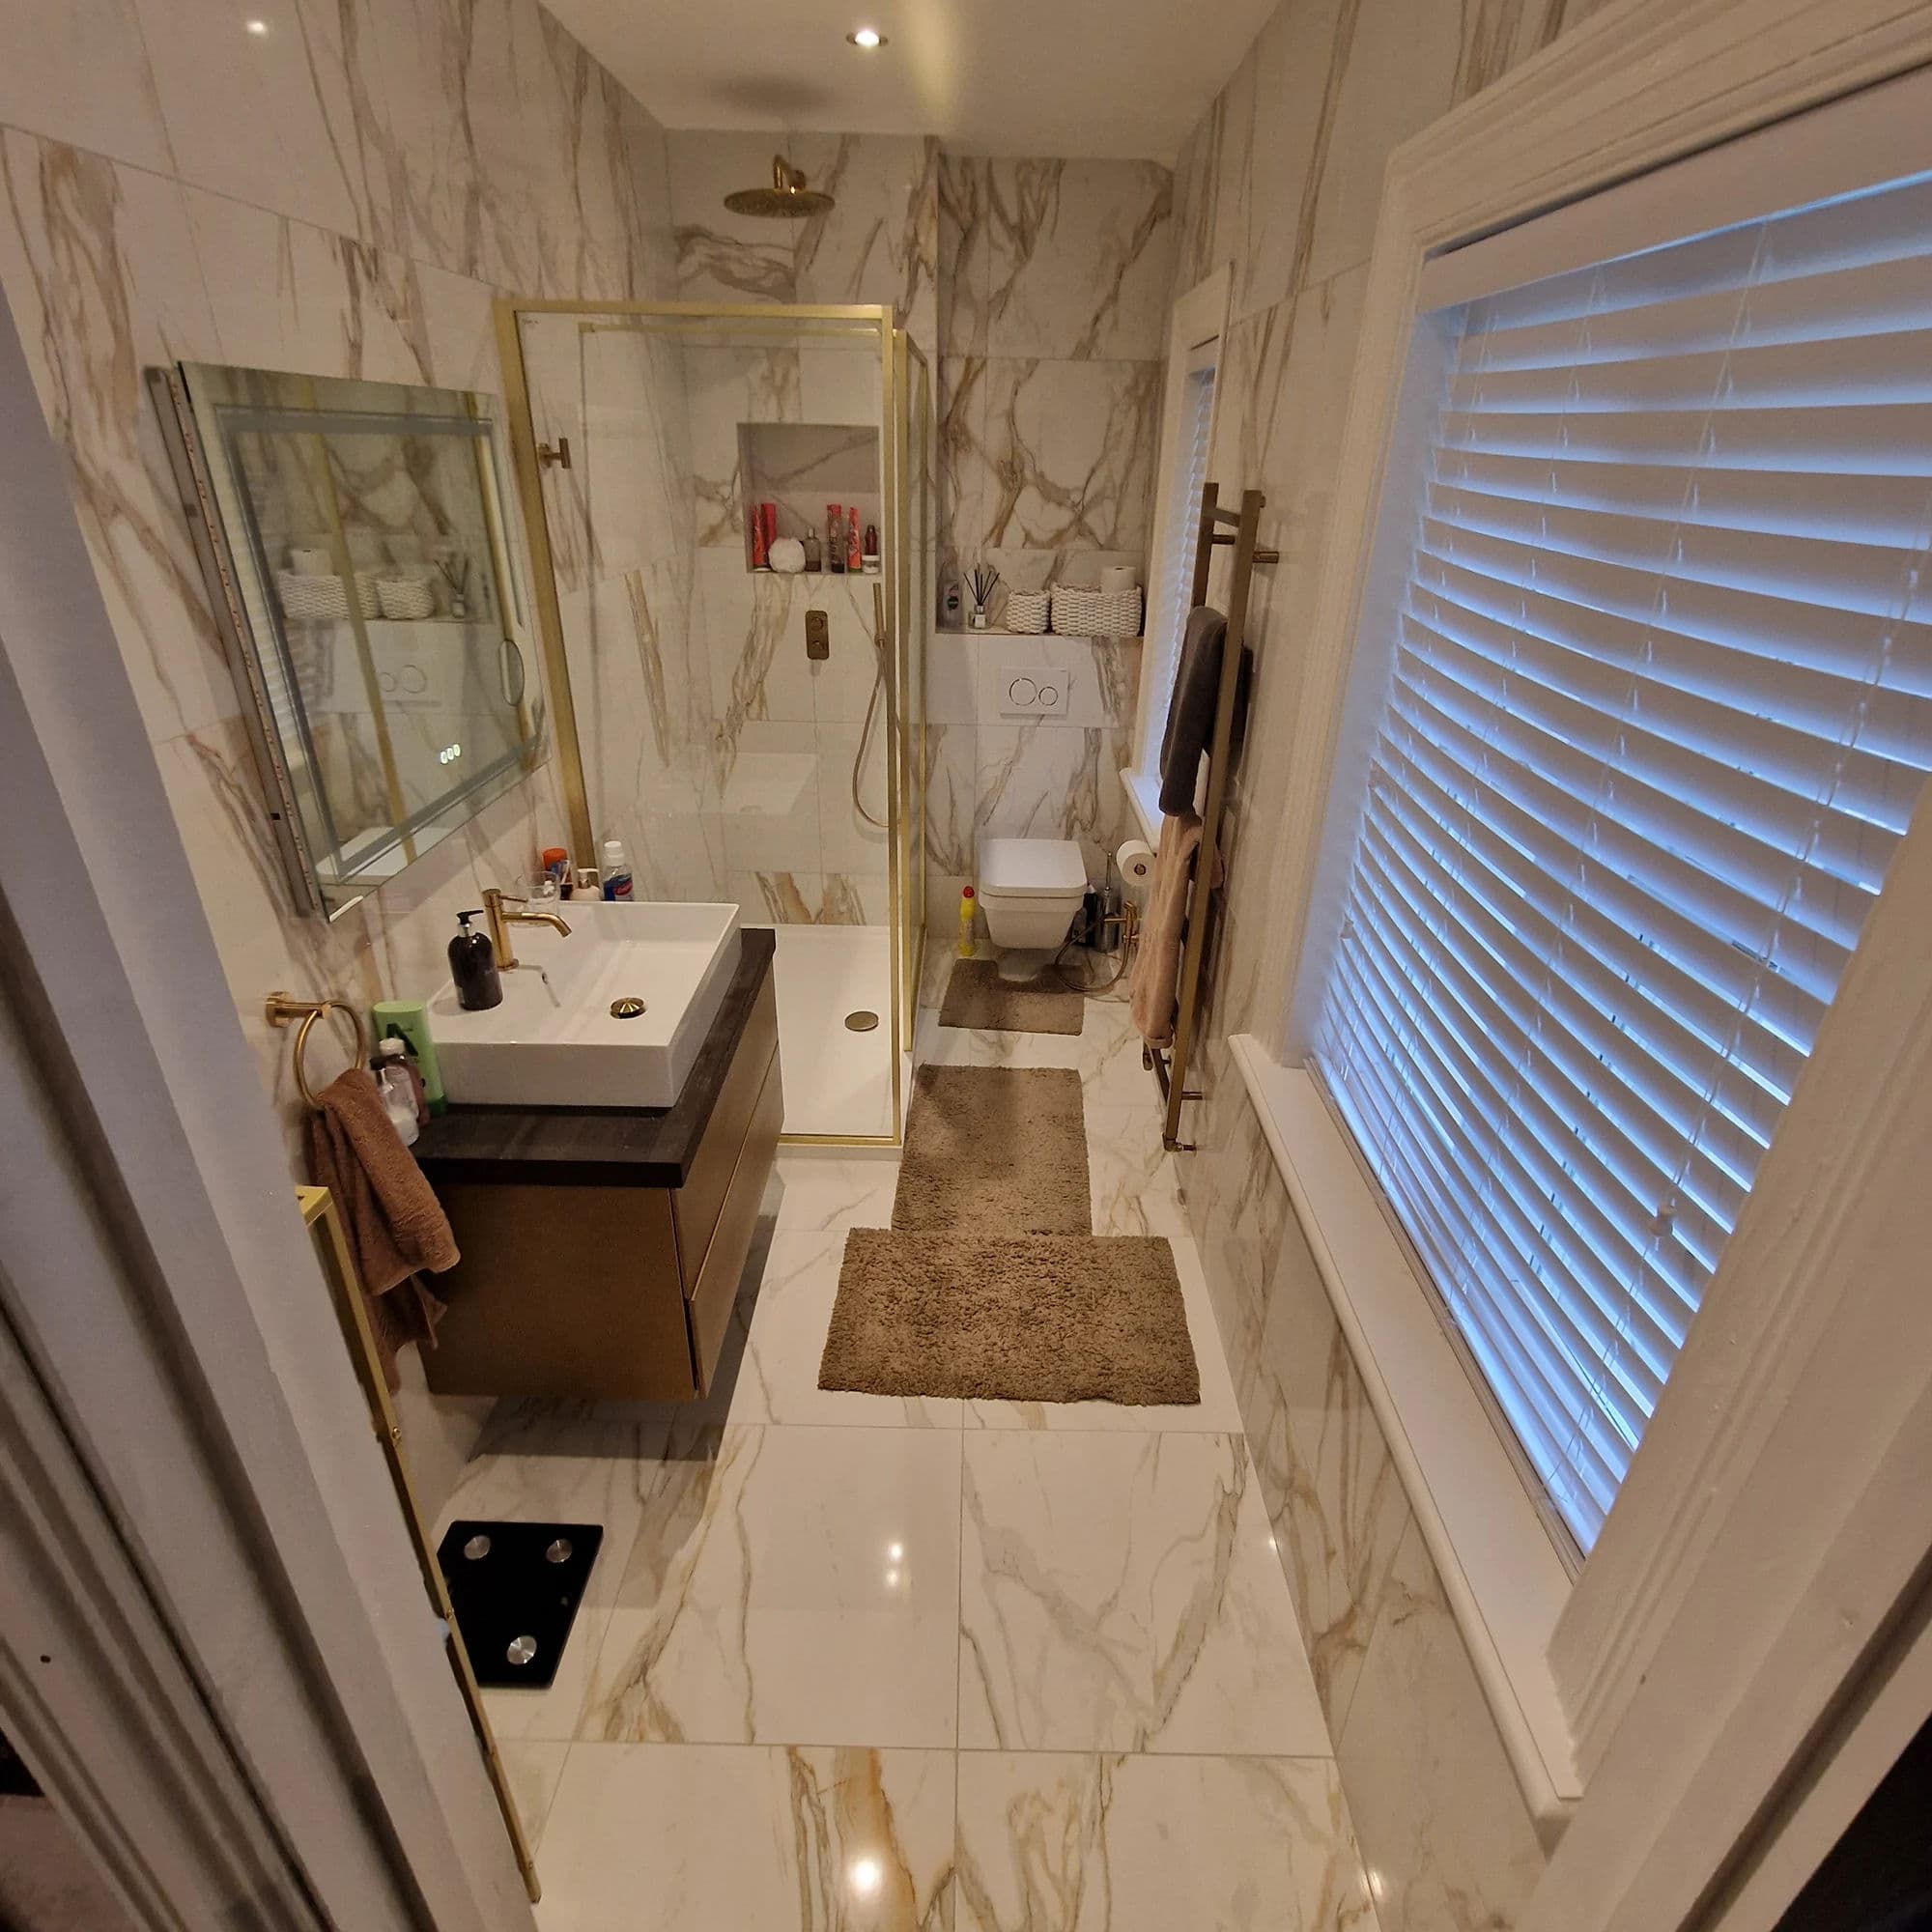
The completed room is now a proper four-piece bathroom with separate bath and shower, a wall-hung WC, countertop basin, herringbone LVT flooring, small-format tiled shower walls, painted wall panelling and natural solid-timber detailing.
Project Overview
The customer wanted to retain the functionality of a separate shower, WC and washbasin but was particularly keen to add a bath.
The concern during the initial discussions was whether a full-size bath could realistically be incorporated into the existing room without making the layout feel cramped or placing the bath in the way of the other fittings.
After assessing the available space, we confirmed that the room could accommodate a bath if the existing layout was substantially reorganised.
This was therefore much more than a like-for-like bathroom replacement.
The existing basin position had to be given over to the new bath, which meant finding a completely new location for the basin. The shower installation needed to be rebuilt, the raised tray was replaced with a new tray installed much lower at floor level, new wastes and water supplies were introduced and the heating arrangement was repositioned.
The finished bathroom installation provides all four principal fixtures within the room without any of them feeling unnecessarily squeezed into the space.
The Existing Bathroom
When Tees Valley Refurbishments Ltd first attended, the room was already being used as one bathroom.
The existing arrangement included:
- a WC near the entrance;
- a washbasin on the opposite side of the room;
- a shower at the far end;
- a shower tray raised on a riser kit;
- a radiator beneath the right-hand window;
- no bath.
The washbasin occupied the area that offered the most practical position for introducing the new bath.
There was also an existing problem around the shower area. Water had been leaking through the old tiled section, meaning that this part of the bathroom needed to be stripped back and rebuilt rather than simply cosmetically updated.
The original raised shower tray also contributed to the dated and less integrated appearance of the room.
Making Space for the Bath
The bath was the customer's main priority.
They specifically wanted to know whether a bath could be introduced while still retaining a separate shower, basin and WC and without creating an impractical layout.
The solution was to use the position of the original basin for the new 1700 × 800 mm bath.
This immediately created another requirement: the washbasin had to be relocated elsewhere within the bathroom.
A new basin position was established close to the entrance, allowing the bath to occupy the longer wall while maintaining usable circulation space through the room.
The WC remained broadly within its original area, while the shower continued to occupy the far end of the bathroom but was completely rebuilt around a new lower tray.
This reorganisation allowed the bathroom to become a genuine four-piece room rather than forcing the customer to choose between having a bath or a separate shower.
Plumbing and Waste Alterations
Changing the layout required substantial plumbing alterations beneath the floor.
New hot and cold water supplies were installed for the bath.
The relocated basin also required:
- new hot water pipework;
- new cold water pipework;
- a new basin waste connection.
A new waste was installed for the bath.
The shower drainage was also altered so that the replacement tray did not need to sit on the type of raised riser system used previously.
Access was opened through the timber floor to carry out the plumbing work.
A new 40 mm shower-waste route was formed between the joists and taken through the external wall before connecting into the existing soil pipe using a boss connection.
This change to the drainage route was an important part of allowing the new shower tray to sit much lower and produce a cleaner finished installation.
Once the plumbing work was complete, the floor could be reinstated and prepared for the final finish.
Floor Strengthening and Preparation
The existing timber joists were found to be sound and did not require structural repair.
While the floor was open, additional noggings were installed where required and extra fixings were used when reinstating the floor to produce a firmer and better-supported base.
The existing floor itself was in reasonable condition.
Before installing the final flooring, the complete surface was overlaid with 6 mm plywood to provide a smooth, consistent and flat background.
The new herringbone LVT flooring was then installed over the prepared plywood.
The herringbone layout required considerably more setting out and cutting than a conventional straight-laid floor, particularly around the bathroom fittings and perimeter of the room.
The completed floor provides a strong visual feature while working with the traditional detailing used elsewhere in the bathroom.
Rebuilding the Shower Area
The existing shower section was completely renewed.
A new 1800 × 800 mm shower tray was installed in place of the previous raised tray.
Because the drainage had been rerouted beneath the floor and through to the external soil connection, the replacement tray could sit down at floor level rather than being elevated on a riser kit.
A concealed shower system was incorporated into the wall, providing:
- a rainfall shower head;
- a separate handset;
- concealed shower controls.
A 1000 mm wide shower screen using 8 mm glass completes the enclosure.
This created a substantially cleaner arrangement than the previous raised shower installation while retaining the large separate shower that the customer wanted.
The shower walls were finished with 60 × 150 mm ceramic tiles.
Before tiling, the new plasterboard background was primed to control suction and prepare the surface for the tile adhesive.
A grey slow-set S1 flexible tile adhesive from BAL was used for the installation.
The tiles were set out carefully using 3 mm joints.
The 3 mm spacing was a deliberate choice. Small-format ceramic tiles can have slight variations in their dimensions and shape, so a slightly wider joint provides enough tolerance to maintain a visually consistent layout across the complete tiled surface.
The installation therefore required careful setting out rather than simply following the edge of each individual tile.
A BAL flexible grout was used to complete the joints.
The internal tiled corners and movement joints were finished using BAL colour-matched matt grout-effect sealant, avoiding the noticeably shiny appearance associated with conventional silicone in the tiled corners.
Anti-mould sanitary silicone with a 15-year guarantee was also used where appropriate around the bathroom fittings and sealed junctions.
The combination of the small-format tiles, consistent 3 mm joints and concealed shower fittings gives the finished shower area a very different character from the original installation.
Wall-Hung WC and Concealed Cistern
The finished bathroom uses a wall-hung WC with a concealed GROHE cistern/frame system.
A new service structure was formed to accommodate the concealed components.
Once the frame, cistern and associated connections were installed, the construction was closed and incorporated into the surrounding wall treatment.
Only the wall-hung WC, flush plate and finished surfaces remain visible.
The WC itself has a more traditional appearance, allowing the practical advantages of a concealed modern installation to sit comfortably alongside the more traditional design details used through the rest of the room.
The solid-timber ledge above the WC also became an important part of the finished appearance and visually connects this area with the timber detailing around the basin and windows.
New Basin Position
Relocating the washbasin was essential to making the new layout work.
The previous basin position was needed for the new bath, so the new basin was installed closer to the entrance.
The completed basin arrangement includes:
- an approximately 800 mm countertop;
- a vessel basin;
- wall-mounted basin taps;
- concealed new hot and cold supplies;
- a new concealed basin waste.
The solid-timber countertop and surrounding timber details provide a strong contrast with the painted wall panelling.
This basin area became one of the standout parts of the completed bathroom and allowed the customer to gain the bath they wanted without sacrificing a full-size washbasin.
1700 × 800 mm Bath
A new 1700 × 800 mm bath was installed in the area previously occupied by the old washbasin.
New hot and cold water supplies and a new waste connection were installed specifically for the bath.
The bath is served by a floor-standing bath filler.
Introducing this bath was the central layout challenge of the refurbishment.
Rather than simply placing an additional fitting into the existing arrangement, the whole room had to be reconsidered around it.
Moving the basin, altering the drainage, changing the shower installation and repositioning the radiator all contributed to creating enough usable space for the bath while retaining the other facilities.
The result is a bathroom where the bath feels like an intentional part of the layout rather than something that has been squeezed into an unsuitable space.
Wall Panelling and Detailed Setting Out
Outside the main tiled shower area, the lower section of the bathroom walls was finished with moisture-resistant MDF panelling.
The wall backgrounds were not relied upon to provide the final alignment.
Timber battens were installed first and packed where required.
A laser was used throughout the setting-out process so that the finished panelling could be kept straight and level around the room despite any variation within the existing walls.
The moisture-resistant MDF was then fixed over the prepared battens.
Before painting, the MDF was sealed using Rustins MDF Sealer to protect the material and prepare it for decoration.
The panelling was subsequently finished in Farrow & Ball Mouse's Back No. 40.
This darker lower-wall finish provides contrast with the white upper walls and ceiling while working alongside the natural timber features around the room.
Solid-Timber Finishing Details
Solid timber was used extensively for the finishing details rather than using MDF for every part of the wall treatment.
The solid-timber elements include:
- the window boards;
- the basin countertop and surrounding detail;
- the ledge above and around the WC structure;
- the decorative top capping above the MDF wall panelling;
- exposed edge trims.
The exposed panel edges were finished using 20 × 20 mm L-shaped solid-timber angle trim approximately 3 mm thick.
The timber capping closes the upper edge of the panel construction and gives the transition between the MDF panelling and the plastered wall a deliberate finished detail.
The main timber boards and ledges were intentionally left in their natural colour at the customer's request.
At the time the bathroom was completed, the customer had not yet decided how dark they wanted the timber to become.
Their plan was for their house decorators to first establish the final colour of the timber handrail elsewhere in the property and then use a matching or complementary finish on the bathroom timber.
For that reason, the natural timber visible in the completed photographs is intentional rather than an unfinished part of the TVR installation.
Radiator Relocation
The original radiator was positioned beneath the right-hand window.
As part of the new layout, the heating arrangement was moved to the centre section of wall between the two windows.
New heating pipework was run to the revised position.
The pipes were concealed within the wall and brought out directly at the radiator connection points.
Corner radiator valves were used to avoid unnecessary visible pipe runs and maintain a cleaner finished appearance.
The new traditional-style radiator and towel-rail arrangement now sits centrally between the windows and forms part of the overall bathroom design rather than occupying the previous awkward position beneath one window.
Electrical Work and Ventilation
The electrical installation was also renewed as part of the refurbishment.
The existing spotlights were removed and replaced with four new spotlights.
Electrical work included:
- removal of the previous lighting;
- first-fix cabling;
- installation of four new spotlights;
- second-fix electrical connections;
- new wiring for the extractor fan;
- installation of a fan isolator.
A new opening for the extractor fan was core drilled through the external wall.
This allowed the ventilation system to be incorporated properly into the refurbished room rather than relying on the previous arrangement.
Plastering, Painting and Decoration
Once the installation and preparation work had progressed sufficiently, the exposed wall and ceiling areas were skimmed and plastered where required.
The exposed upper walls and ceiling were finished in white using Dulux bathroom paint suitable for the higher moisture and humidity levels found in bathrooms.
The lower MDF wall panelling was prepared separately with MDF sealer before receiving its Mouse's Back finish.
This created a clear distinction between three principal finishes within the room:
- white plastered upper walls and ceiling;
- painted moisture-resistant MDF panelling;
- natural solid-timber boards, ledges and trims.
The shower area then provides a fourth finish through the vertically arranged small-format ceramic tiling.
Bringing these materials together required considerably more detailed fixing, preparation and decorating than a bathroom finished entirely with large-format tiles or plain painted walls.
A Detail-Heavy Installation
Although the completed bathroom has a clean and balanced appearance, several parts of the installation required particularly careful workmanship.
The herringbone LVT needed precise setting out and individual cutting to maintain the pattern around the room.
The 60 × 150 mm ceramic tiles also required more detailed alignment than larger rectified tiles because of their small format and natural dimensional variation.
The concealed WC required the frame, cistern and associated services to be built into a new structure before the finished wall treatment could be completed.
The wall panelling involved battening, packing, laser setting-out, MDF installation, sealing, solid-timber capping, angle trims and painting.
The project also involved substantial plumbing alterations beneath the floor, a new external shower-waste route, radiator relocation, electrical first and second fix, core drilling for both drainage and ventilation, plastering, painting and final fitting.
This is why a bathroom of this type is considerably more involved than simply removing one suite and replacing it with another in the same positions.
Two-Week Programme
The complete bathroom refurbishment was completed in exactly two working weeks.
Within that programme, the work included:
- strip-out of the existing installation;
- alteration of the bathroom layout;
- new bath plumbing;
- new basin plumbing and waste;
- new shower drainage;
- core drilling and external soil-pipe connection;
- floor opening and reinstatement;
- additional floor noggings and fixings;
- 6 mm plywood floor preparation;
- herringbone LVT installation;
- new concealed WC system;
- new shower tray;
- concealed rainfall shower and handset;
- small-format ceramic tiling;
- wall panelling;
- solid-timber finishing details;
- radiator relocation;
- electrical first and second fix;
- four new spotlights;
- new extractor-fan installation;
- plastering;
- painting and decoration;
- installation and final finishing of the bathroom fittings.
Completed Thornaby Bathroom
The completed bathroom is substantially different from the room we originally attended.
The customer now has the bath that was the main priority from the beginning while retaining the separate shower, basin and WC.
The finished four-piece bathroom includes:
- 1700 × 800 mm bath;
- floor-standing bath filler;
- 1800 × 800 mm shower tray;
- concealed rainfall shower;
- separate shower handset;
- 1000 mm wide shower screen;
- 8 mm shower glass;
- 60 × 150 mm ceramic shower-wall tiles;
- wall-hung WC;
- concealed GROHE cistern/frame system;
- vessel washbasin;
- approximately 800 mm solid-timber countertop;
- wall-mounted basin taps;
- relocated traditional-style radiator and towel rail;
- concealed radiator pipework with corner valves;
- herringbone LVT flooring;
- 6 mm plywood floor preparation;
- moisture-resistant MDF wall panelling;
- Farrow & Ball Mouse's Back No. 40 panel finish;
- solid-timber panel capping;
- solid-timber window boards;
- solid-timber basin and WC ledges;
- solid-timber L-shaped finishing trims;
- white plastered upper walls and ceiling;
- four new spotlights;
- new extractor fan and isolator.
Everything visible within the finished bathroom photographs was installed and finished as part of the Tees Valley Refurbishments Ltd project.
The natural timber elements were deliberately left in their natural state so that the customer's decorators could later coordinate their final colour with the timber handrail elsewhere in the property.
The most significant achievement of the refurbishment is that the additional bath did not come at the expense of the rest of the room.
By moving the basin, rebuilding the shower arrangement, altering the waste routes, repositioning the heating and carefully planning the finished fittings, the room now provides a separate bath, shower, basin and WC within a practical layout.
For homeowners considering a similar bathroom refurbishment, this project demonstrates the difference that proper layout planning and coordinated bathroom fitting, plumbing, flooring, electrical work and bathroom tiling can make when the existing room does not initially appear to have space for everything required.
Customer Feedback
After the refurbishment was completed, the customer left Tees Valley Refurbishments Ltd a five-star Google review.
They praised the professional handling of the project, the clear explanations throughout the work, punctual attendance and the way the room and working areas were kept tidy.
The customer also said the process had been made stress-free and that they were genuinely impressed with the completed bathroom and would recommend Tees Valley Refurbishments Ltd to others looking for a reliable bathroom fitter.