Google
“Deyan and Kev have done an amazing job with my bathroom refurbishment. Fantastic guys - highly skilled, helpful, responsive, fastidious and pleasant to be around. I can't praise Deyan enough. Services Tile work installation, Floor fitting”
Transcribed word-for-word from our public profiles
“Deyan and Kev have done an amazing job with my bathroom refurbishment. Fantastic guys - highly skilled, helpful, responsive, fastidious and pleasant to be around. I can't praise Deyan enough. Services Tile work installation, Floor fitting”
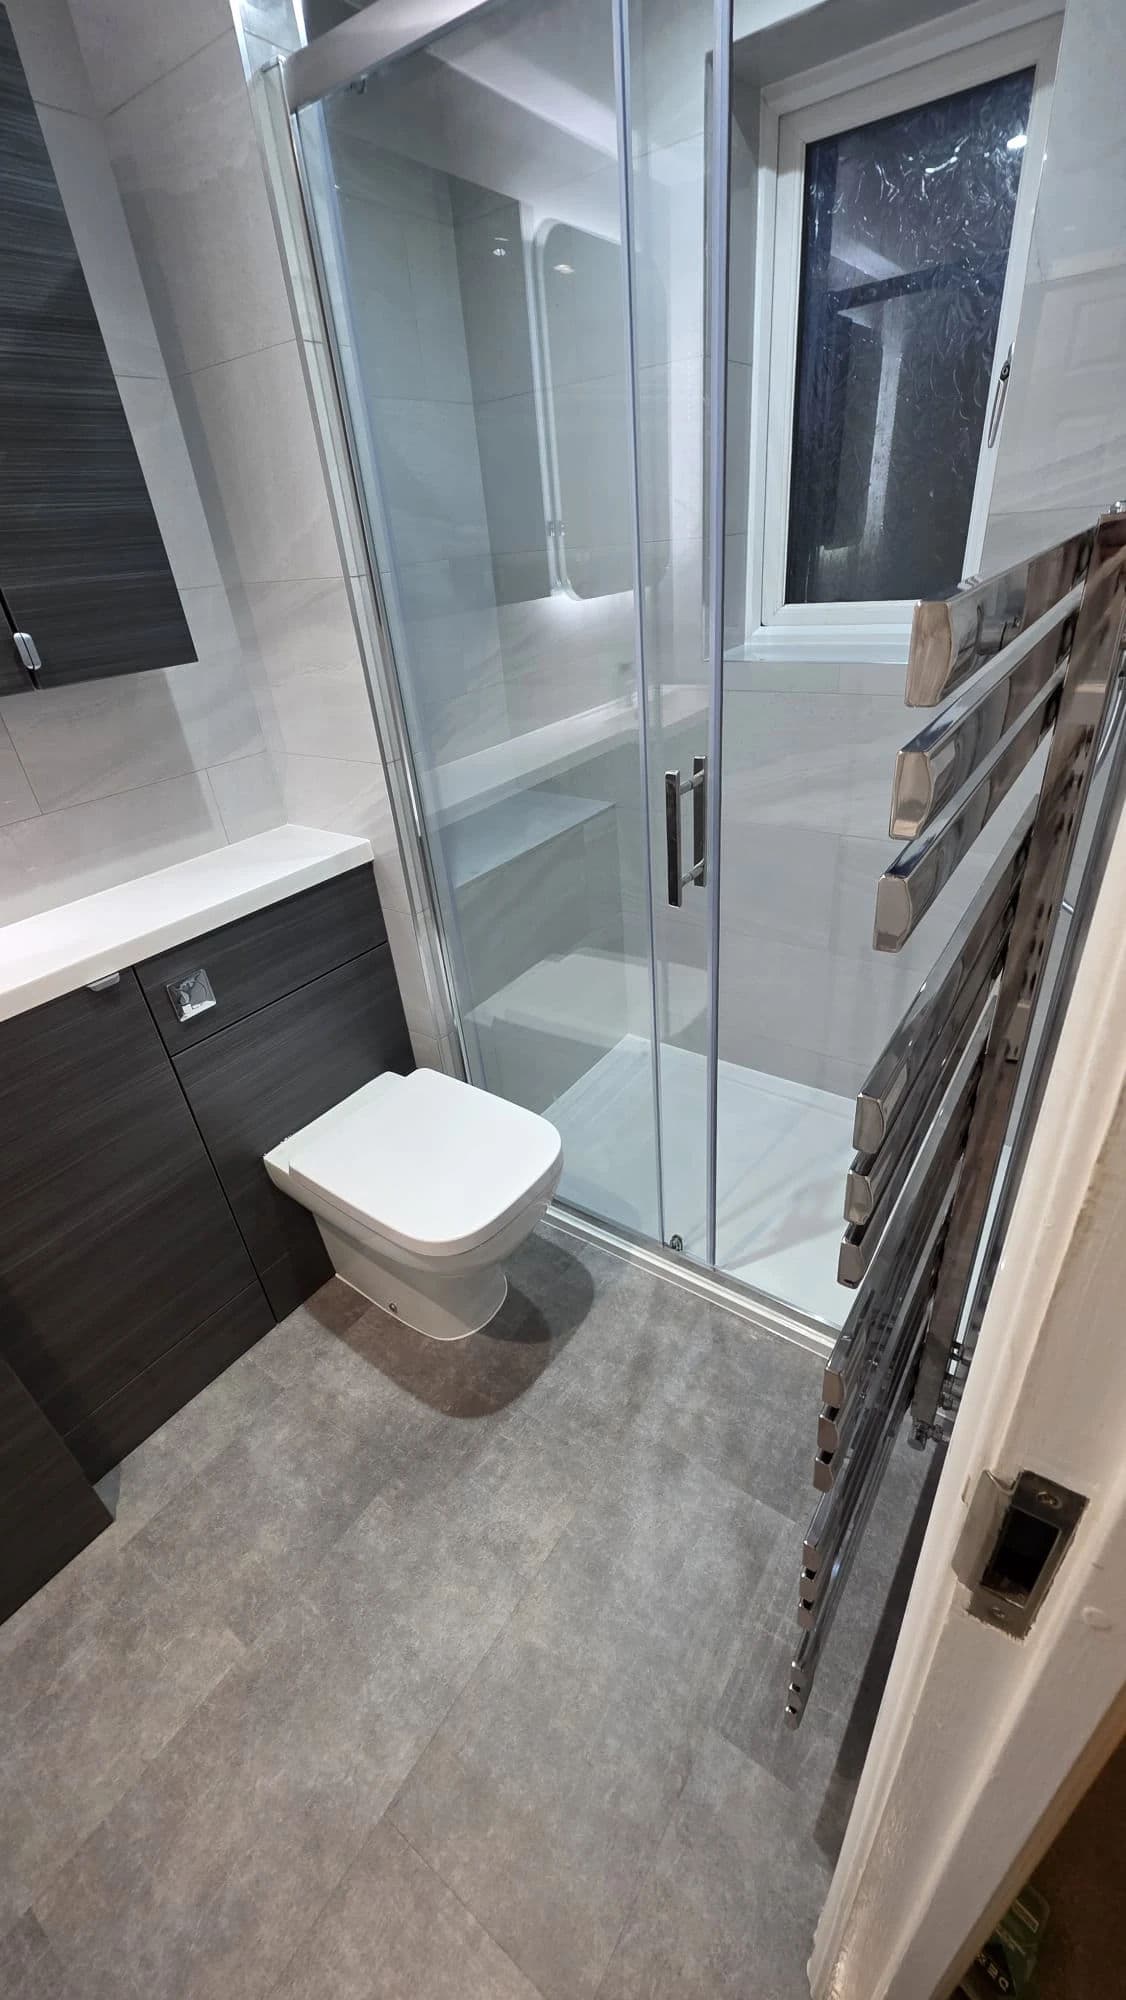
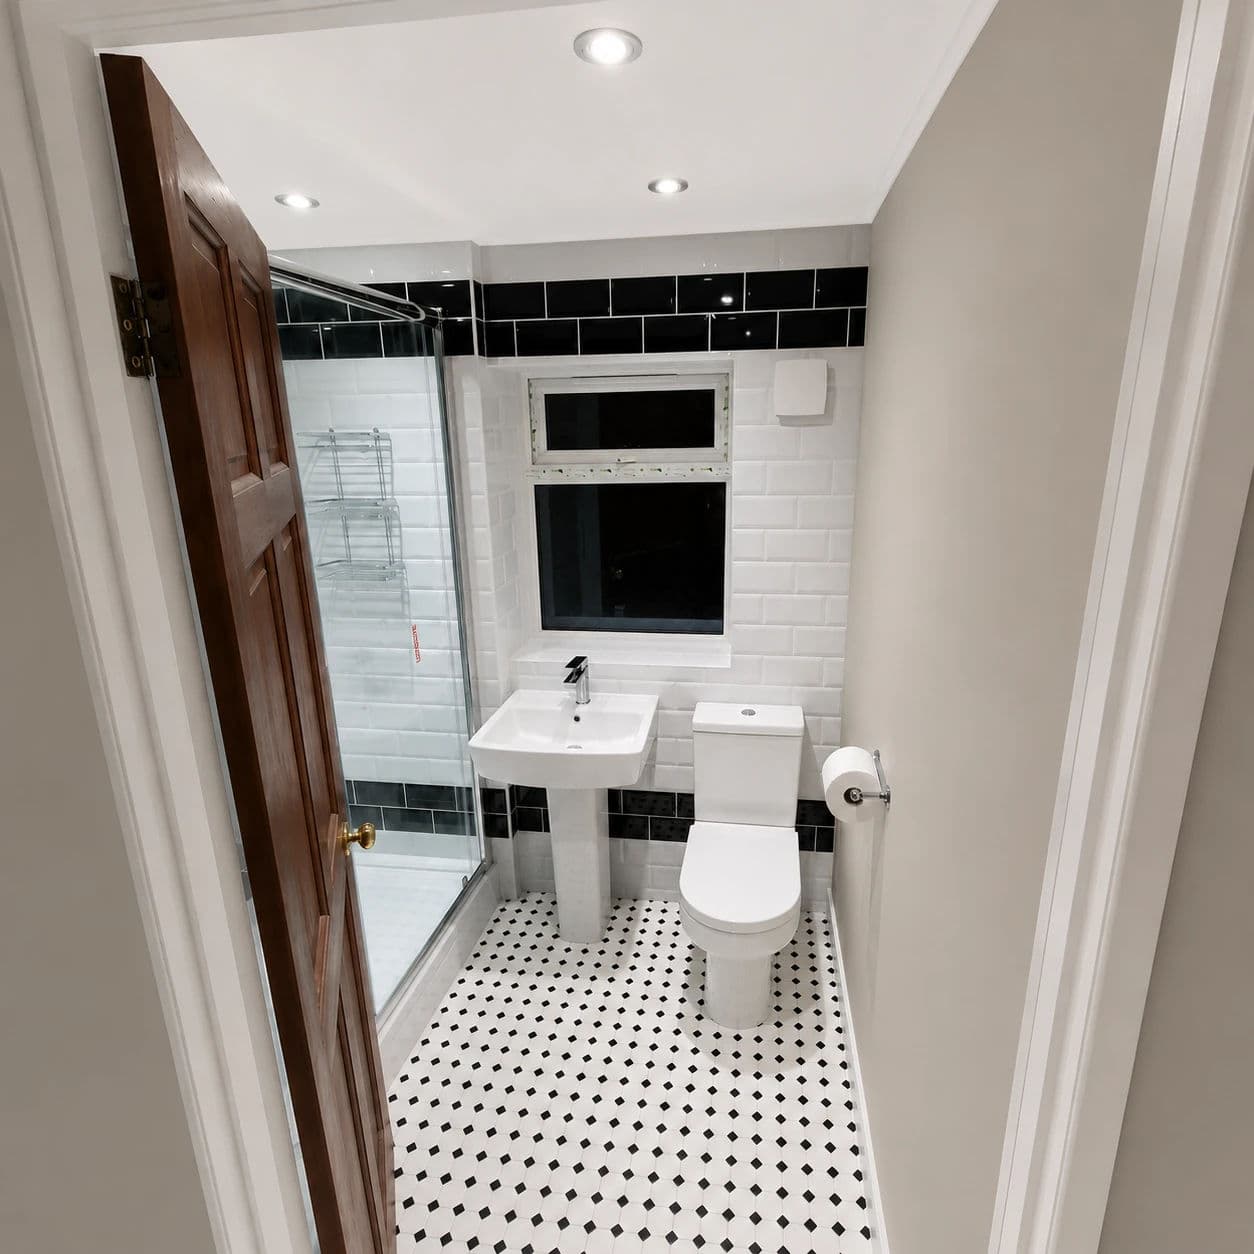
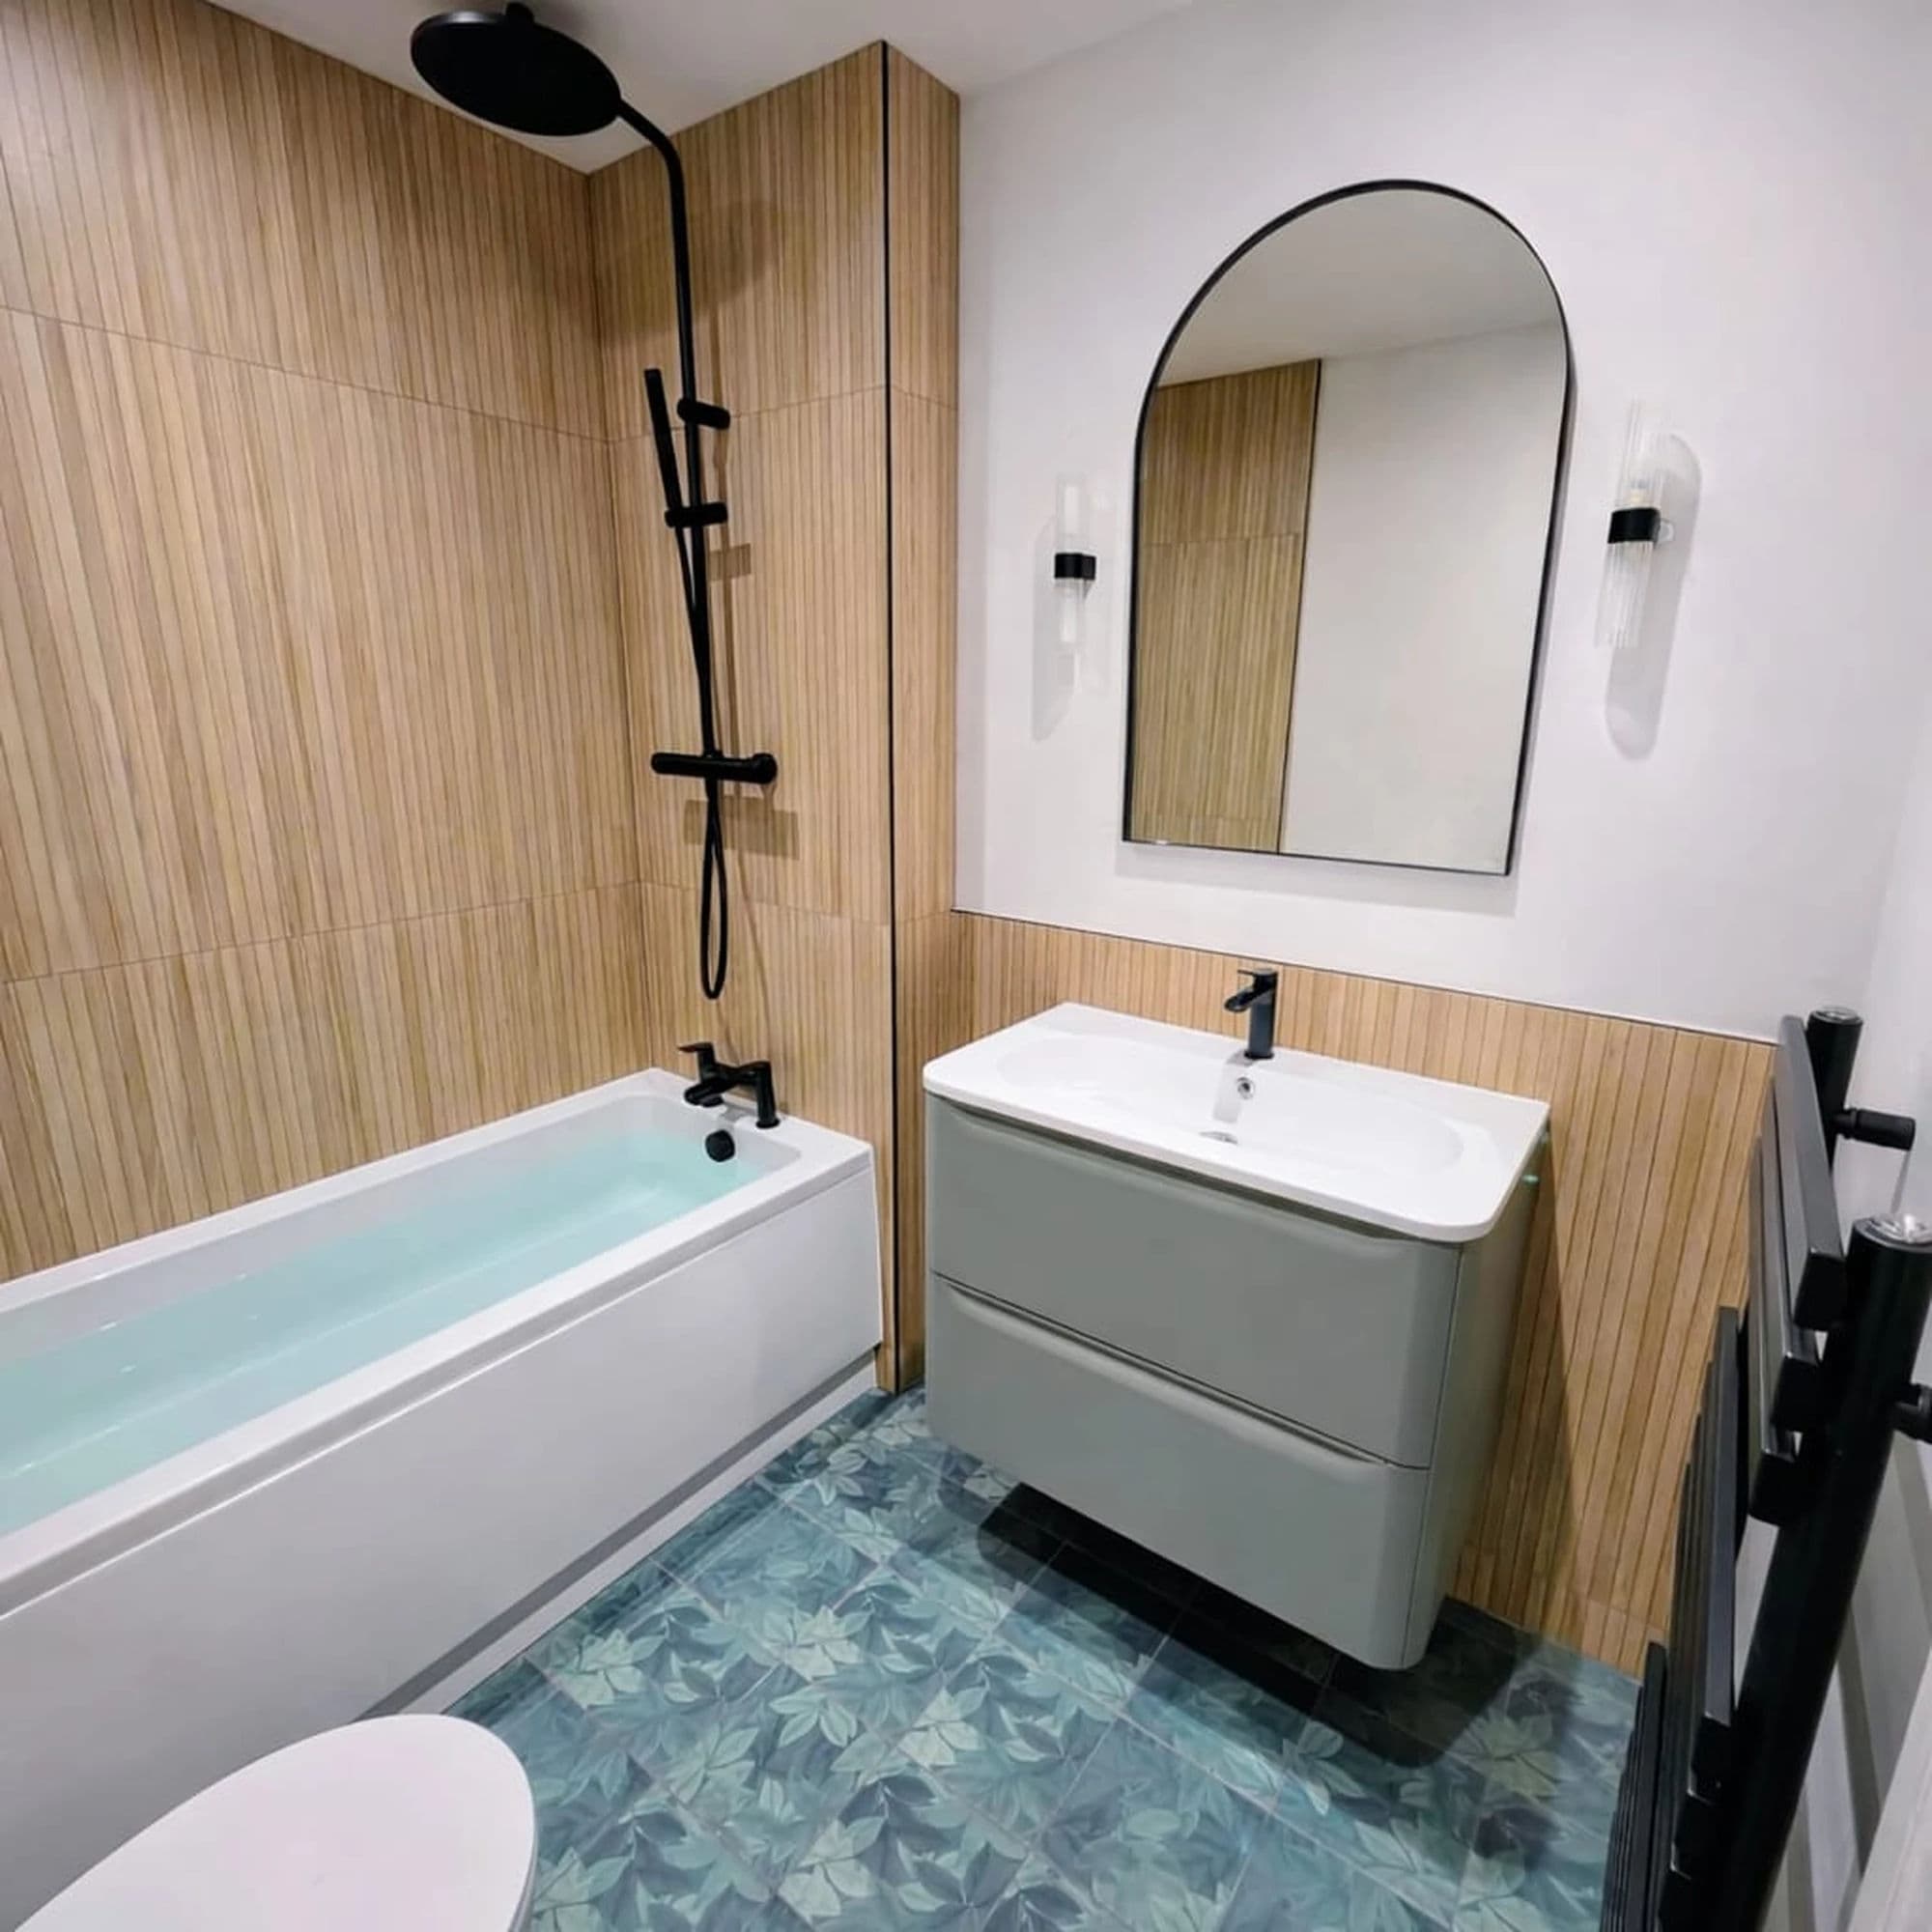
Completed in August 2026, this complete bathroom refurbishment in Norton, Stockton-on-Tees, transformed the main bathroom of a three-bedroom home from a dated bath and electric-shower arrangement into a much more practical bathroom built around a large 1800 × 900 mm walk-in shower.
The existing bathroom was completely stripped out, loose and unsuitable backgrounds were removed and all walls were reboarded with moisture-resistant plasterboard. Existing surface-run plumbing was rerouted and concealed, the timber floor was prepared with HardieBacker cement board, and the room was finished with 600 × 300 mm neutral stone-effect porcelain wall tiles and a distinctive 250 × 250 mm Victorian-inspired patterned porcelain floor.
The customer wanted a bathroom that combined modern practicality with more traditional character. A traditional-style rainfall shower, white-and-chrome radiator, patterned floor and green painted walls were therefore combined with fitted bathroom furniture, an illuminated demister mirror, upgraded lighting and new externally ducted ventilation.
The complete bathroom refurbishment was delivered over exactly 10 working days, Monday to Friday across two working weeks, with no weekend working.
The room is the main bathroom of a three-bedroom home in Norton, Stockton-on-Tees.
Before the refurbishment, the bathroom contained a bath in the area now occupied by the new walk-in shower, together with an electric shower, a conventional pedestal washbasin, a close-coupled WC and a towel radiator.
The basin, WC and radiator were already positioned in broadly the same parts of the room as the replacement fittings, so the project did not require a completely different sanitaryware layout.
The main change was the removal of the bath and electric-shower arrangement in favour of a substantially larger and more practical walk-in shower.
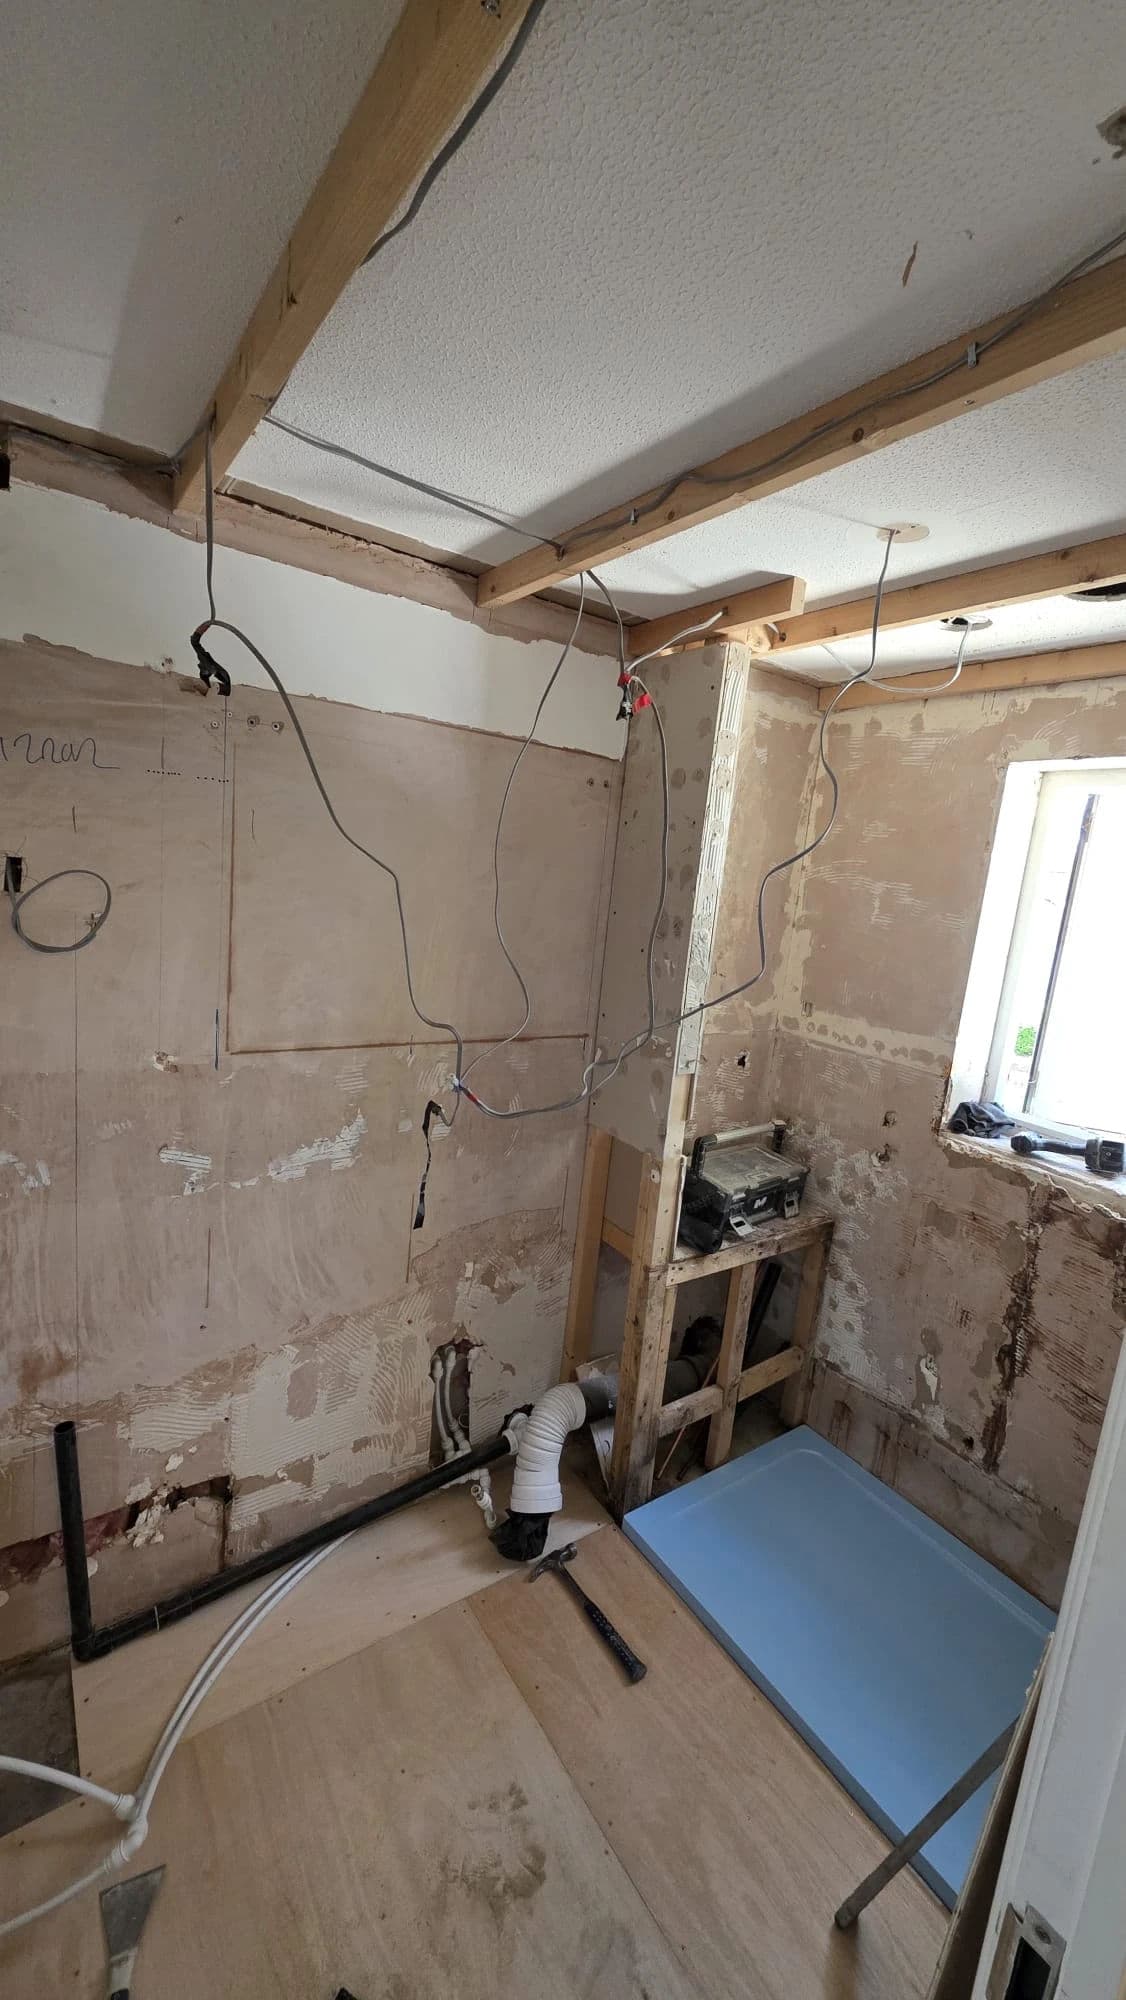
The original walls were tiled and the floor had a sheet-vinyl covering. Existing basin water supplies and waste pipework were also routed visibly above floor level and concealed within surface boxing.
The bathroom had become dated and there had also been leakage within the existing installation. Once the old finishes were removed, loose and unsuitable wall backgrounds were exposed and the extent of the preparation required became much clearer.
Both existing windows were retained in their original positions.
The customer's main priority was to remove the bath and replace it with a generous showering area while giving the complete bathroom a fresh, modern finish.
The first design concept included an oak-effect floor.
During the design process, however, the customer decided that they wanted the finished bathroom to have more traditional character rather than a completely contemporary appearance.
The flooring choice was therefore changed to a Victorian-inspired patterned porcelain tile.
That decision influenced several other elements of the finished bathroom.
The traditional character was developed through:
These traditional elements were then combined with modern features including fitted bathroom storage, a concealed WC cistern, a large illuminated demister mirror, recessed spotlights and humidity-controlled mechanical ventilation.
The result is not intended to reproduce a period bathroom exactly. Instead, the design combines traditional visual references with the practicality expected from a modern bathroom installation.
Before strip-out began, the access route through the occupied home was protected using dust sheets.
Protection extended from the entrance door through the route to the bathroom, including the staircase and landing.
The protection remained in use while tools, materials and waste were being moved through the property.
At the end of each working day, the access route was vacuumed and cleaned and the dust sheets were lifted and tidied away rather than being left permanently throughout the house.
This routine was maintained throughout the two-week programme to reduce the spread of dust and keep the areas outside the bathroom usable while the refurbishment was underway.
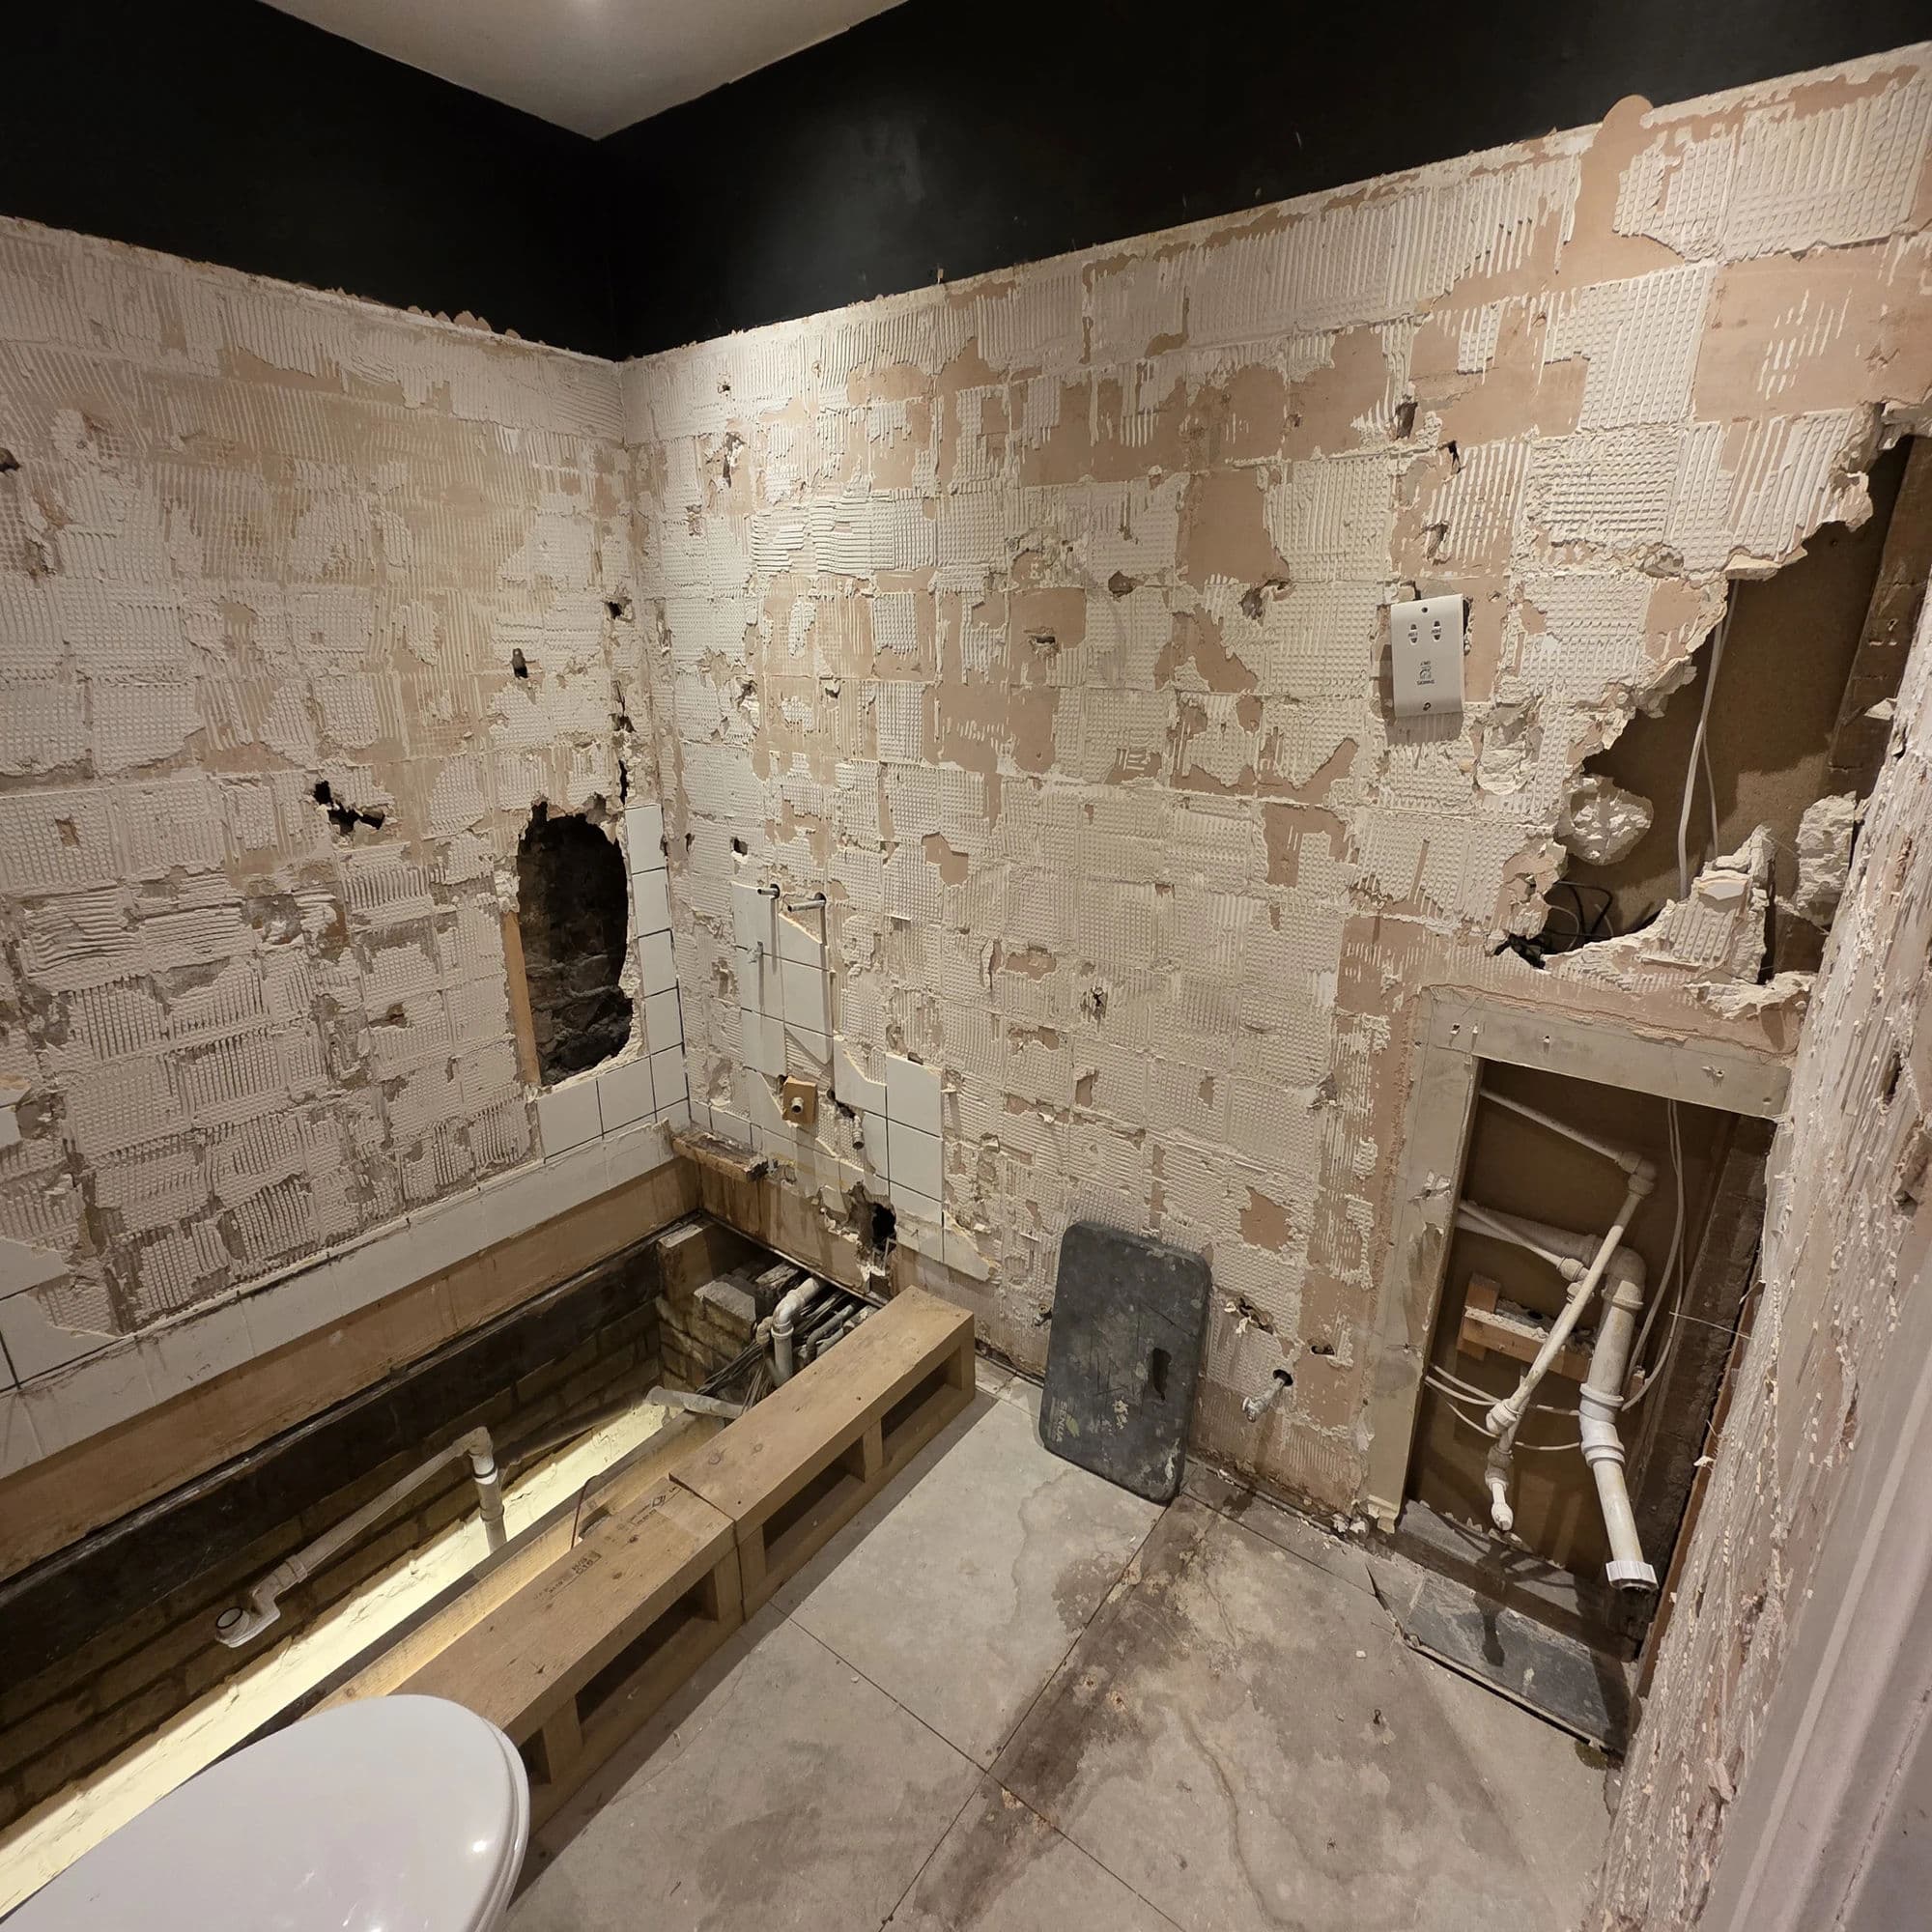
The existing bathroom was stripped out to provide access to the underlying structure and services.
Removal included:
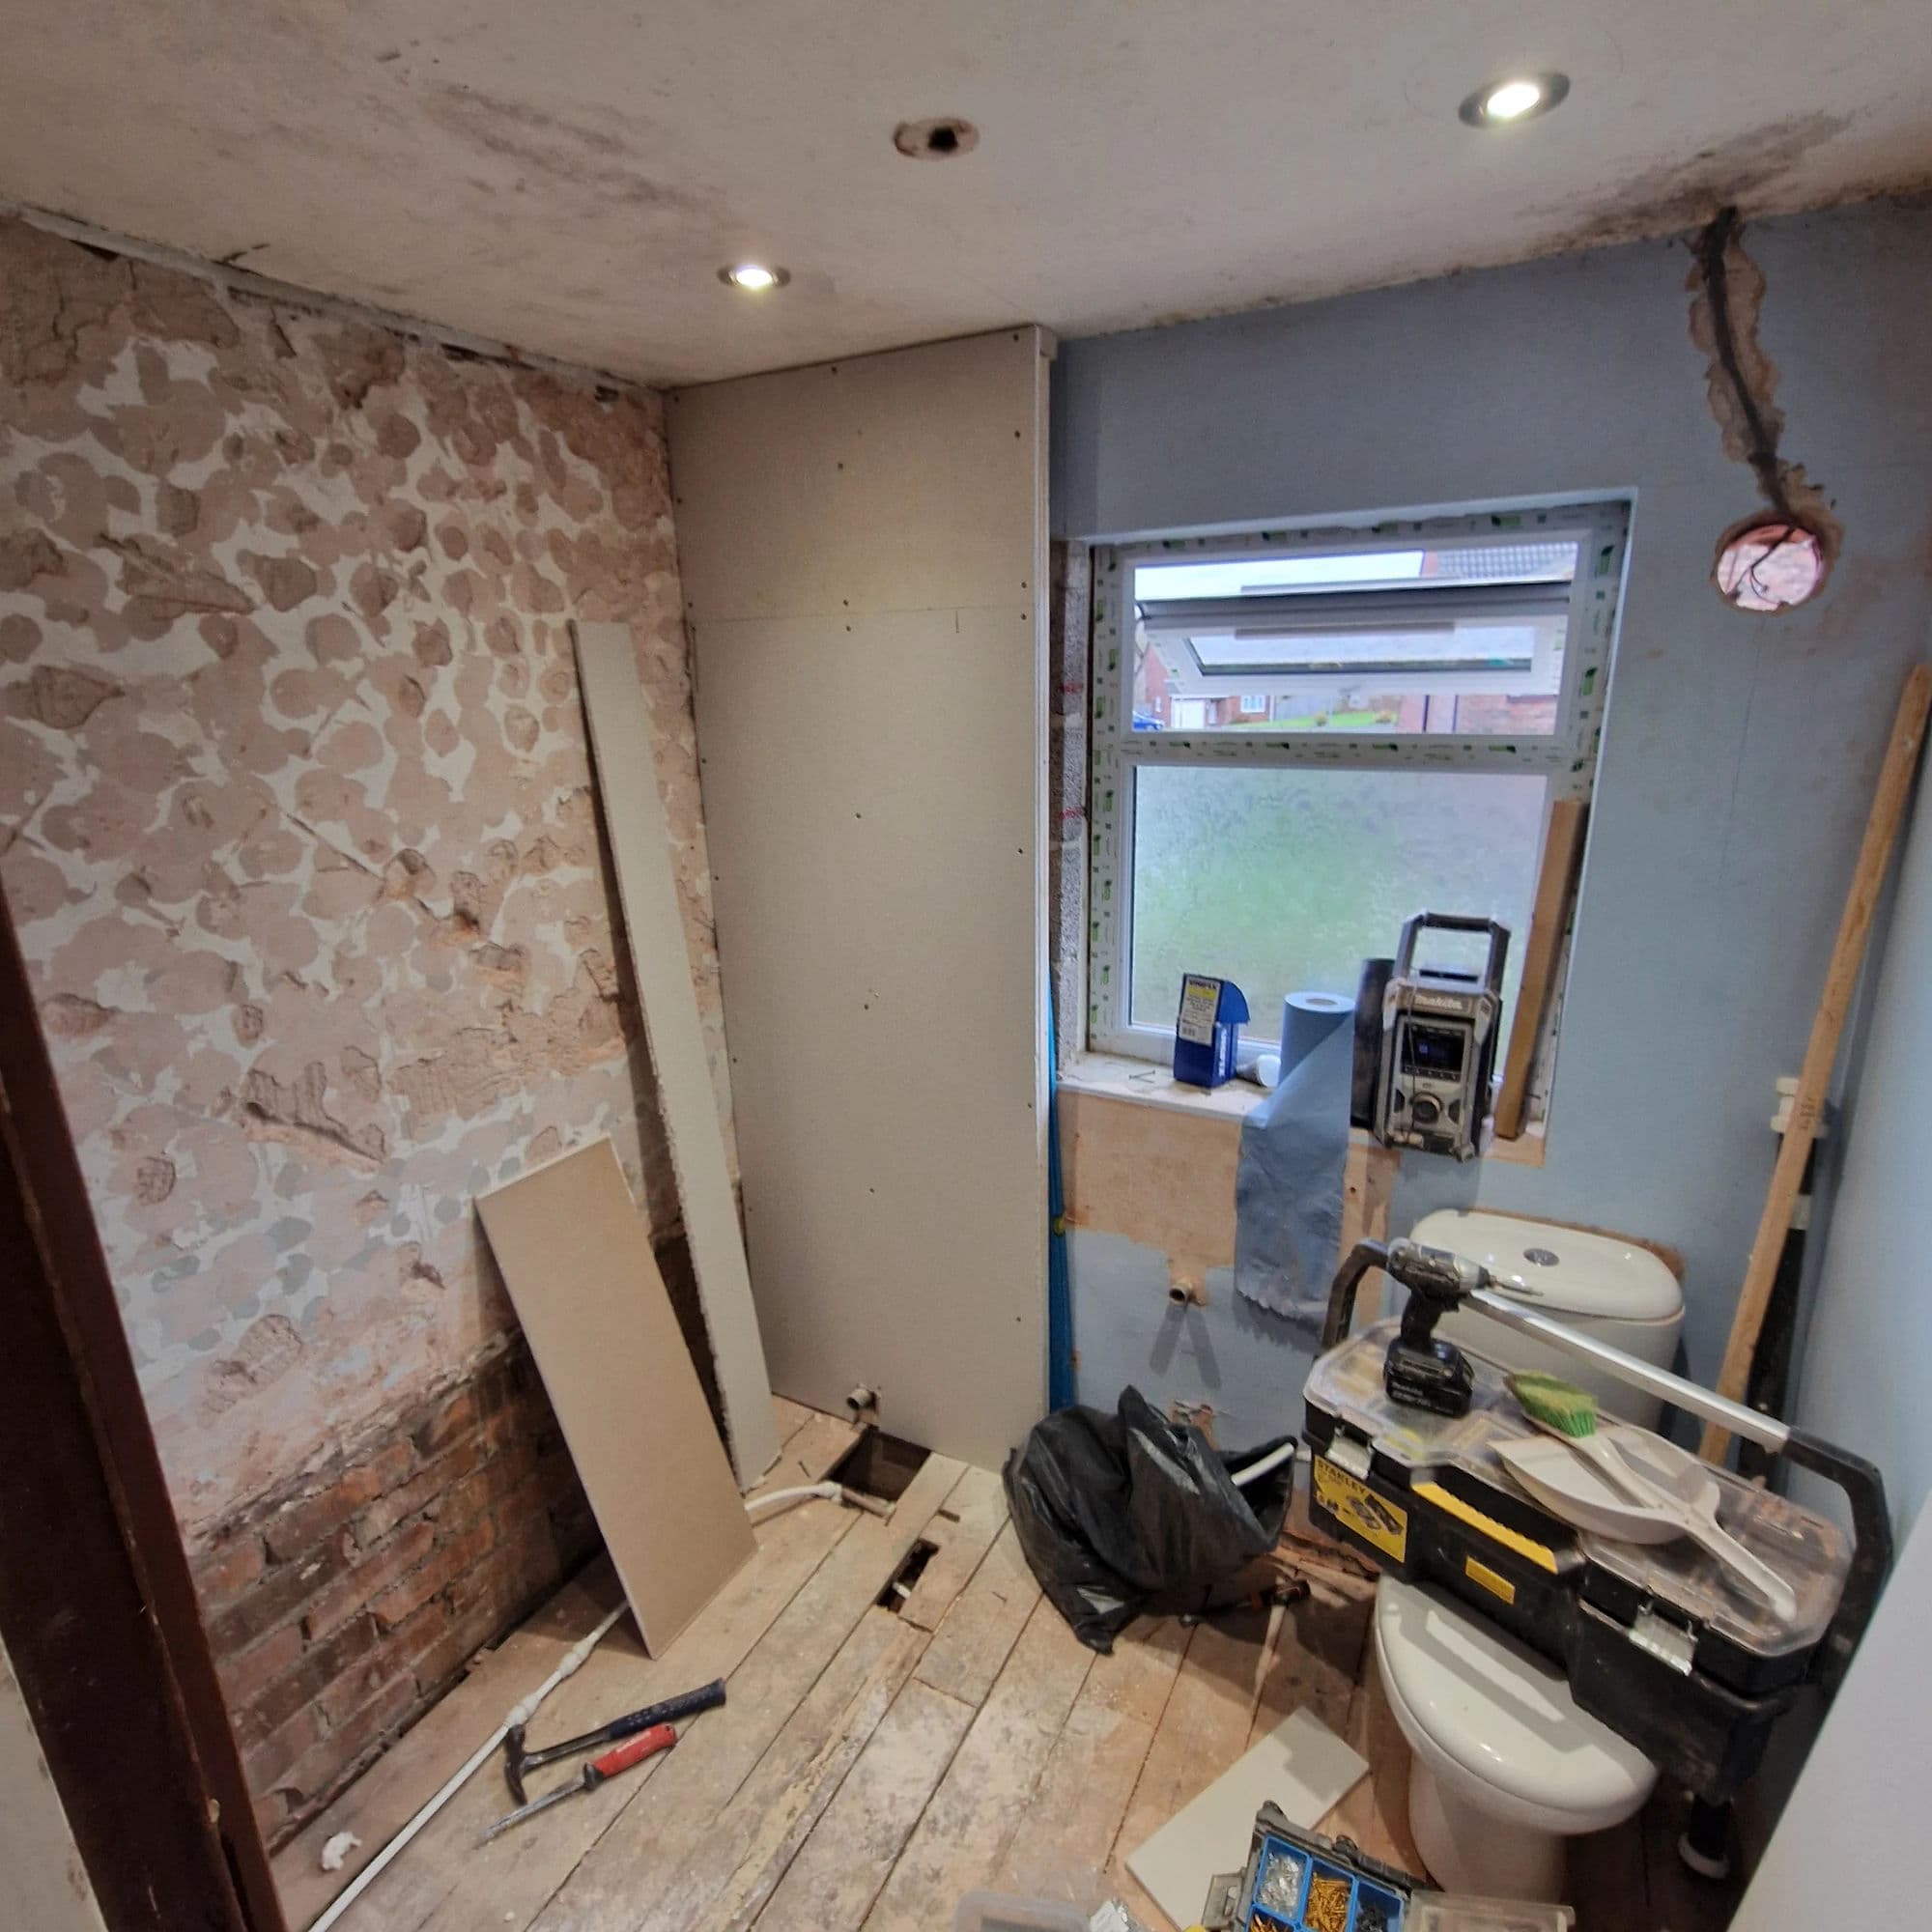
After the tiles and old fittings were removed, sections of loose render and unsuitable background material were removed until sound substrates were reached.
Substantial areas of masonry became exposed during this process.
Rather than attempting to tile over irregular or unreliable old surfaces, the walls were prepared for completely new backgrounds.
All bathroom walls were reboarded using moisture-resistant plasterboard.
Before the new boards were installed, the relevant backgrounds were primed.
The moisture-resistant boards were then installed using plasterboard adhesive and carefully set plumb to create straight, consistent wall surfaces throughout the room.
Setting the new boards accurately was particularly important because the finished design included:
Creating straight and plumb backgrounds at this stage allowed the later furniture, sanitaryware and tiling to be installed against much cleaner lines.
The sections intended for tiling were not unnecessarily skimmed with finishing plaster.
Instead, the moisture-resistant plasterboard within the tiled areas was appropriately prepared and primed before the tile installation.
The upper sections of wall that were to remain untiled were skimmed to provide a smooth painted finish.
The bathroom ceiling was skimmed as part of the refurbishment.
The untiled upper sections of the walls were also plastered to create smooth surfaces before decorating.
Tees Valley Refurbishments Ltd completed the plastering and preparation work as part of the overall bathroom project.
The ceiling was subsequently decorated in Dulux Brilliant White matt paint.
The upper wall sections were finished in a green Dulux matt bathroom paint, providing a strong contrast against the neutral tiled areas and helping establish the traditional-inspired colour scheme selected by the customer.
Although the WC, basin and radiator remained in broadly similar locations, the plumbing installation was substantially improved.
The old bathroom had water and waste pipework running visibly above floor level, with sections concealed behind surface boxing.
As part of the refurbishment, this arrangement was removed wherever practical.
New hot and cold water supplies were installed for the basin and routed within the floor.
The existing basin waste, which had previously run above floor level within boxing, was rerouted and concealed within the wall.
New hot and cold supplies were also installed for the replacement shower and concealed within the newly prepared wall construction.
The shower waste position had to be altered because the new 1800 × 900 mm shower tray replaced the previous bath.
The heating pipework was also altered to suit the new traditional radiator.
Removing the old surface pipe runs and boxing helped simplify the appearance of the completed bathroom even though the main sanitaryware positions remained broadly unchanged.
Serviceability was considered during the plumbing work.
Two isolation valves were incorporated beneath the raised shower-tray platform and remain accessible through the front access/plinth arrangement.
These allow the principal bathroom water supplies to be isolated without unnecessary disturbance to the finished room.
Further isolation valves were provided for the basin and WC.
This allows individual fittings to be maintained or serviced without having to interfere with the wider bathroom installation.
The original bath and electric shower were removed and replaced with a large 1800 × 900 mm stone-resin shower tray.
The tray has an approximately 40 mm profile and occupies the area previously used by the bath.
Because of the required installation height and plumbing arrangement, a bespoke rigid support platform was constructed rather than relying on a conventional adjustable shower-tray riser kit.
The support structure was formed from timber and plywood.
The plywood surface was primed before adhesive was applied and the stone-resin tray was installed onto the prepared platform.
This provided a substantial, stable base for the large tray.
The shower waste was repositioned internally to suit the new tray, with the necessary drainage alterations completed within the bathroom construction.
The resulting showering area is substantially larger and more practical than the previous bath and electric-shower arrangement.
The shower was finished with a Roman glass-screen arrangement.
The main fixed glass panel measures approximately:
A further 300 mm hinged flipper panel was installed at the open end.
The combination provides additional splash protection while retaining the open appearance associated with a walk-in shower.
The large clear-glass screen also allows the patterned flooring, neutral tiling and traditional shower fittings to remain visible across the room rather than visually dividing the bathroom.
A traditional-style exposed dual shower was selected to complement the customer's preferred design direction.
The shower includes:
New hot and cold water supplies were installed specifically for the shower and routed within the wall before the tiling was completed.
Although the walk-in arrangement provides a significant practical upgrade over the old bath and electric shower, the styling of the shower itself helps maintain the more traditional appearance requested by the customer.
The original pedestal washbasin provided very little practical storage.
It was replaced with a coordinated run of fitted bathroom furniture measuring approximately 1100 mm overall.
The arrangement consists of three units:
A continuous acrylic basin/worktop spans the furniture arrangement.
The fitted furniture provides substantially more concealed storage than the original pedestal basin while keeping the basin and WC within approximately the same part of the room.
This was one of the main practical improvements achieved without requiring unnecessary relocation of the complete bathroom layout.
The longer furniture run also creates a much more substantial and balanced feature beneath the large illuminated mirror.
The original close-coupled toilet was replaced with a back-to-wall WC.
Its cistern is concealed within the fitted bathroom furniture, leaving the pan and flush control visible while the working components are hidden from view.
The existing WC soil position was suitable for the new arrangement, so major relocation of the soil connection was not required.
Using the concealed cistern arrangement helps the WC integrate with the surrounding furniture and gives this side of the bathroom a cleaner appearance than the previous standalone close-coupled toilet.
A large illuminated mirror was fitted above the basin and furniture.
The mirror measures approximately 1000 × 500 mm and incorporates several practical features:
Its scale works particularly well with the 1100 mm furniture arrangement below.
The mirror introduces a clearly modern element into the bathroom while the green walls, patterned floor and traditional sanitary fittings provide the more classic character requested by the customer.
The original towel radiator was removed and replaced with a traditional-style radiator measuring approximately 600 × 800 mm.
The new radiator combines a white column-style body with chrome detailing and traditional-style valves.
The existing heating supply had used 10 mm pipework beneath the floor.
This was altered so the finished connections to the new radiator use 15 mm pipework, giving the visible installation a cleaner and more appropriate appearance alongside the traditional radiator.
The heating connections were routed through the floor and repositioned to suit the new fitting.
The white-and-chrome radiator coordinates with the traditional shower and patterned floor and forms an important part of the overall design rather than simply functioning as a heat source.
The existing timber floor required suitable preparation before porcelain tiles could be installed.
The floor was cleaned and primed before a layer of tile adhesive was applied.
HardieBacker cement boards were then installed over the prepared timber background.
The boards were:
Tile adhesive was subsequently applied over the HardieBacker before the new porcelain floor tiles were installed.
This created a suitable stable background for the 250 × 250 mm patterned porcelain floor.
No underfloor heating was incorporated into this project.
The finished floor is one of the defining visual features of the bathroom.
The customer had initially considered an oak-effect floor but decided during the design process that a more traditional appearance would suit the bathroom better.
The specification was therefore changed to 250 × 250 mm Victorian-inspired patterned porcelain tiles.
The tiles were installed in a straight layout over the prepared HardieBacker floor.
The patterned design adds considerably more character than a plain floor while visually connecting the traditional radiator and shower fittings with the green painted walls.
The result gives the bathroom a recognisable identity without compromising the practical benefits of a porcelain tiled surface.
The walls were completed using 600 × 300 mm cream/beige stone-effect matt porcelain tiles.
The neutral finish was deliberately selected to balance the stronger patterned floor and green painted walls.
Within the shower area, the tiles were installed from floor to ceiling.
Around the remainder of the bathroom, the tiling was generally kept to approximately half height, allowing the green painted upper walls to become part of the overall design.
The wall tiles were laid in a brick-bond pattern.
Ash-coloured grout was selected specifically to allow the brick-bond layout to remain visible rather than allowing the joints to disappear completely into the neutral tile colour.
The installation used:
The tiled backgrounds were primed with a suitable Mapei tiling primer before adhesive was applied.
The combination of careful preparation, 2 mm joint control and levelling clips helped maintain consistent lines across the brick-bond installation.
The larger existing window sits within the new shower area and was retained as part of the completed design.
Because this window forms part of the fully tiled shower wall, the complete reveal was carefully finished with porcelain tiles.
The tile setting-out had to continue cleanly around the opening while maintaining the brick-bond layout and consistent joint lines.
The finished tiled reveal is particularly visible through the large clear-glass shower screen and forms an important detail within the completed shower area.
Rather than treating the window as an interruption to the tiling, it was incorporated into the shower design so the neutral porcelain finish continues neatly around the complete opening.
The original bathroom had a single central ceiling light.
As part of the refurbishment, the lighting arrangement was upgraded to four recessed ceiling spotlights.
This provides more even illumination across the shower, basin, WC and general bathroom area.
The customer wanted to retain pull-cord operation because it suited the traditional character being introduced elsewhere in the room.
A new pull cord was therefore installed as part of the electrical work rather than changing the room to a conventional wall-switch arrangement.
The recessed lighting provides modern, practical illumination while the pull-cord control retains a small traditional reference within the design.
The refurbishment also included a completely new extractor-fan installation.
A new electrical supply was run for the fan and a new opening was core drilled through the external wall.
The fan was ducted directly outside and a new external vent was installed.
The new fan incorporates:
This provides automatic assistance with moisture removal after showering and gives the new bathroom a properly arranged mechanical ventilation system to support everyday use of the large walk-in shower.
All electrical work associated with the bathroom refurbishment was completed by the certificated electrician used by Tees Valley Refurbishments Ltd.
The electrical scope included:
The old electric shower was removed as part of the bathroom strip-out.
Its redundant electrical circuit was disconnected and made dead by the electrician once it was no longer required.
Once the plastering and installation work was complete, Tees Valley Refurbishments Ltd carried out the decorating.
The ceiling was finished in Dulux Brilliant White matt.
The untiled upper wall sections were painted in a green Dulux matt bathroom paint selected as part of the customer's traditional-inspired colour scheme.
The existing architrave was also redecorated as part of the finishing work.
The combination of green walls, cream/beige stone-effect tiling and patterned porcelain flooring gives the completed bathroom considerably more character than a conventional all-neutral installation.
The complete bathroom fitting was delivered over exactly 10 working days.
Work began on a Monday and continued Monday to Friday over two consecutive working weeks.
There was no weekend working.
The programme included:
The complete bathroom was finished within the planned two-week working programme.
This is not the only bathroom completed by Tees Valley Refurbishments Ltd in Norton.
Another bathroom installation completed in Norton involved a very different specification, including a large shower, bespoke tiled bench and contemporary fitted bathroom furniture.
The two projects demonstrate different approaches to bathroom work within the same part of Stockton-on-Tees.
The earlier Norton project has a more contemporary character, while this August 2026 refurbishment combines a large walk-in shower with Victorian-inspired patterned flooring, green painted walls and traditional-style fittings.
Both projects form part of our growing portfolio of completed bathroom work in Norton and the wider Stockton-on-Tees area.
A short video of the completed bathroom is also available on YouTube.
Watch the Norton bathroom refurbishment video on YouTube
The video shows the finished walk-in shower, fitted bathroom furniture, patterned porcelain floor, illuminated mirror, traditional radiator and the overall completed room.
The completed bathroom bears little resemblance to the dated installation it replaced.
The old bath and electric shower have been replaced by a large 1800 × 900 mm stone-resin walk-in shower with a Roman glass screen and traditional-style rainfall shower.
The original pedestal basin and close-coupled WC have been replaced by coordinated fitted furniture, substantially increased storage, a continuous basin/worktop and a back-to-wall WC with concealed cistern.
The completed bathroom now includes:
Although the sanitaryware positions remained broadly similar, removing the bath, eliminating unnecessary surface pipe boxing and introducing the large clear-glass shower arrangement makes the completed room feel considerably more spacious.
The customer now has the main practical feature they originally wanted — a large walk-in shower instead of the bath — together with substantially improved storage, lighting and ventilation.
At the same time, the Victorian-inspired patterned floor, green walls, traditional radiator and traditional shower prevent the bathroom from feeling like a generic contemporary installation.
The result is a practical, individual main bathroom designed around the customer's preferences and completed as a full bathroom refurbishment in Norton, Stockton-on-Tees.
The project can be viewed alongside our other completed bathroom projects. Homeowners planning a similar bathroom refurbishment, walk-in shower or complete bathroom installation in Norton or Stockton-on-Tees can request a free bathroom survey to discuss the existing room, preferred design and required scope of work.
Book a free bathroom survey — we'll visit, measure up and give you a detailed, fixed-price written quotation clearly setting out the agreed scope of work.
Book a Free Bathroom Survey