
“We contacted Deyan after receiving many quotes for our new bathroom. We were in the middle of renovating our full house but our bathroom was a priority first. Deyan came out following many other tradesmen but he convinced us straight away. His warm, friendly nature was reassuring as the bathroom we had in front of us was not ideal. Deyan was not the cheapest out of the quotes but we could tell looking at his work and the way he spoke about things that he would do us a good job. Deyan completed the work whilst we were both out of our home working. We gave him our house key and could trust him 100%. We ordered our furniture and items through plumbcity and Deyan did the rest. Deyan likes everything to be perfect. He is very precise and particular in his work which really showed in the end result. Deyan did an absolutely amazing job of our bathroom. He really transformed it for us and we can’t recommend him enough. Please don’t think twice if you’re wanting a quality job done. He’s the real deal. Pictures below. Look at that! Thank you Deyan!”
Bathroom Refurbishment Ingleby Barwick with Over-Bath Shower
What the customer said
Transcribed word-for-word from our public profiles
Project in 30 seconds
Completed in October 2025, this complete bathroom refurbishment in Ingleby Barwick transformed a dated shower-only room into a contemporary family bathroom with a full-size bath and practical over-bath shower.
The room was completely stripped out and rebuilt, with leak-damaged wall linings repaired, oversized pipe boxing substantially reduced, plumbing reorganised and the existing timber floor strengthened for tiling. A new 1700 × 700 mm bath, vanity unit, WC, heated towel rail, upgraded lighting and premium ventilation were installed as part of the complete bathroom installation.
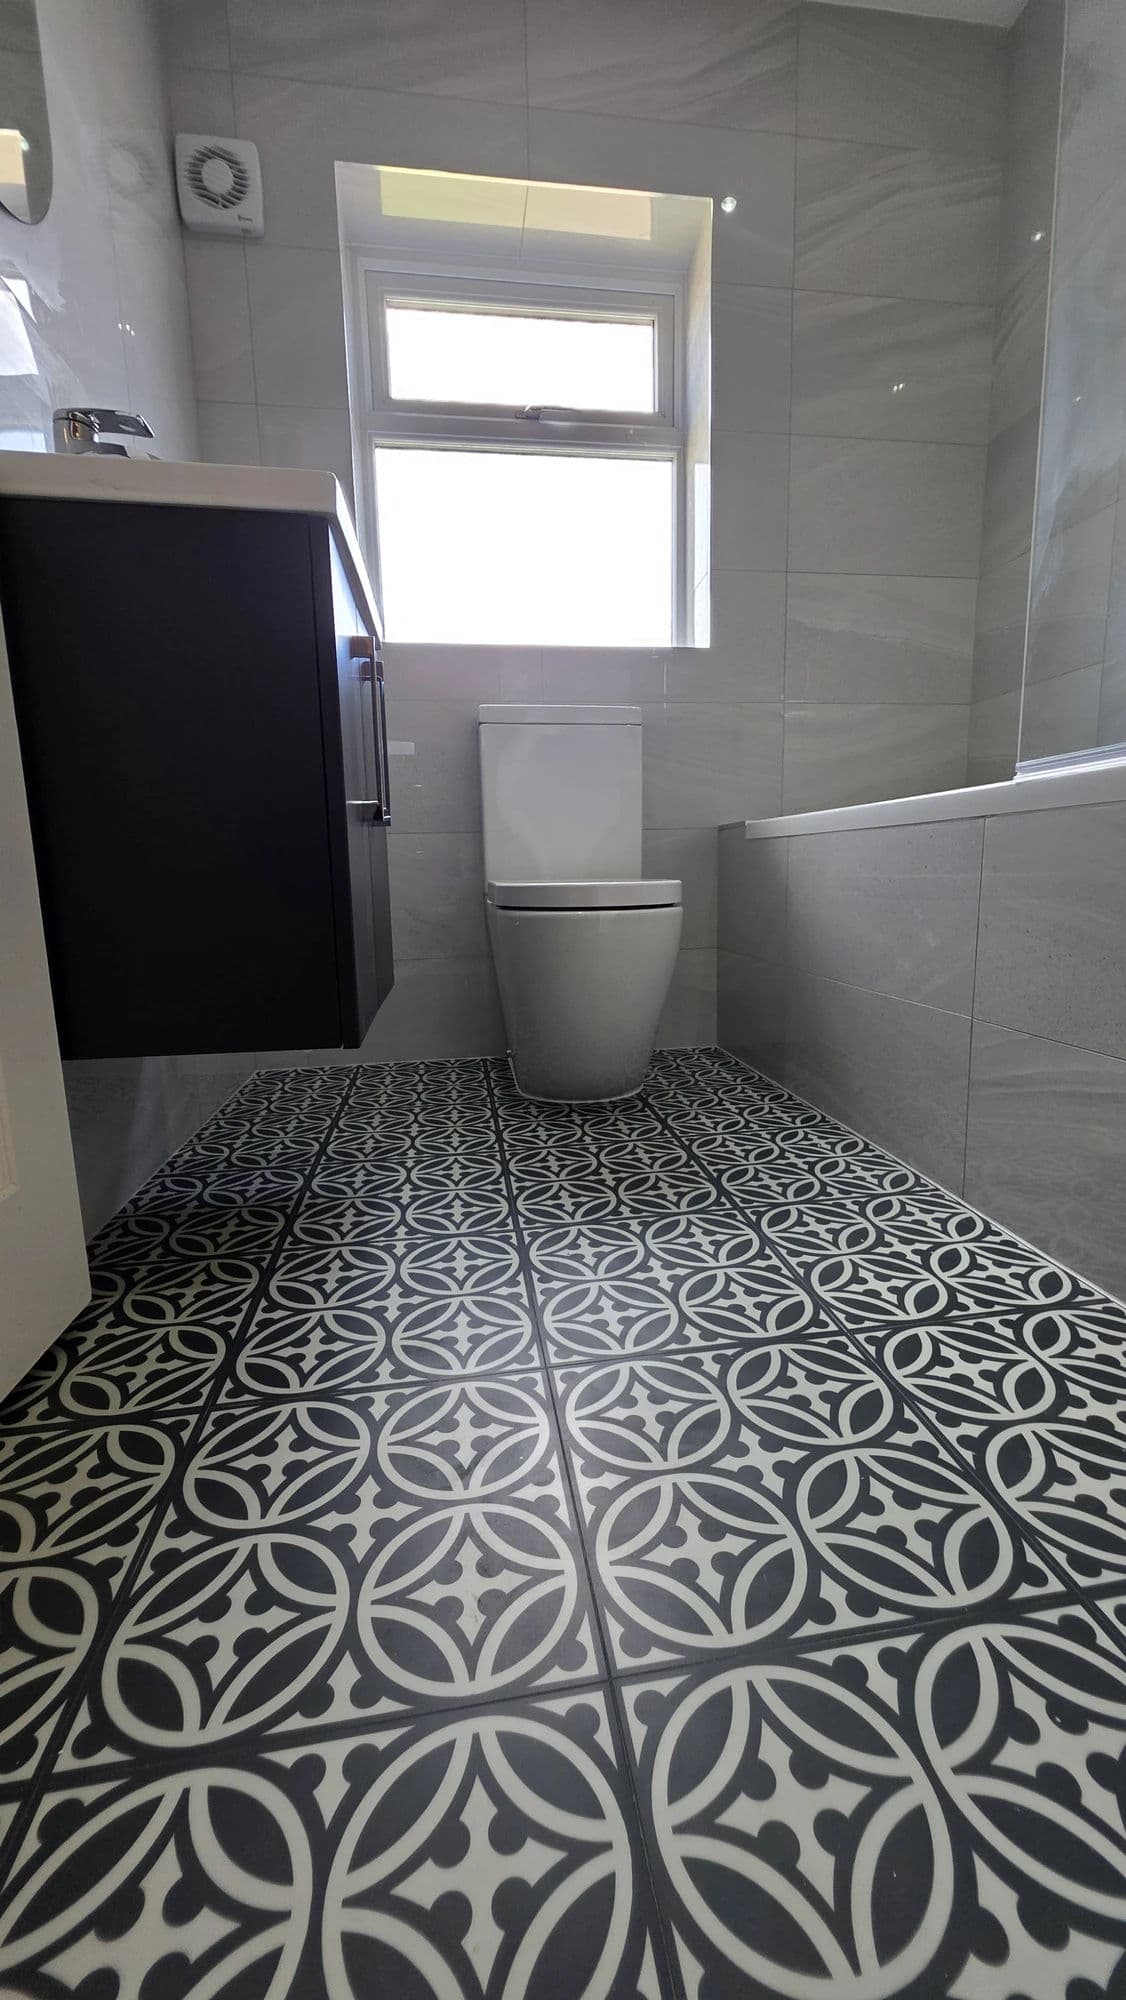
The finished bathroom combines large-format wall and floor bathroom tiling, contrasting feature tiles, concealed services and carefully detailed boxing with a large LED mirror and Vent-Axia humidity-controlled extractor fan.
The complete refurbishment was delivered by our experienced bathroom fitters over eight working days, with no weekend working.
The Original Bathroom
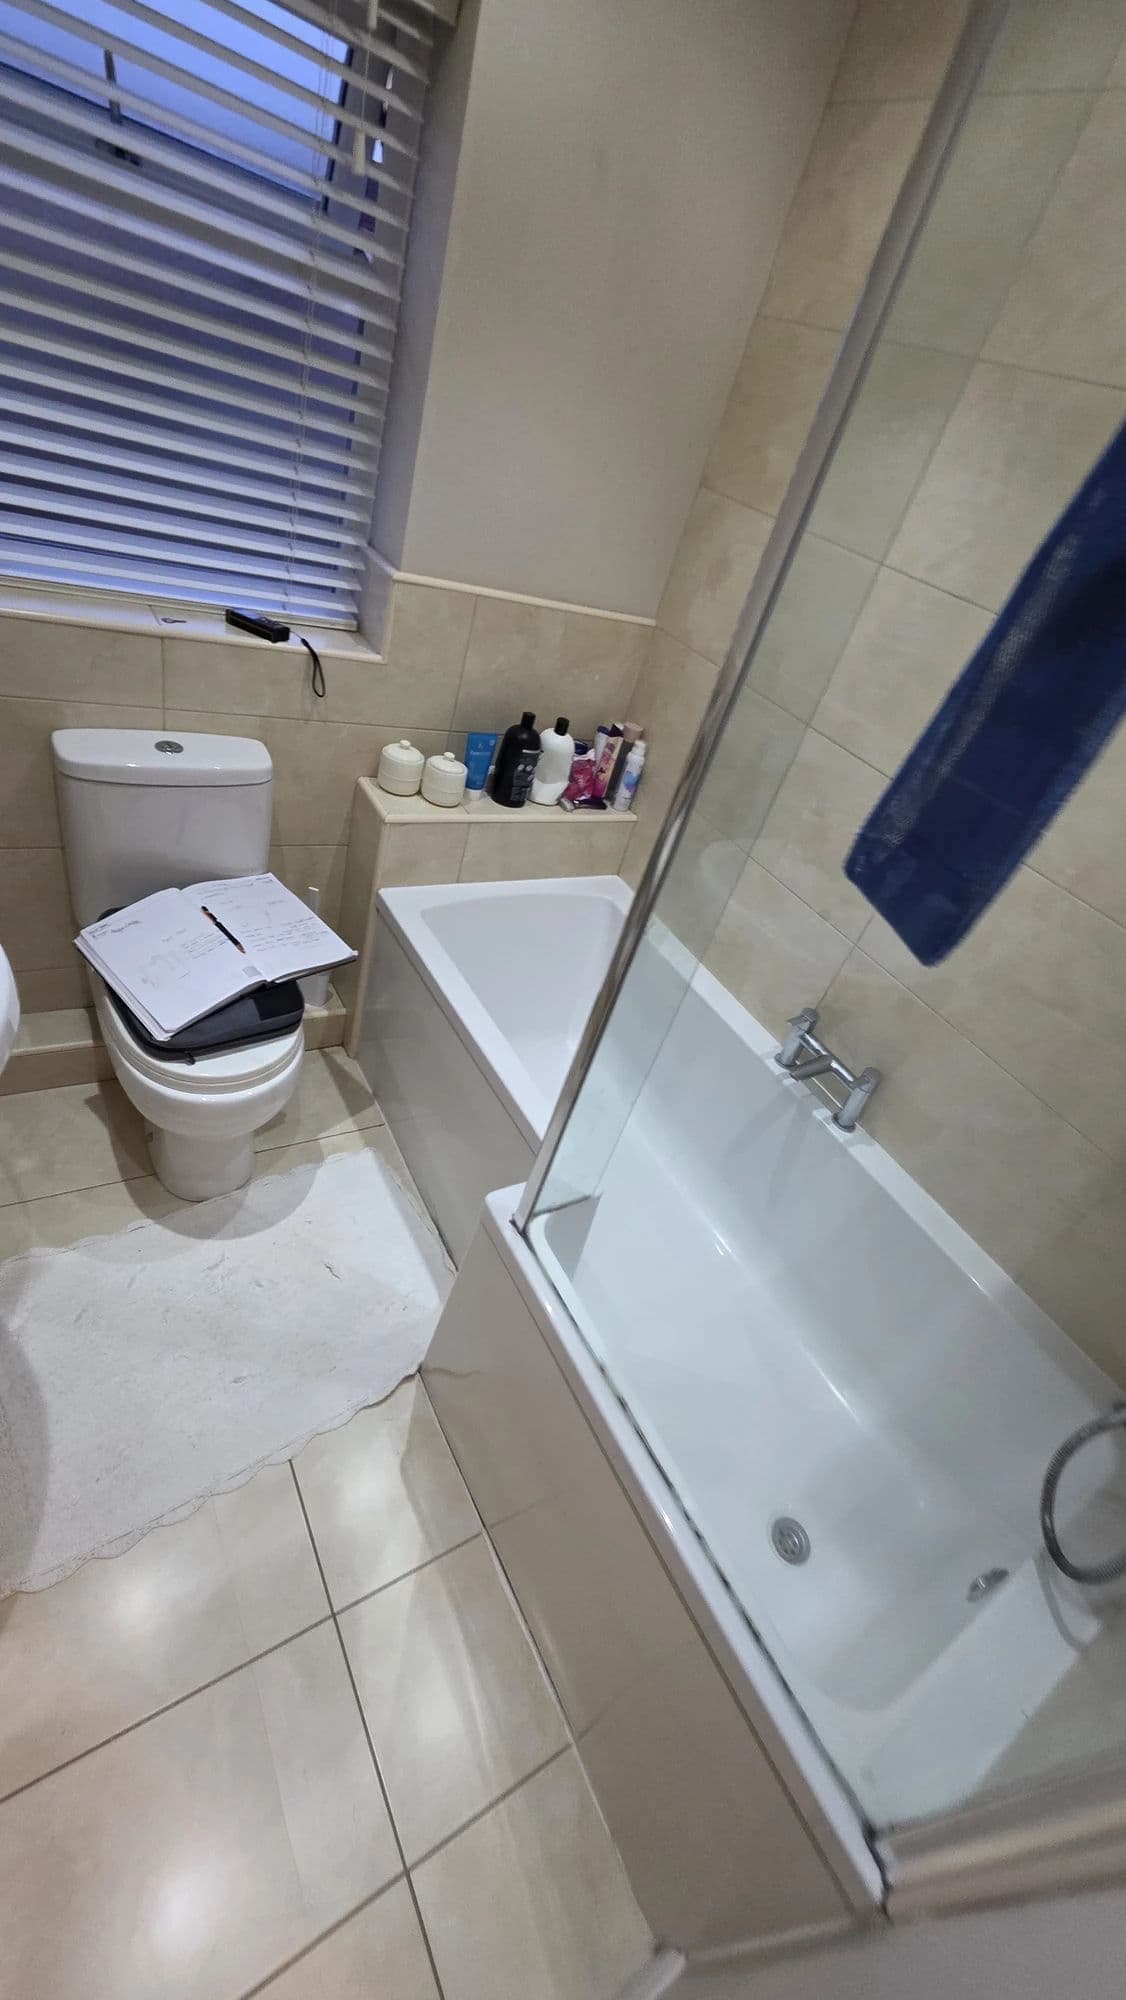
The original bathroom had a strongly dated appearance, with bright-pink painted walls, older partially tiled surfaces and wood-effect flooring.
The room contained:
- a corner shower enclosure;
- a shower arrangement the customers found uncomfortable and impractical;
- a close-coupled WC;
- a pedestal washbasin;
- a standard white radiator;
- older ceiling spotlights;
- an existing extractor fan;
- extensive pipe boxing;
- tiled and painted wall finishes;
- wood-effect finished flooring.
The existing corner shower had not been installed to a satisfactory standard and did not provide the comfort or practicality the customers wanted. More importantly, the room had no bath.
The customers specifically wanted the option of taking a bath while retaining a proper shower for everyday use. Their priority was therefore to remove the corner enclosure and create a complete bath and over-bath shower arrangement.
Oversized Existing Pipe Boxing
One of the customers’ main concerns was the amount of space occupied by the original pipe boxing.
Rather than constructing smaller sections around the actual services, the previous installation had used one unnecessarily large boxed area. Although this was easier to build, it made the bathroom feel more restricted and gave the pipework a bulky appearance.
The customers wanted as much of this boxing removed as practically possible.
The original structure was dismantled and replaced with smaller, carefully considered sections designed around the actual pipe routes. A compact tiled service box was constructed behind the WC, while separate detailed boxing was formed beside the new bath.
This required considerably more setting out, cutting and finishing than simply constructing another large false wall. However, it preserved more usable space and produced a cleaner, more refined result.
Property Access and Working Arrangements
The house remained occupied while the wider property refurbishment was taking place.
Both customers were normally away from the property during working hours and entrusted us with their house key. This allowed the bathroom project to continue while they were at work without requiring them to remain at home or repeatedly arrange access.
The customers gave us considerable freedom to use our professional judgement when resolving the technical details and final finishing decisions. Their trust allowed each element to be completed according to what would provide the best practical and visual result rather than following the quickest installation method.
Complete Bathroom Strip-Out
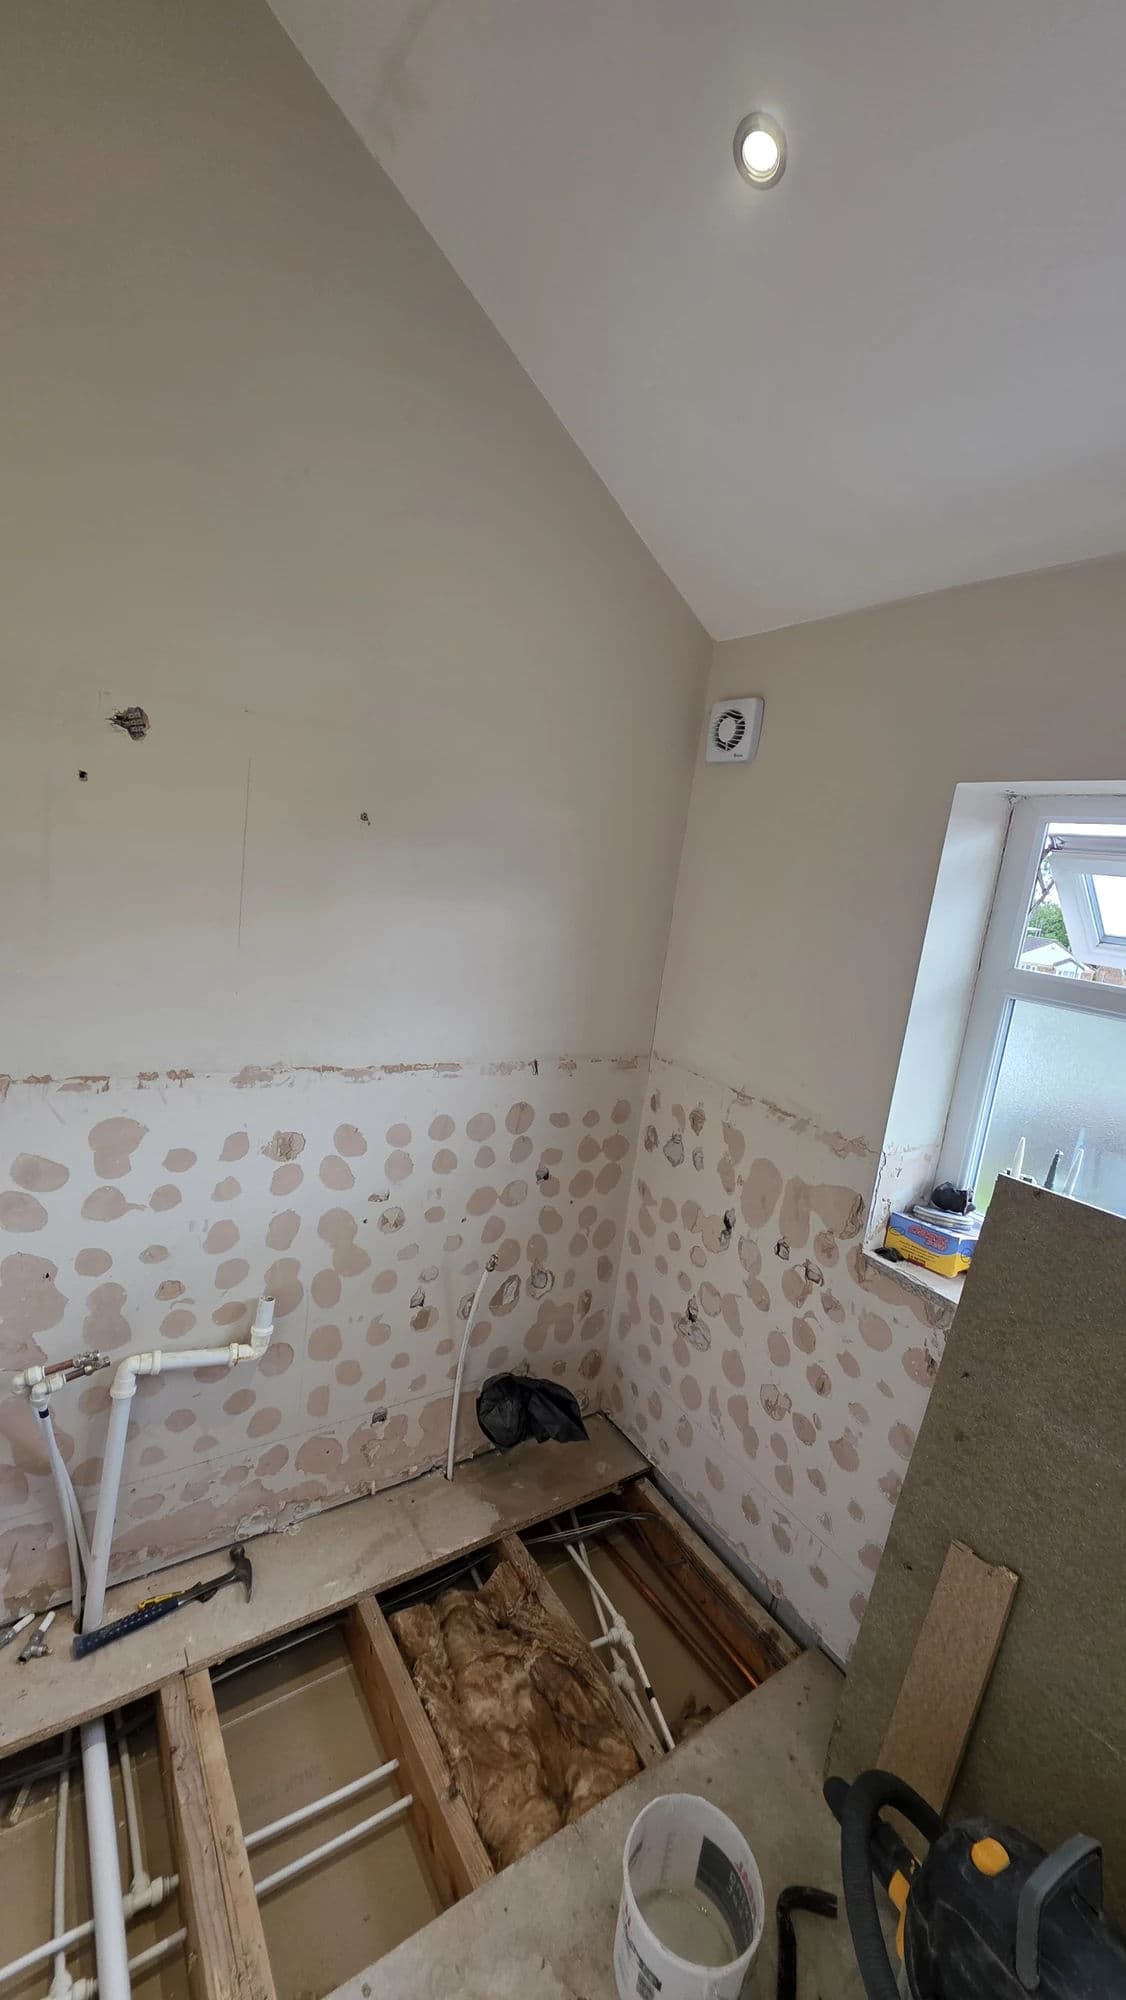
The existing bathroom was fully stripped back before the new installation began.
The removal work included:
- the corner shower enclosure;
- the existing shower fittings;
- the WC;
- the pedestal basin;
- the radiator;
- the wall tiles;
- the floor finishes;
- the oversized pipe boxing;
- the old ceiling spotlights;
- the existing extractor fan;
- damaged sections of plasterboard;
- redundant plumbing and associated fittings.
Removing the existing finishes exposed areas that could not have been assessed properly before the strip-out.
Leak-Damaged Wall Repairs
Once the shower enclosure and wall finishes had been removed, it became clear that previous water leakage had damaged sections of the existing plasterboard.
The affected areas were no longer suitable as backgrounds for the new tiled finish.
Rather than covering the damaged surfaces, the walls were repaired properly before the installation continued. Unsuitable plasterboard was removed, replacement boards were fitted where required and additional sections were bonded into position where necessary.
The repaired walls were checked and prepared before an undercoat primer was applied. BAL flexible tile adhesive was then used to install the new tiled finishes.
These repairs created sound backgrounds for the new bathroom while addressing the deterioration left by the previous leaking installation.
Revised Layout and Plumbing
The principal positions of the WC, washbasin and washing facilities remained broadly the same, but substantial alterations were made to the plumbing and the way the services were concealed as part of the complete bathroom refurbishment.
The work included:
- adapting the former shower area to accommodate a full-size bath;
- installing the new bath supplies and waste;
- providing the new over-bath shower connections;
- adapting the basin supplies and waste for the new vanity unit;
- reorganising the plumbing around the WC;
- reducing the size of the original service boxing;
- redirecting the heating pipes for the new towel rail;
- concealing pipework within the walls and new boxing wherever possible.
Although the WC remained in its original area, the visible pipework and oversized boxing around it were completely redesigned.
The result was a much smaller tiled service section behind the WC, preserving more space and creating a cleaner background around the sanitaryware.
Detailed Boxing Beside the Bath
The service boxing beside the bath was one of the most time-consuming and carefully considered parts of the project.
It was constructed around the actual services rather than extending into one large, easier-to-build wall. Its size and position had to coordinate precisely with:
- the new bath;
- the shower and bath pipework;
- the surrounding wall tiles;
- the contrasting feature tiles;
- the bath-edge support;
- the finished tile trims.
The boxing was boarded, prepared and tiled before being completed with accurately fitted trims around the exposed edges.
This type of detailed construction takes longer than building a single oversized section, but the finished boxing looks more deliberate and occupies only the space genuinely required for the services.
The precision cutting and trim work around these smaller sections contribute significantly to the bathroom’s professionally finished appearance.
Reinforced Bath Installation
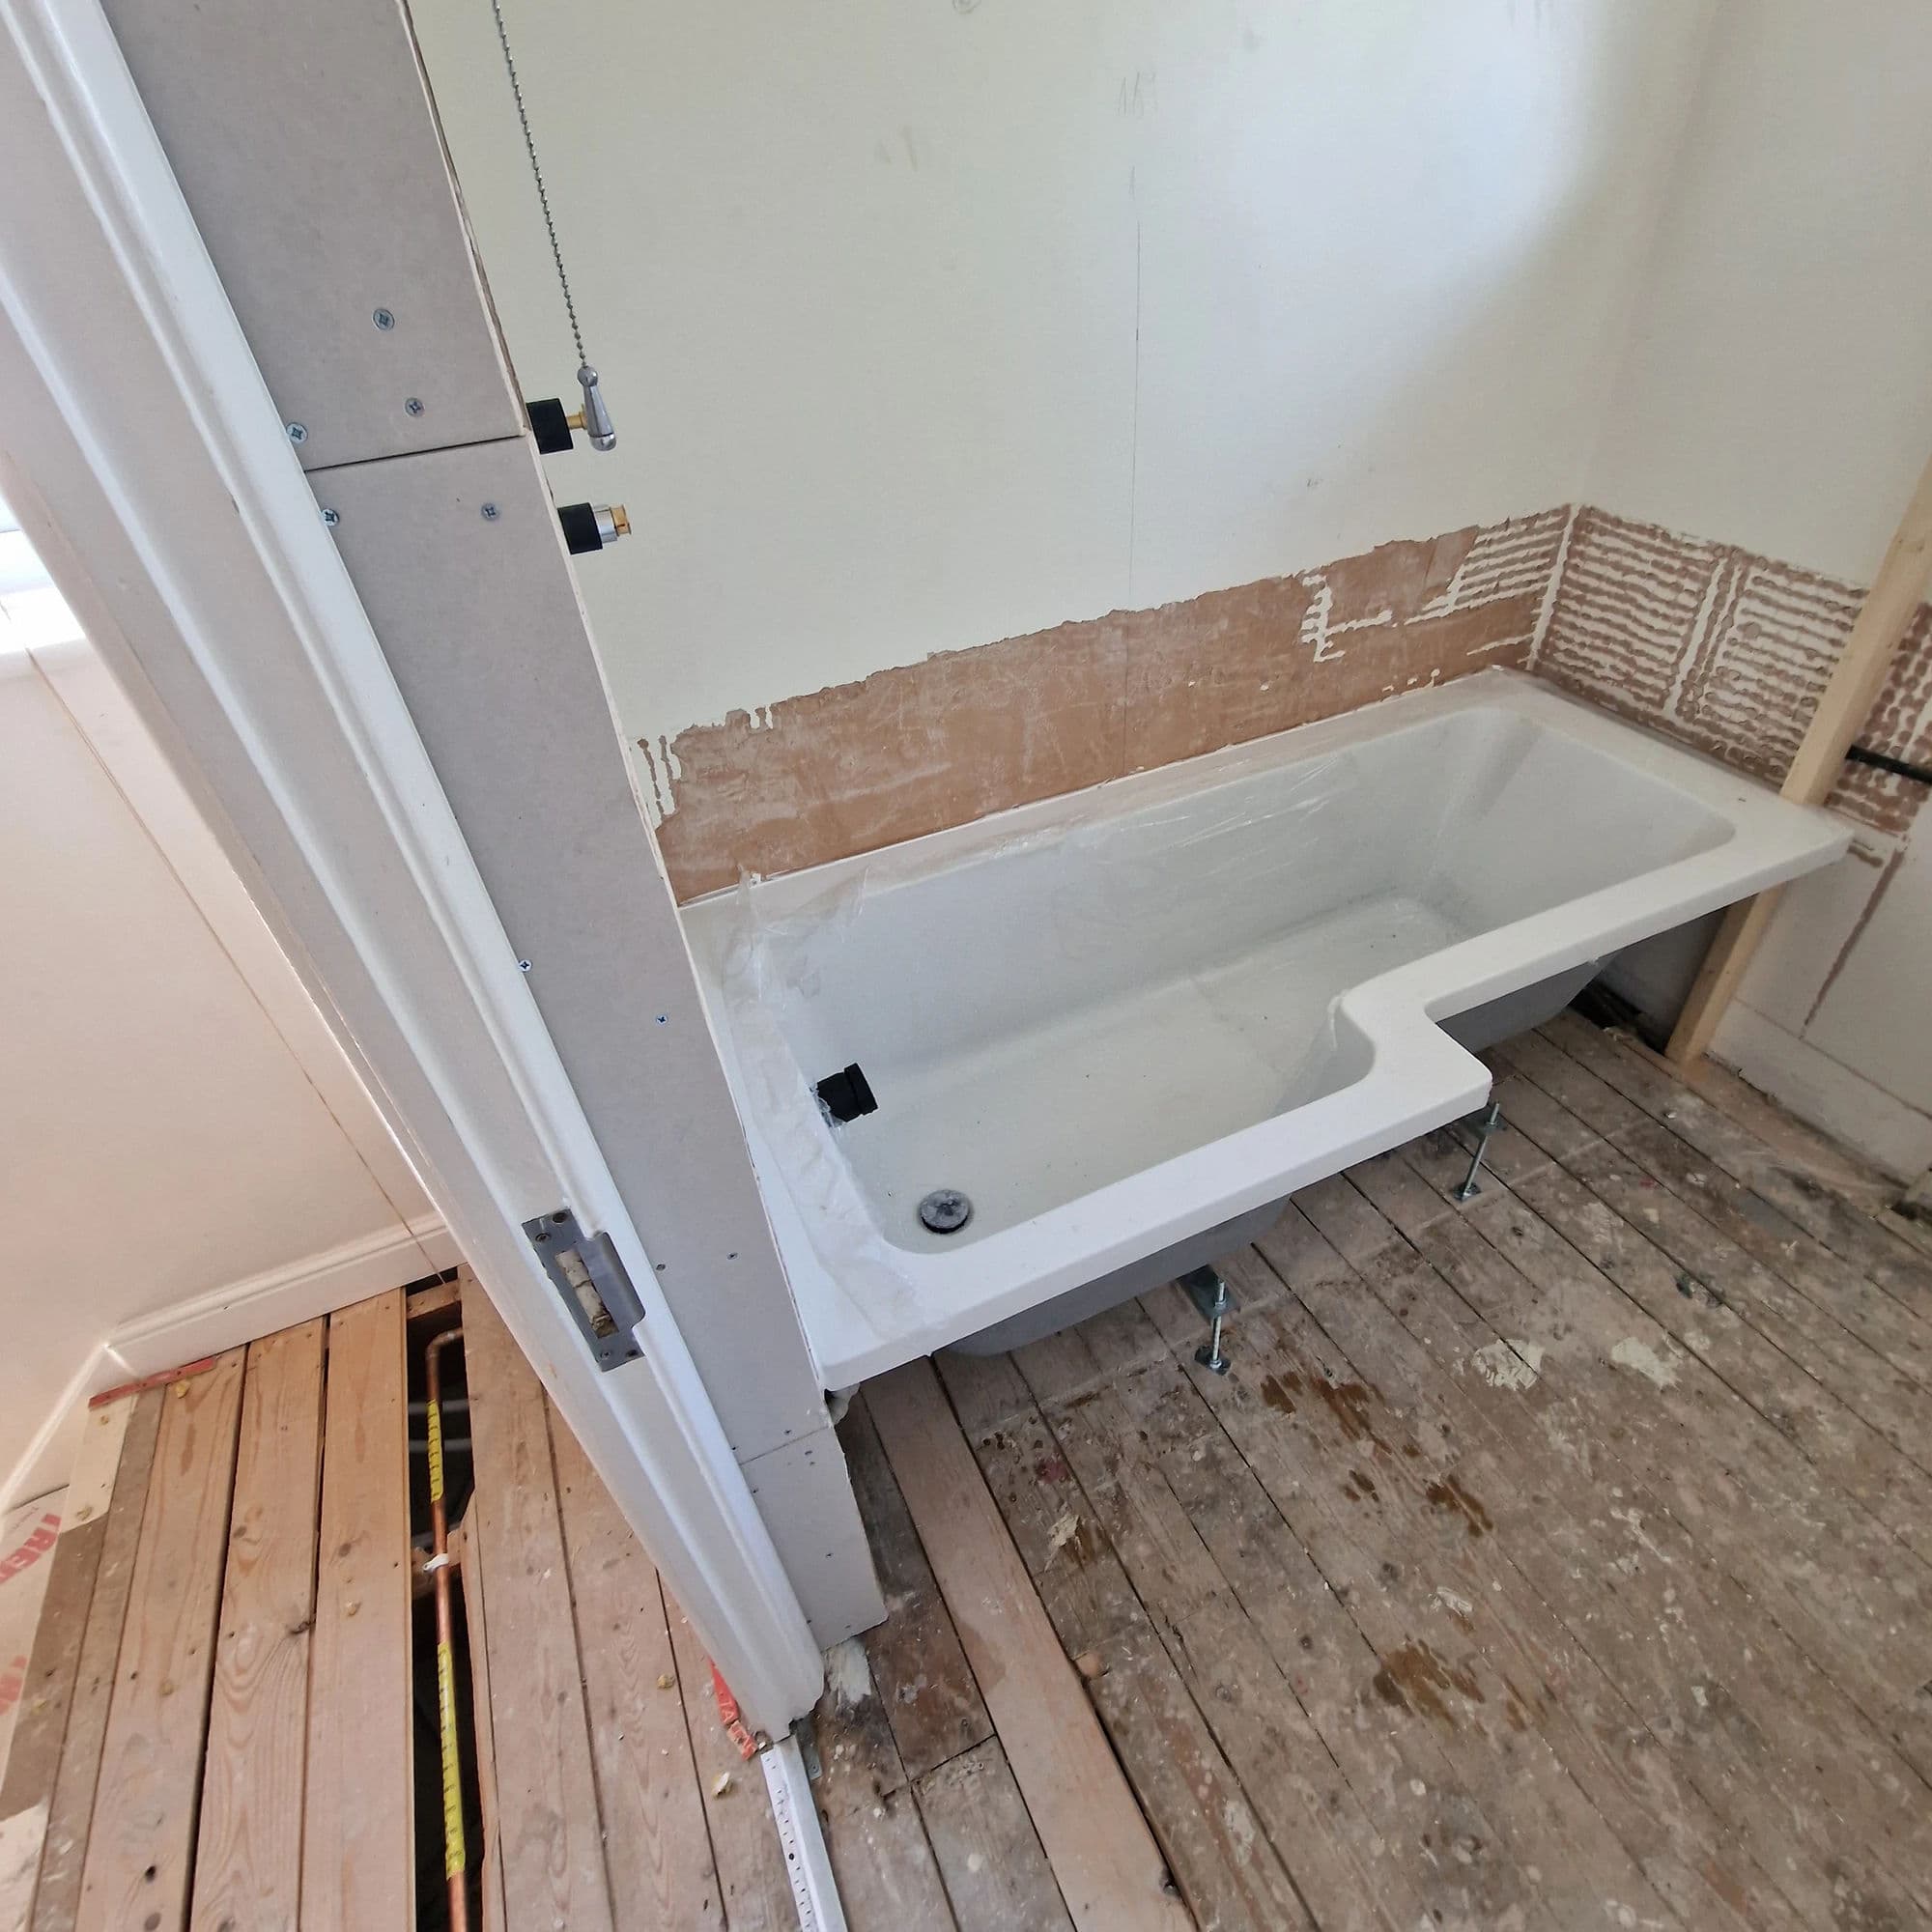
A new 1700 × 700 mm bath was installed in place of the former corner shower arrangement as part of the complete bathroom installation.
As part of our normal bath-fitting method, timber supports were fixed along the perimeter walls beneath the bath edges. These provide continuous support around the bath and help minimise movement along the sealed wall junctions.
A separate timber framework was constructed across the front of the bath to support the exposed side and finished bath panel.
This reinforced installation method provides a more secure base than relying only on the adjustable bath legs. It also helps protect the perimeter seals from movement during everyday use.
The completed bath gives the customers the comfort they had specifically requested while still allowing the room to function as a practical showering space.
Over-Bath Shower and Glass Screen
The previous corner shower was replaced with a new shower positioned above the bath.
The completed arrangement includes:
- a chrome over-bath shower;
- an adjustable shower handset and riser rail;
- new hot and cold connections;
- a clear glass bath screen;
- carefully sealed junctions around the bath;
- coordinated chrome fittings.
The new layout provides both bathing and showering facilities within the same footprint, making the room considerably more useful for the customers without requiring major alterations to the overall sanitaryware positions.
Vanity Unit and WC
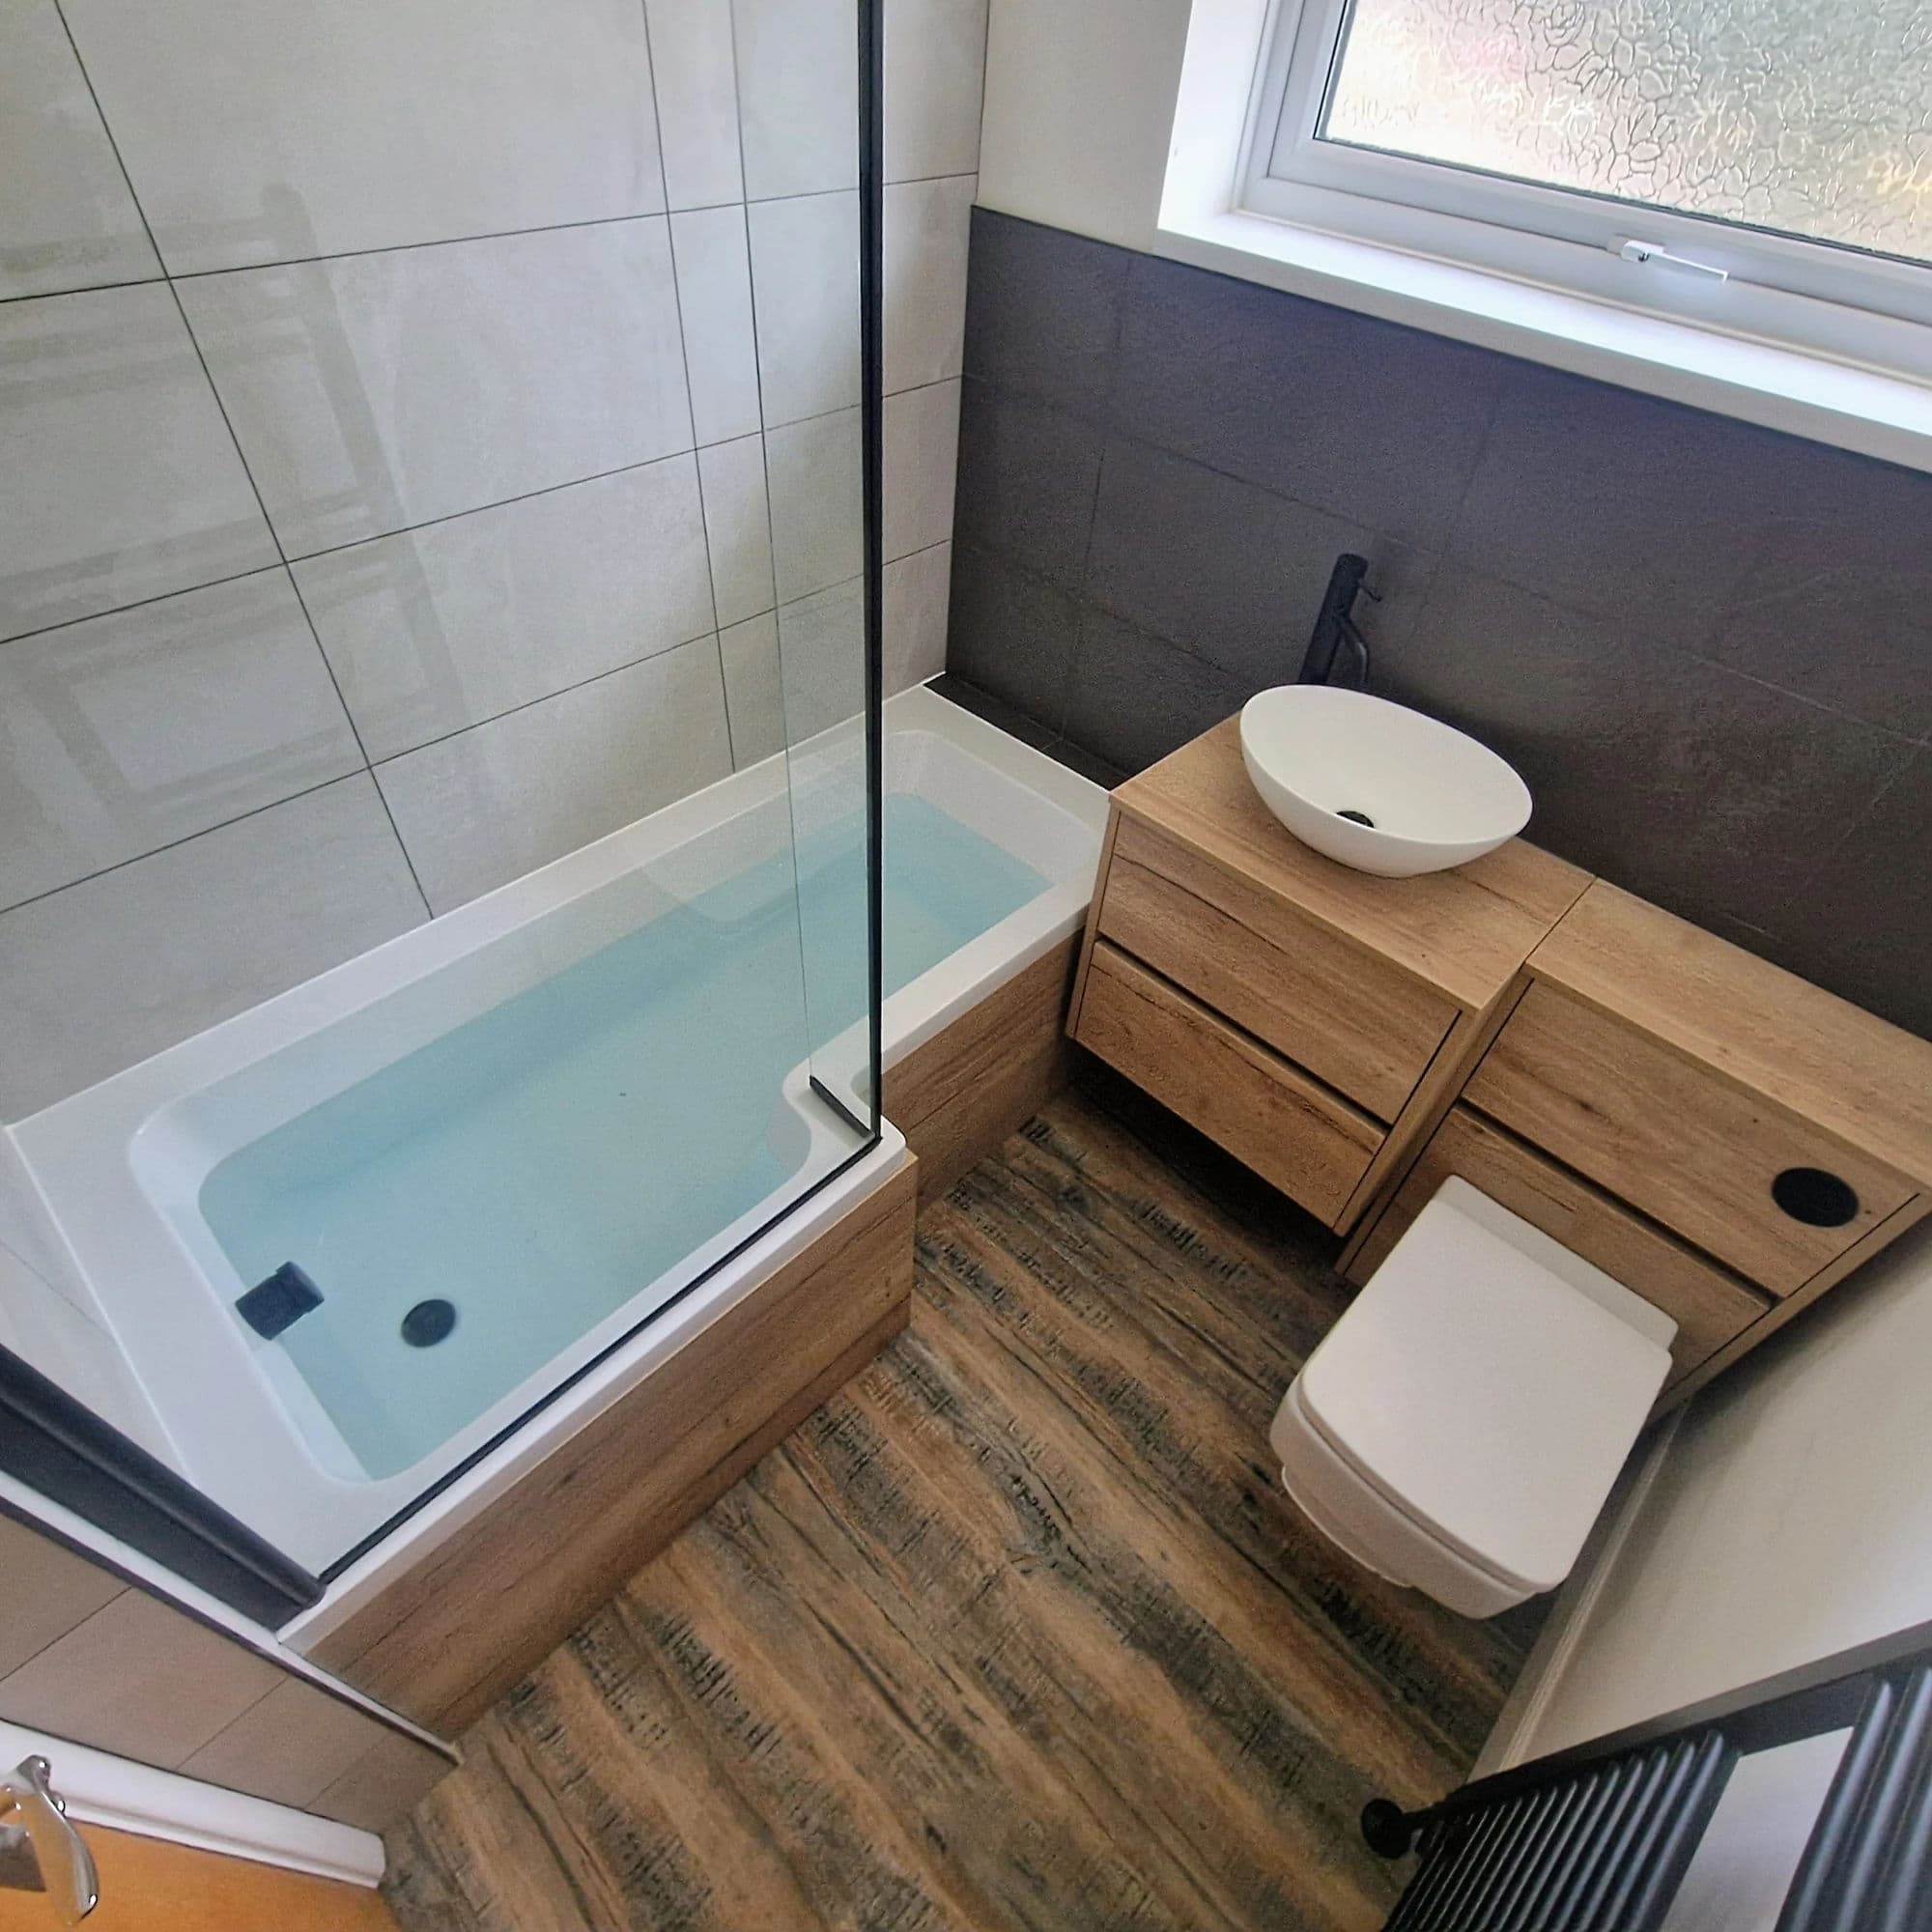
The original pedestal basin was replaced with a wood-effect vanity unit and integrated white basin as part of the final bathroom fitting.
The bathroom furniture introduces useful concealed storage, while its warm timber appearance provides contrast against the neutral tiled walls and floor.
A modern close-coupled WC was installed in approximately the original position. However, the surrounding plumbing was reorganised and concealed within the newly constructed compact boxing behind it.
The top and exposed edges of the boxing were tiled and finished using carefully cut trims, turning a necessary service area into a neat and deliberately designed part of the completed bathroom.
High-Specification LED Mirror
A high-specification 1200 × 600 mm LED mirror was installed above the new vanity unit.
The mirror includes:
- integrated LED illumination;
- a demister function;
- motion-sensor operation.
Its large format creates a strong focal point above the vanity while reflecting light across the room and helping the bathroom feel more open.
The motion sensor allows the lighting to be controlled without repeatedly touching the mirror surface, while the demister helps keep the glass clearer following a bath or shower.
Timber Floor Preparation
The original floor finishes were removed to expose the existing timber floorboards.
A tiled bathroom floor requires a rigid and properly prepared background. Installing tiles directly over traditional timber floorboards would leave the finished surface vulnerable to movement.
The floor-preparation process therefore included:
- checking the condition and stability of the existing floorboards;
- applying BAL flexible tile adhesive;
- bedding HardieBacker cement boards into the adhesive;
- mechanically fixing the boards through to the timber floor;
- priming the prepared board surface;
- applying a further bed of flexible tile adhesive;
- installing the new 600 × 600 mm floor tiles.
The combination of flexible adhesive, cement backer boards and mechanical fixings created a considerably more stable background for the finished tiled floor.
All principal preparation and fixing materials used during the project were sourced through Topps Tiles.
Precision Floor-Tile Setting Out
The new floor was completed using 600 × 600 mm tiles.
Before fixing began, the layout was carefully calculated so that a full tile could run through the centre of the bathroom with matching cuts positioned along both sides.
This avoided leaving one large tile on one side and a narrow, unbalanced cut on the other.
The finished floor therefore has:
- a clear central tile line;
- equal cuts along the opposing sides;
- balanced joints around the WC and vanity;
- carefully measured cuts around the bath and boxing;
- consistent alignment throughout the visible floor area.
This precision setting-out detail is subtle, but it gives the floor a balanced, high-end appearance rather than making it look as though the installation was simply started from the nearest wall.
Wall Tiling and Statement Feature Tiles
The walls were completed using large-format neutral stone-effect tiles selected by the customers through City Plumbing.
A contrasting textured feature tile was introduced around the bath mixer area. This created a distinctive statement feature within the bath and shower zone while breaking up the wider neutral tiled surfaces.
The bathroom tiling required detailed cutting and setting out around:
- the two window openings;
- the bath and glass screen;
- the shower fittings;
- the bath mixer;
- the vanity and basin;
- the WC;
- the compact service box behind the toilet;
- the detailed boxing beside the bath;
- the towel rail connections;
- the electrical fittings.
The window reveals were repaired and tiled as part of the installation. Coordinating trims were fitted around the exposed tile edges to create straight, protected and professionally finished corners.
A Dakota tile-levelling system from Topps Tiles was used during installation to maintain consistent alignment and minimise lipping between adjoining tiles.
The neutral stone-effect surfaces, contrasting feature tiles and precision edging give the completed bathroom a refined contemporary character without making the design feel excessive.
Electrical Work and Spotlights
The electrical first fix had already been completed as part of the wider house refurbishment.
During the bathroom installation, the prepared electrical supplies were used to fit the new recessed ceiling spotlights and complete the upgraded ventilation arrangement.
The new spotlights provide more even lighting across the bath, vanity and WC areas while complementing the illumination from the large LED mirror.
Premium Vent-Axia Extractor Fan
The old extractor fan was removed and replaced with a premium Vent-Axia Lo-Carbon Silent VASF100HTC extractor fan, product reference 479089.
This high-specification 100 mm bathroom fan includes:
- an integrated humidistat;
- timer control;
- continuous low-level ventilation;
- automatic boosted extraction when required;
- variable settings selected during installation;
- quiet operation from approximately 12 dB(A) at three metres;
- a maximum extraction rate of approximately 79 m³ per hour, depending on its configured setting.
The humidity control allows the fan to respond automatically when moisture levels rise, helping remove humid air after the bath or shower has been used.
Its quiet operation, efficient performance and discreet white finish made it a carefully considered upgrade for a bathroom positioned within an occupied family home.
Chrome Open-Sided Heated Towel Rail
The original standard radiator was replaced with a chrome open-sided heated towel rail.
Unlike a conventional closed ladder-style radiator, the open-ended design allows towels to be slid conveniently onto the horizontal bars from the side.
The heating pipes were redirected and concealed within the wall before emerging directly at the towel rail connections.
Keeping the supplies hidden removed unnecessary visible pipework and allowed the chrome towel rail to sit cleanly against the finished tiled wall.
This combination of practical access, concealed services and coordinated chrome detailing contributes to the bathroom’s refined finish.
Customer-Supplied Products
The customers selected and supplied the bathroom suite, furniture, fittings and tiles through the City Plumbing showroom in Stockton-on-Tees.
They had confidence in the overall direction of the project and allowed Tees Valley Refurbishments Ltd to use professional judgement when resolving the technical details and final setting out.
This was particularly important when deciding:
- how much of the original pipe boxing could be removed;
- how to form the smaller boxing around the remaining services;
- how to support the new bath;
- how to position the floor tiles symmetrically;
- how to incorporate the statement feature tiles;
- how to finish the exposed tiled edges;
- how to conceal the heating and bathroom pipework.
The customers’ trust allowed each detail to be completed according to what would provide the cleanest and most practical result rather than following the quickest installation method.
Programme
The complete bathroom refurbishment took eight working days, starting on a Monday and finishing on the Wednesday of the following week, with no weekend working.
The property remained occupied and was undergoing a wider refurbishment. Both customers were normally away at work during the day and provided a house key, allowing the bathroom project to continue independently without disrupting their working routine.
Within the eight-working-day programme, the room was completely stripped out, the leak-damaged walls were repaired, the plumbing was altered, the timber floor was strengthened, the new bath and bathroom fittings were installed, the detailed boxing was constructed, the walls and floor were tiled, and the lighting and ventilation were completed.
Completed Bathroom Refurbishment
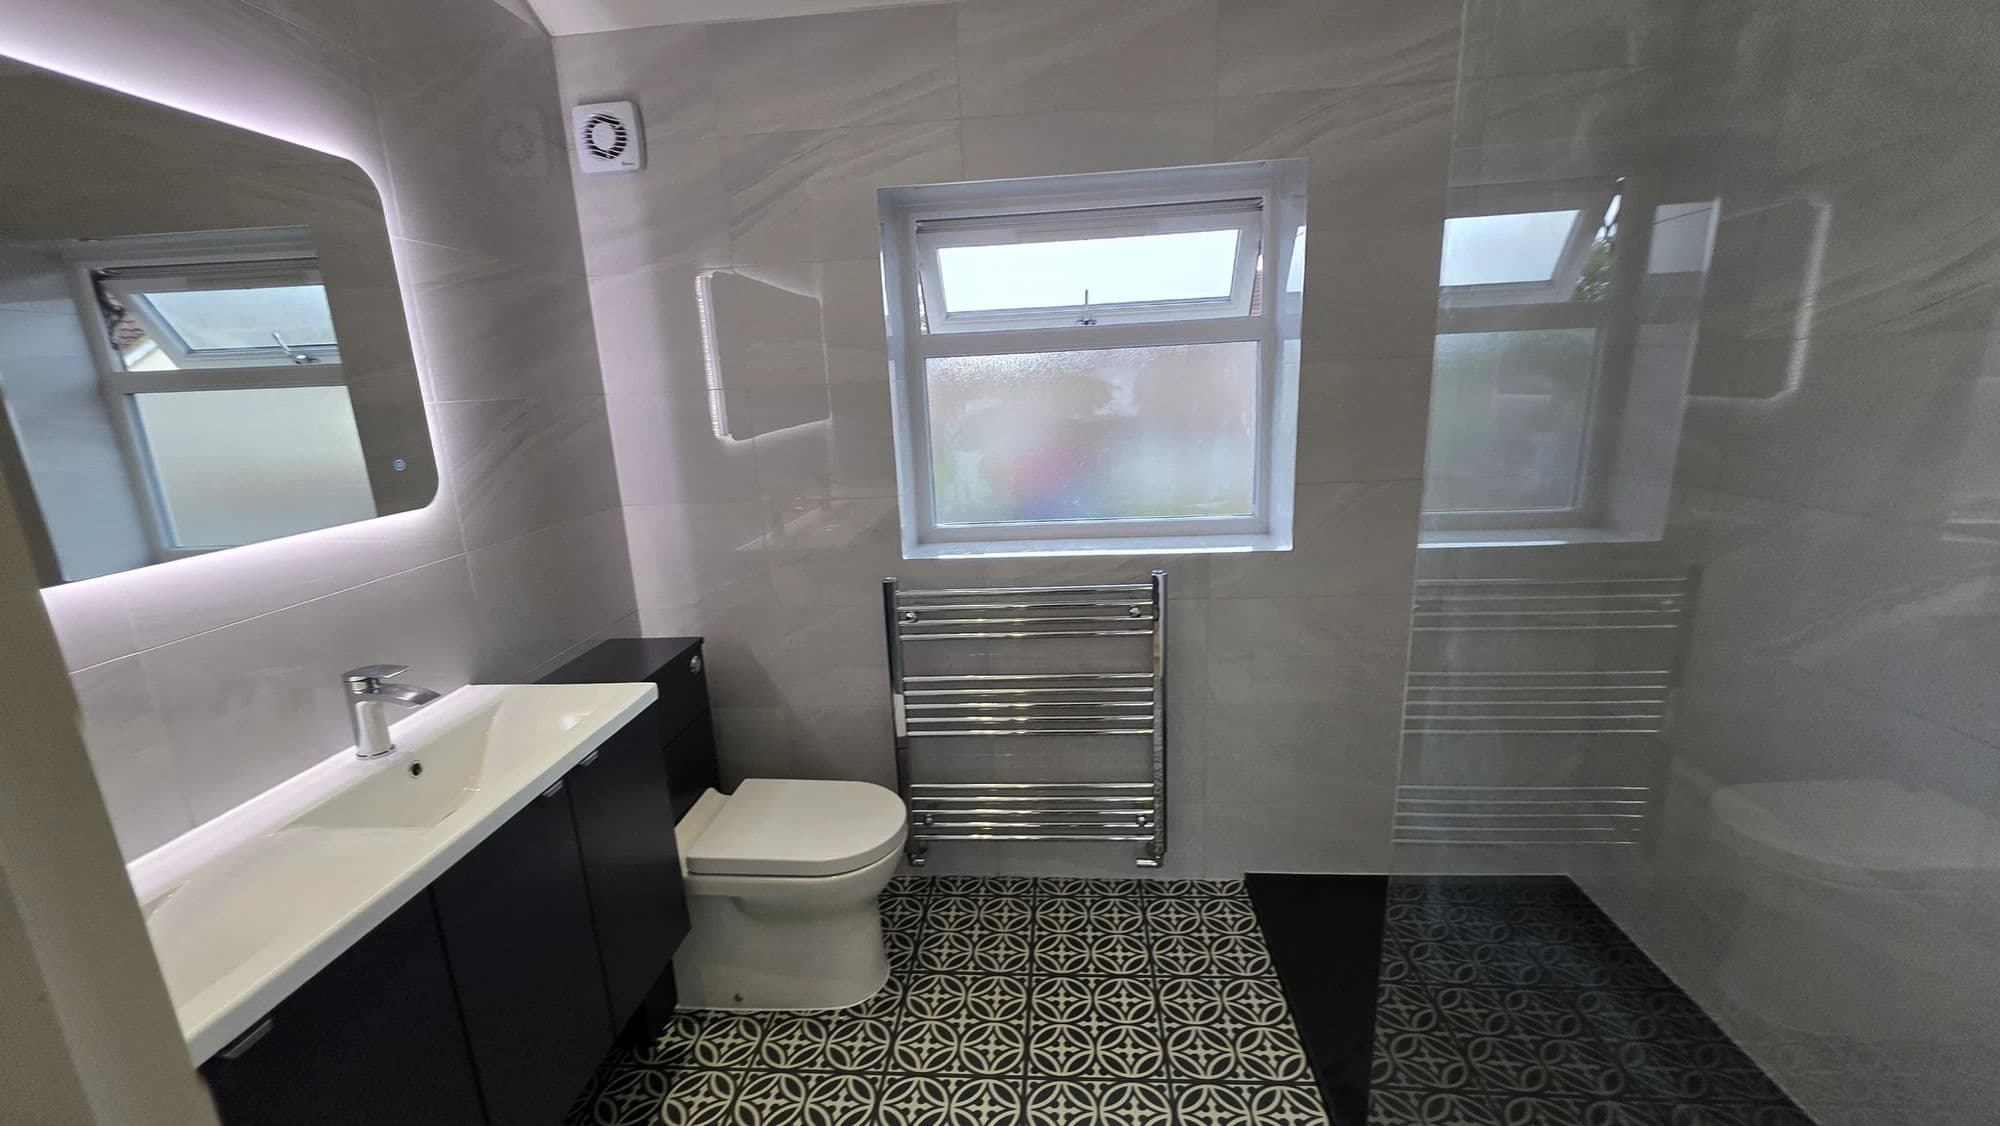
The finished bathroom is considerably more practical and comfortable, with precise tile setting-out, carefully considered boxing and selected premium features creating a refined, high-end finish.
The old corner shower, pedestal basin, standard radiator, oversized boxing, damaged wall linings and dated finishes were replaced with:
- a reinforced 1700 × 700 mm bath;
- a chrome over-bath shower;
- a clear glass bath screen;
- a wood-effect vanity unit with integrated basin;
- a modern close-coupled WC;
- compact tiled boxing behind the WC;
- detailed tiled service boxing beside the bath;
- a high-specification 1200 × 600 mm illuminated mirror;
- motion-sensor lighting and an integrated demister;
- large-format neutral stone-effect wall tiling;
- contrasting statement tiling around the bath mixer;
- symmetrically set-out 600 × 600 mm floor tiles;
- tiled window reveals with precisely finished trims;
- recessed ceiling spotlights;
- a premium Vent-Axia humidity-controlled extractor fan;
- a chrome open-sided heated towel rail;
- concealed plumbing and heating connections.
The customers now have both the full-size bath they particularly wanted and a practical overhead shower for everyday use.
Careful floor preparation, reinforced bath support, reduced service boxing, balanced tile setting out and precision edge finishing distinguish this project from a straightforward like-for-like bathroom replacement.
The completed room is a quality contemporary family bathroom that combines everyday comfort with selected high-specification features, distinctive tiling and a carefully executed professional finish.
This project can be viewed alongside our other completed bathroom projects, including our Ingleby Barwick main bathroom renovation with patterned Harvey Maria flooring and our Ingleby Barwick bathroom installation with walk-in shower and double vanity.
Homeowners planning a similar bathroom refurbishment in Ingleby Barwick can explore our Ingleby Barwick bathroom fitting and installation work, read our customer reviews, or request a free bathroom survey to discuss the existing room, practical options and required scope of work.
More bathrooms in Ingleby Barwick
Want a bathroom like this?
Book a free bathroom survey — we'll visit, measure up and give you a detailed, fixed-price written quotation clearly setting out the agreed scope of work.
Book a Free Bathroom Survey