The 30-Second Read
This downstairs WC formed part of the same wider project as our Bathroom Installation Hartlepool with Walk-In Shower, but required its own substantial refurbishment rather than a simple change of sanitaryware.
The existing sanitaryware positions were retained, but much of the visible plumbing was completely reorganised. Hot and cold basin supplies, the basin waste and radiator pipework had previously been boxed or left exposed. We rerouted those services inside the walls so the new fittings could be installed without recreating the bulky boxing from the original room.
The WC was then fully tiled from floor to ceiling using 600 × 600 mm porcelain tiles, including the previously untiled left-hand wall. We also repaired and plastered the ceiling, replaced the original single light with two new spotlights, used an adjustable spotlight on the sloping section of ceiling to control glare, ran a new cable for the illuminated mirror and upgraded the ventilation with a Vent-Axia 479089 humidity-and-timer extractor fan.
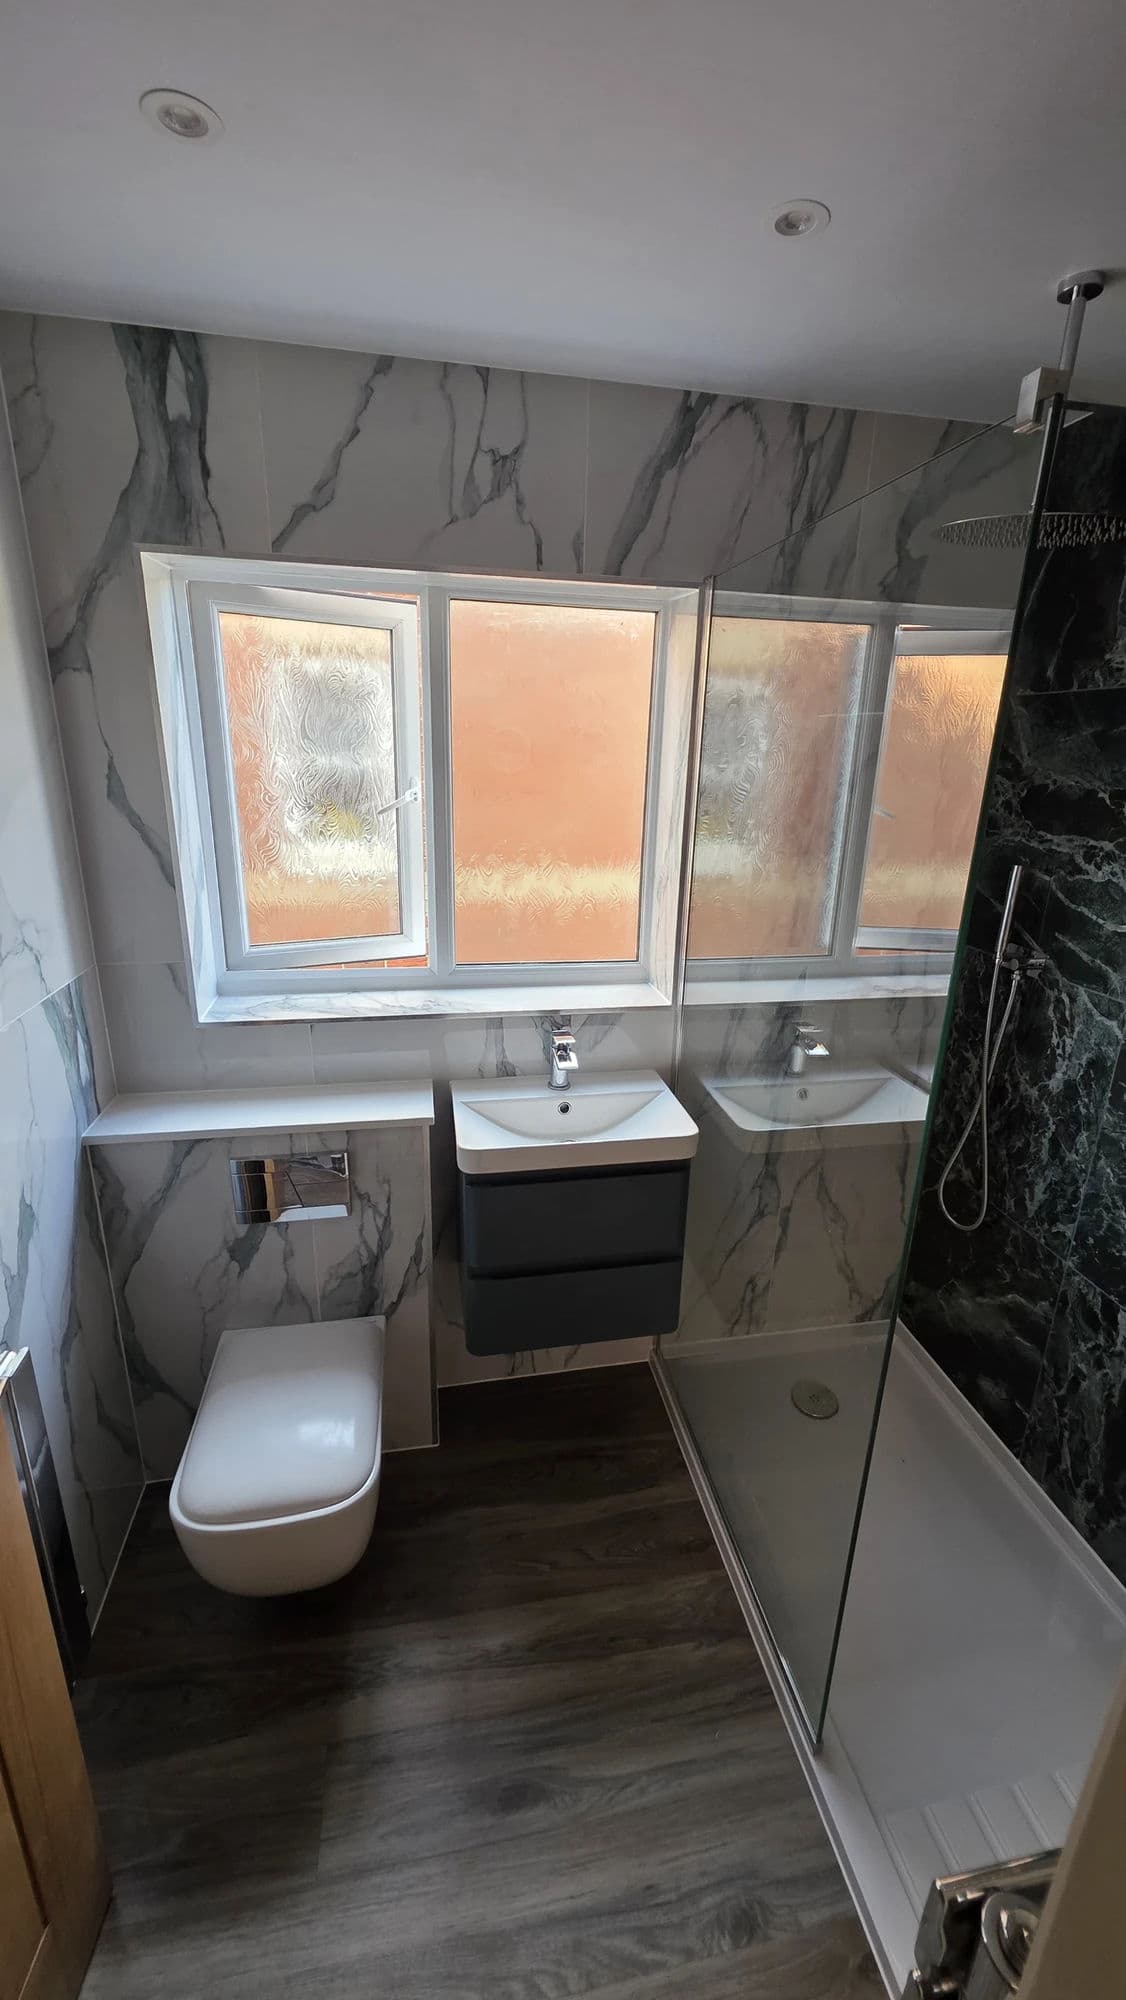
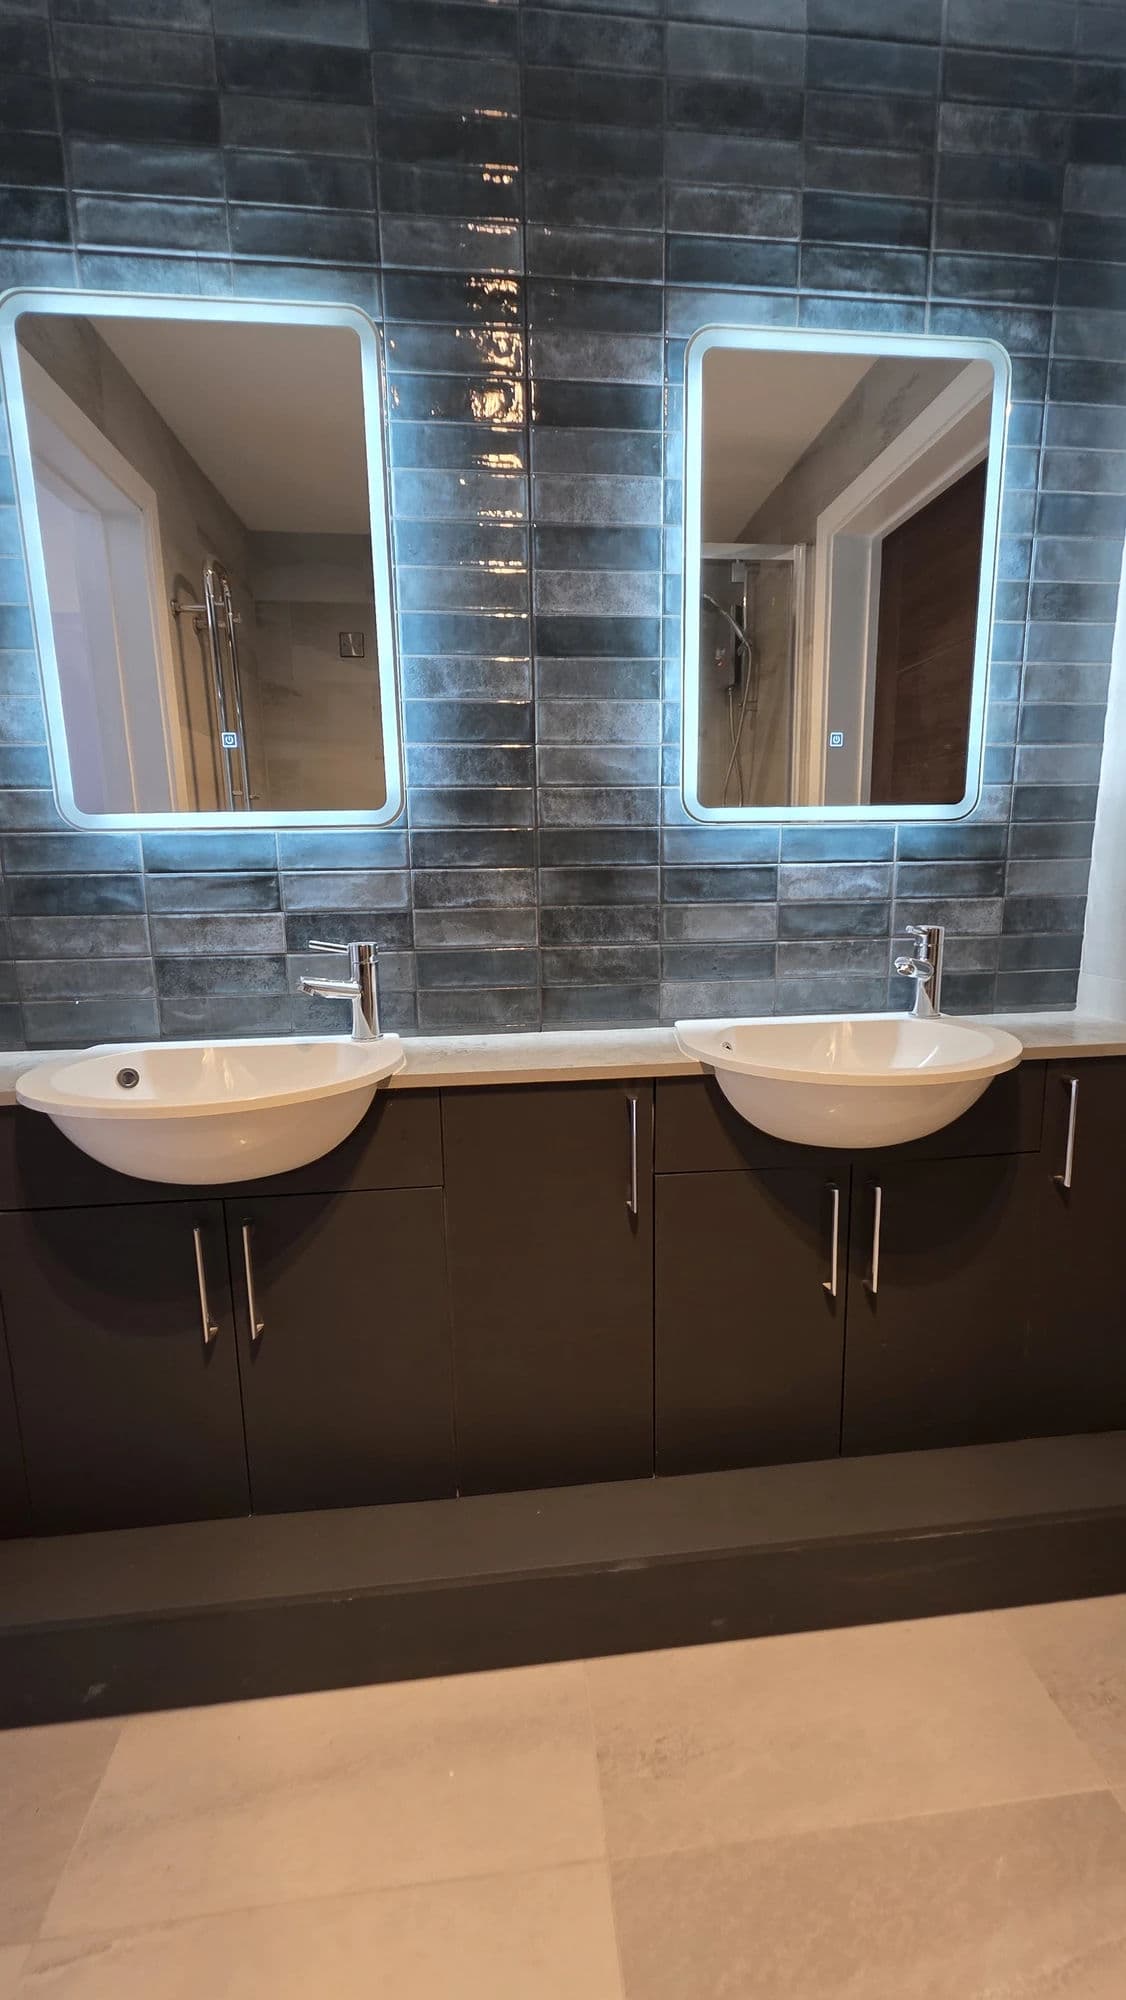
The finished room includes a back-to-wall WC with fitted storage furniture, compact 400 mm basin with exposed chrome fittings, illuminated dimmable mirror and anthracite central-heating radiator with matching corner valves.
The downstairs WC took approximately four working days and was completed in August 2026.
Project Overview
Completed in August 2026, this bathroom refurbishment in Hartlepool transformed a dated downstairs toilet into a fully tiled and much more carefully detailed small bathroom space.
This room formed part of the same wider customer project as our larger upstairs bathroom:
Bathroom Installation Hartlepool with Walk-In Shower
The main bathroom was the larger element of the work and took ten working days across two weeks. This downstairs WC required approximately four additional working days.
Although none of the principal sanitaryware positions needed to move, the room still required substantial plumbing, electrical, ceiling and tiling work.
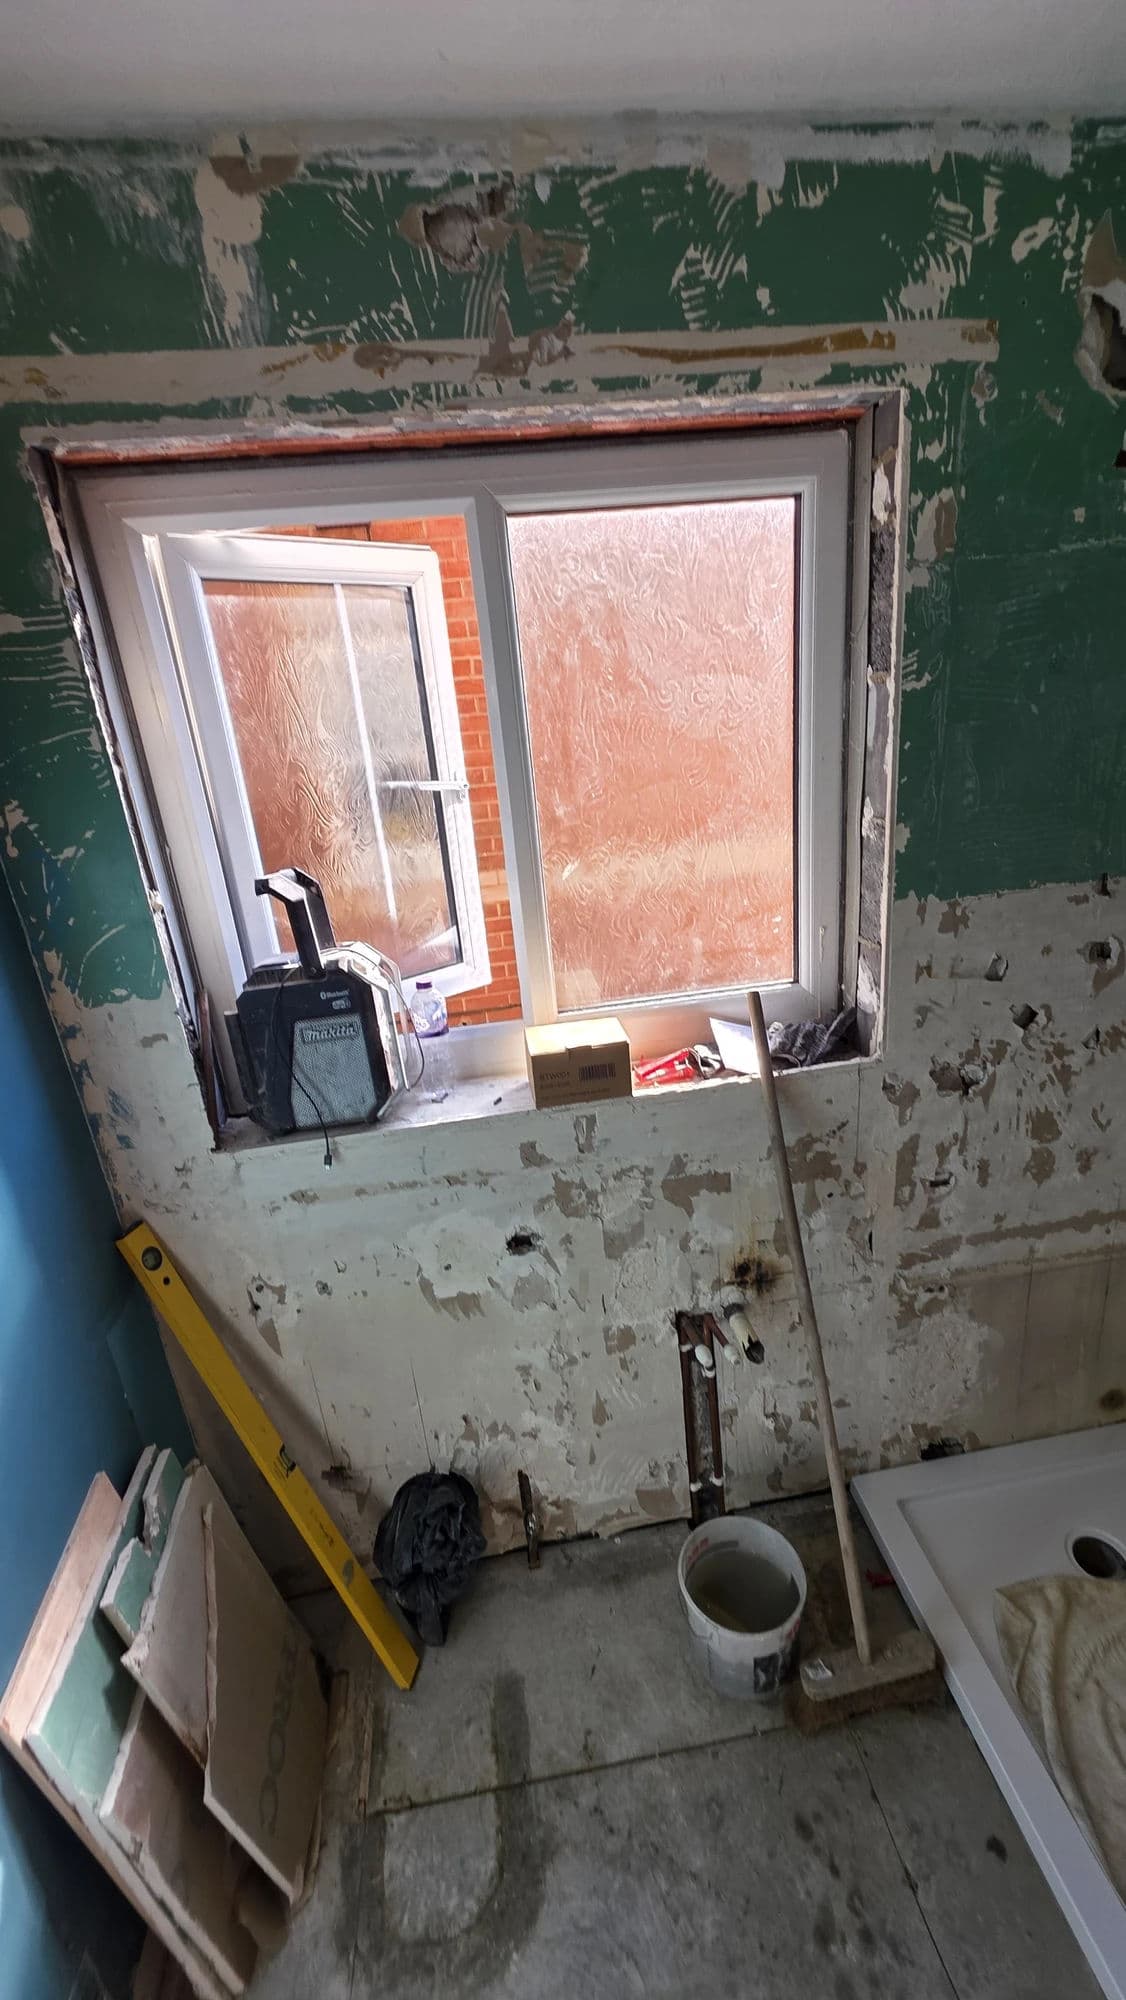
The previous installation contained unnecessary boxing beneath the basin, exposed basin waste pipework and heating pipes that prevented the cleaner finish we wanted to achieve.
Rather than reproduce those details around the new fittings, the services were reorganised and concealed within the wall construction wherever practical.
The refurbishment included:
- removal of the old service boxing;
- rerouting of basin hot and cold supplies;
- concealment of the basin waste;
- radiator pipework alterations;
- installation of a new anthracite central-heating radiator;
- full-height porcelain wall tiling;
- porcelain floor tiling;
- tiling of the previously untiled wall;
- new WC and fitted storage furniture;
- compact basin installation;
- replacement extractor fan;
- new electrical provision for the illuminated mirror;
- removal of the original single ceiling light;
- installation of two new ceiling spotlights;
- adjustable spotlight installation on the sloping ceiling;
- ceiling repairs and plastering;
- wall repairs and preparation;
- final grouting, silicone and finishing.
The Existing Downstairs WC
The original downstairs toilet already contained the basic sanitaryware positions required for the room, so there was no reason to relocate the WC, basin or radiator simply for the sake of changing the layout.
The problem was how the services around those fittings had originally been installed.
Pipework beneath the basin had been enclosed inside visible boxing.
The basin waste was particularly untidy because part of it remained exposed outside the boxing.
The radiator pipework also ran through the boxed area rather than being neatly integrated into the wall.
The left-hand wall had not been tiled in the same way as the rest of the room, and the ceiling still had a basic single-light arrangement.
The refurbishment therefore concentrated on improving the quality of the installation itself rather than unnecessarily moving every fitting.
Removing the Old Boxing and Exposed Plumbing
One of the most important decisions was to remove the old service boxing beneath the basin.
Simply replacing the basin and rebuilding the same box would have left the refurbished room with exactly the same visual problem.
Once the original finishes and boxing had been removed, we gained access to the plumbing and could redesign the service routes properly.
The existing:
- hot basin supply;
- cold basin supply;
- basin waste;
- radiator flow pipe;
- radiator return pipe;
were all addressed as part of the new installation.
The principle was simple: where the wall construction allowed it, the working plumbing should disappear behind the finished surfaces rather than dictate the appearance of the room.
Concealing the Basin Plumbing Inside the Wall
The original basin installation had several visible services around it.
Both the hot and cold supplies and the basin waste were rerouted so they could be concealed within the wall.
This was the most technically demanding part of the downstairs WC refurbishment.
The wall had to be opened in the required areas, new service routes established and the plumbing positioned accurately so the final connections emerged exactly where they were required.
Once the alterations had been completed, the affected wall surfaces were repaired and prepared for the new porcelain tiling.
This allowed the new compact basin to be installed without recreating the bulky service boxing that had dominated the previous arrangement.
The finished basin area therefore appears deliberately simple even though considerably more work is concealed behind it.
400 mm Compact Basin with Exposed Chrome Details
A compact basin approximately 400 mm wide was installed to suit the proportions of the downstairs WC.
Rather than hiding every connection, selected fittings were deliberately left visible because they form part of the finished detail.
The basin installation includes:
- chrome basin tap;
- chrome waste;
- exposed decorative chrome trap;
- modern chrome corner isolating valves.
These exposed components were chosen as finished fittings rather than being treated as plumbing that simply had to be hidden.
This creates a very different appearance from the original installation, where untidy pipework beneath the basin had required substantial boxing.
Why We Prefer Corner Valves
Where the plumbing arrangement allows it, we prefer neat corner valves rather than bringing conventional connections vertically through the finished floor.
There are both visual and practical reasons for this.
The pipework can remain tighter to the wall, producing a cleaner finished connection.
Keeping valves and exposed pipes away from the floor also reduces the chance of catching them with a mop, vacuum cleaner or other cleaning equipment.
That detail is particularly useful in a small WC where sanitaryware, furniture and circulation space are all relatively close together.
The same principle was applied to both the basin connections and the new radiator installation.
Back-to-Wall WC and Fitted Storage
The new toilet is a floor-standing back-to-wall WC.
Behind it, the fitted furniture creates an approximately 1000 mm-wide arrangement consisting of:
- approximately 200 mm storage cabinet;
- approximately 600 mm central WC unit;
- approximately 200 mm storage cabinet.
The two narrower side cabinets provide useful additional storage without requiring separate cupboards elsewhere in the room.
The central unit houses the WC services and gives the back-to-wall pan a clean finished background.
This arrangement makes effective use of the wall behind the toilet while keeping the room balanced and uncluttered.
Anthracite Central-Heating Radiator
The existing radiator was replaced with a new anthracite central-heating radiator.
The original heating pipes had formed part of the previous boxed arrangement.
As part of the refurbishment, these pipes were rerouted into the wall so they no longer needed to travel visibly across the floor area.
The new radiator was installed with matching anthracite corner valves supplied by Tees Valley Refurbishments Ltd.
This creates a much neater wall connection and avoids unnecessary vertical pipework rising through the porcelain floor.
It is a relatively small detail, but one that makes a noticeable difference to the quality of the finished installation.
Vent-Axia 479089 Humidity-and-Timer Extractor Fan
The existing extractor fan was replaced as part of the refurbishment.
Tees Valley Refurbishments Ltd supplied and installed a Vent-Axia 479089 100 mm bathroom extractor fan with humidistat and timer control.
The fan provides automatic humidity-responsive ventilation together with timed overrun and continuous-running capability.
It is designed to provide effective bathroom ventilation while operating at a very low noise level, making it well suited to a compact downstairs WC where the fan is positioned relatively close to the user.
Replacing the original unit formed part of the wider approach to improving the room technically as well as visually.
Ceiling Repairs and Plastering
The ceiling also required attention as part of the refurbishment.
Rather than leaving the existing surface and simply changing the light fitting, the ceiling was repaired and plastered to create a cleaner background for the new lighting arrangement.
This allowed the ceiling to be treated as part of the refurbishment rather than as an untouched surface above an otherwise completely renewed room.
The new plastered finish also provided a much better visual setting for the two replacement spotlights.
Replacing the Single Light with Two Spotlights
The original WC had a single basic ceiling light.
This was replaced with two new spotlights to distribute the light more evenly through the room.
The ceiling is not completely flat.
One of the spotlight positions falls within a sloping section of the ceiling.
Using a conventional fixed downlight there would have directed the light at an unsuitable angle and could have produced uncomfortable glare.
We therefore installed an adjustable swivel spotlight in that position.
The fitting could then be angled so the beam illuminates the room correctly rather than shining directly towards the user's eyes.
It is a small design decision, but it shows why lighting positions and fittings need to respond to the actual geometry of the room rather than simply being installed symmetrically.
New Cable for the Illuminated Mirror
The original WC did not have the electrical provision required for the new illuminated mirror.
A new cable was therefore run to serve the mirror as part of the refurbishment.
The finished mirror is approximately 500 mm in size and incorporates:
- integrated illumination;
- touch control;
- dimming function.
Introducing the supply while the refurbishment was underway allowed the wiring to be concealed within the construction rather than adding surface trunking or visible cables afterwards.
The illuminated mirror provides useful additional task lighting around the basin while complementing the two new ceiling spotlights.
Full-Height 600 × 600 mm Porcelain Wall Tiling
The room was transformed using 600 × 600 mm porcelain tiles approximately 10 mm thick.
The wall tiles were installed in a straight-bond layout.
Previously, the left-hand wall had not been tiled in the same way as the other surfaces.
As part of this refurbishment, that wall was tiled as well, creating a consistent floor-to-ceiling porcelain finish throughout the room.
Using 600 × 600 mm tiles in a small WC requires careful setting out.
Large-format tiles reduce the number of grout joints, but cuts around the:
- WC furniture;
- compact basin;
- mirror;
- radiator;
- extractor fan;
- doorway;
- corners;
- service penetrations;
become particularly noticeable because there are fewer joints available to absorb setting-out differences.
The bathroom tiling was therefore planned around the room as a whole before installation.
600 × 600 mm Porcelain Floor Tiling
The floor uses the same 600 × 600 mm porcelain tile format as the walls.
These were also installed in a straight-bond arrangement.
Using the same tile dimensions across the floor and wall surfaces gives the small room a more unified appearance without introducing unnecessary additional patterns.
The floor background was prepared and primed before the porcelain installation.
Careful setting out and cutting were required around the WC, basin area, radiator connections and perimeter junctions so the large-format floor tiles remained visually balanced within the restricted floor area.
Wall Repairs and Preparation
Removing the original tiles, boxing and concealed services exposed areas of wall that required repair before the new finishes could be installed.
The affected backgrounds were patched and made suitable for tiling.
Once the repairs had been completed, the appropriate surfaces were primed before the porcelain tiles were fixed.
This preparation was particularly important because large-format porcelain makes irregularities in the underlying surface more noticeable.
Accurate background preparation therefore formed an essential part of achieving consistent joints and controlling lipping across the 600 × 600 mm installation.
Excel Bond Slow Set Flexible Grey S1 Adhesive
The porcelain tiles were installed using Excel Bond Slow Set Flexible Grey S1 adhesive.
The slower setting time provides useful working time when installing large-format porcelain because tiles can be positioned and adjusted accurately while maintaining the planned setting-out.
The S1 classification also provides the flexibility required for a demanding wall and floor tile installation.
Tees Valley Refurbishments Ltd supplied the adhesive together with the other standard preparation and fixing materials required for the project.
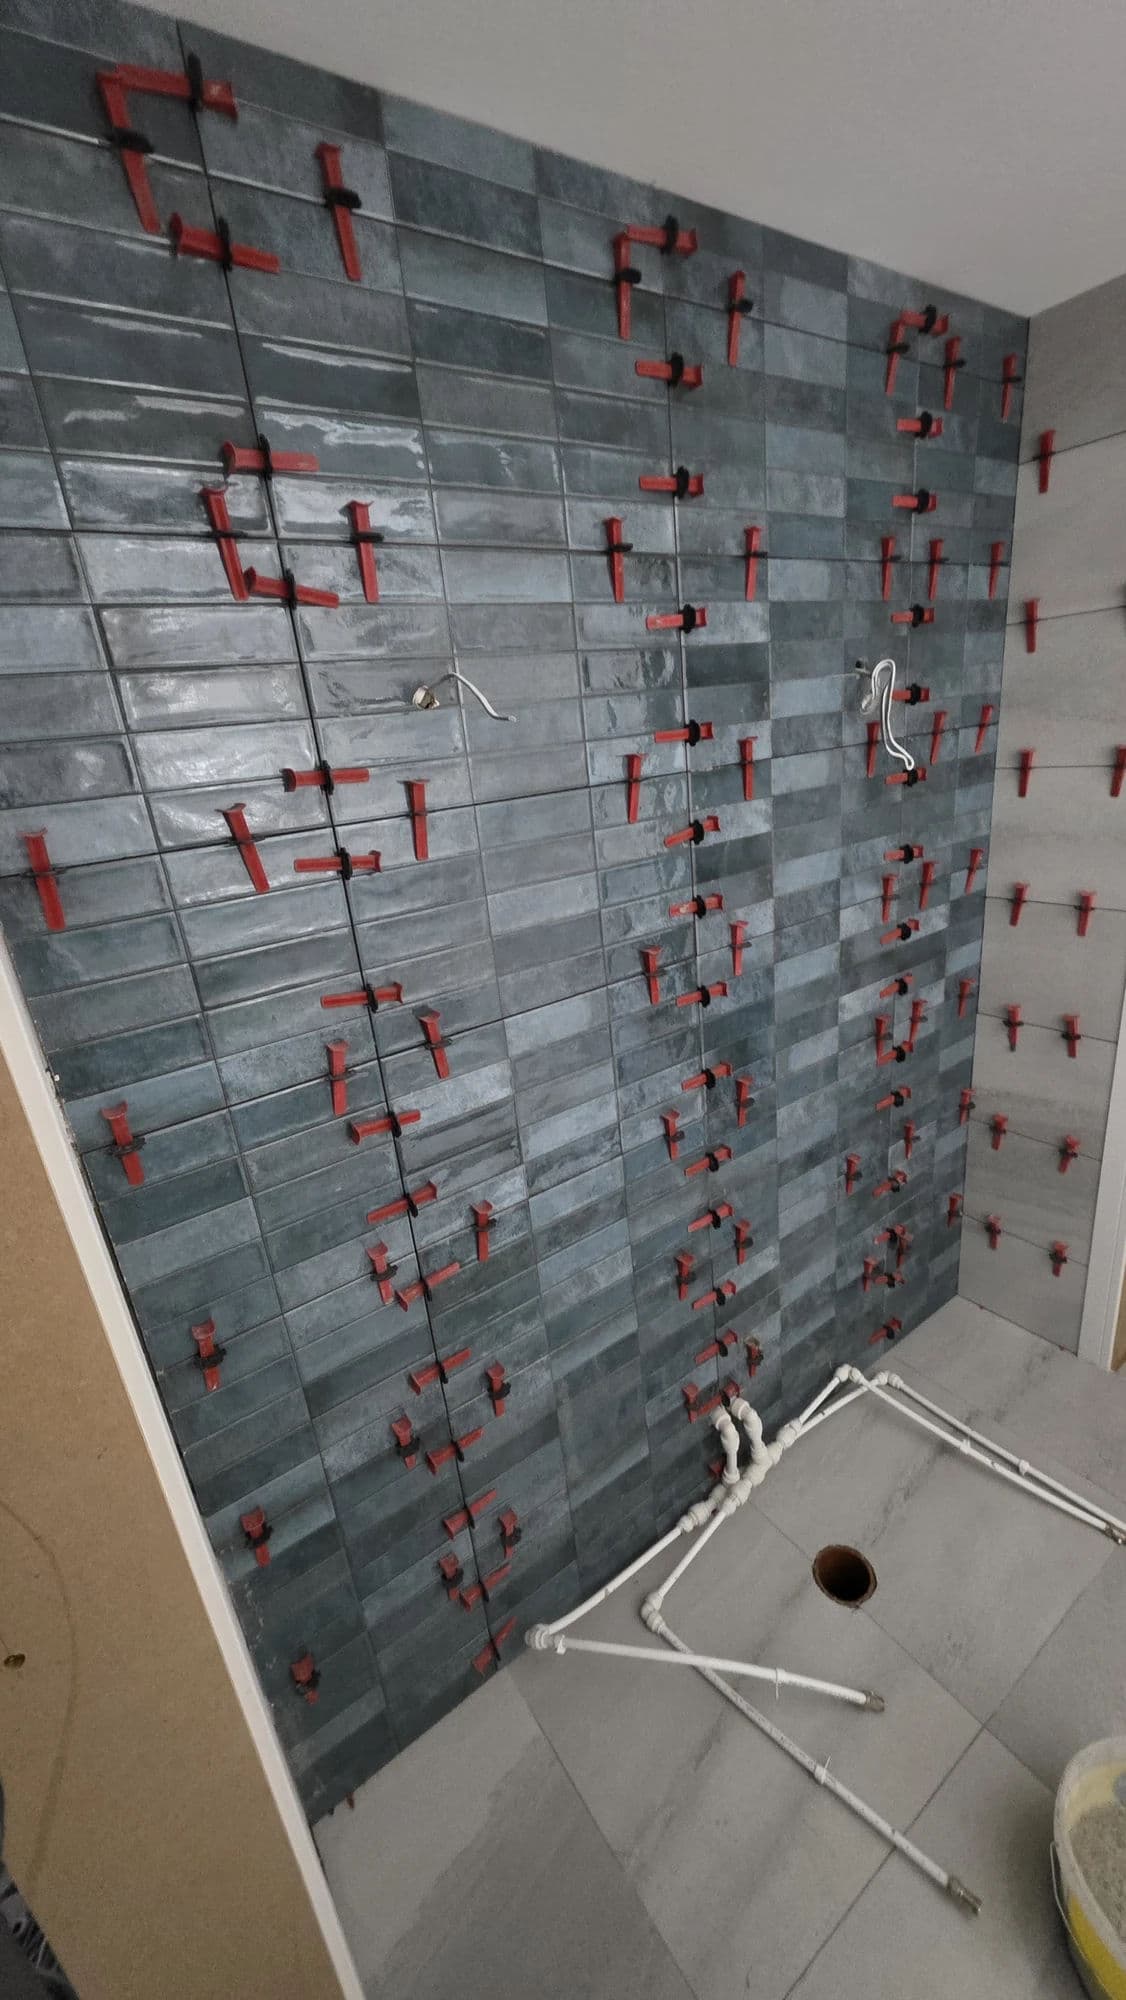
2 mm Dakota Tile-Levelling System
A 2 mm Dakota tile-levelling system was used during installation.
With 600 × 600 mm porcelain tiles, controlling the relative height of neighbouring tile edges is important because even relatively small differences can become visible across the finished surface.
The system helped maintain:
- consistent 2 mm joints;
- accurate tile alignment;
- reduced lipping;
- clean straight-bond lines.
The levelling system was used alongside proper background preparation rather than as a substitute for it.
BAL Micromax3 Eco Grout in Ash
The completed porcelain installation was grouted using BAL Micromax3 Eco grout in Ash.
The Ash colour provides definition between the tiles without creating an unnecessarily strong contrast against the porcelain finish.
The grout also coordinates closely with the flexible sealant used at movement and perimeter junctions.
BAL Micromax Grout-Effect Silicone in Ash
The required flexible junctions were finished using BAL Micromax Grout-Effect Silicone Sealant in Ash.
Unlike conventional glossy bathroom silicone, the grout-effect product has a flatter appearance designed to coordinate more closely with the surrounding grout.
That makes the sealed junctions less visually intrusive across a fully tiled room.
The silicone still provides the required flexible sealing function while integrating more naturally with the BAL Micromax3 Eco grout.
Customer-Supplied Fixtures and TVR-Supplied Installation Materials
The principal visible bathroom products were supplied by the customer.
These included:
- floor-standing back-to-wall WC;
- fitted WC furniture and storage cabinets;
- approximately 400 mm basin;
- illuminated mirror;
- anthracite central-heating radiator;
- porcelain wall tiles;
- porcelain floor tiles.
Tees Valley Refurbishments Ltd supplied the installation materials and specialist components required to complete the refurbishment, including:
- Vent-Axia 479089 extractor fan;
- chrome corner basin isolating valves;
- anthracite corner radiator valves;
- plumbing pipework;
- primer;
- Excel Bond Slow Set Flexible Grey S1 adhesive;
- BAL Micromax3 Eco grout in Ash;
- BAL Micromax Grout-Effect Silicone in Ash;
- 2 mm Dakota tile-levelling clips;
- electrical cable and installation materials required for the mirror and lighting alterations;
- normal building, fixing and finishing materials.
This allowed the customer-selected visible products to be combined with the installation materials and technical components required to complete the room properly.
Approximately Four Working Days
The downstairs WC refurbishment took approximately four working days.
Within that programme we completed:
- removal of the old finishes as required;
- removal of the old service boxing;
- rerouting of basin hot and cold supplies;
- concealment of the basin waste;
- radiator pipework alterations;
- wall repairs;
- ceiling repairs;
- ceiling plastering;
- wall preparation and priming;
- replacement of the extractor fan;
- installation of the Vent-Axia 479089 fan;
- new cable provision for the illuminated mirror;
- removal of the original single ceiling light;
- installation of two new spotlights;
- installation and adjustment of the swivel spotlight on the sloping ceiling;
- full-height 600 × 600 mm porcelain wall tiling;
- 600 × 600 mm porcelain floor tiling;
- WC furniture installation;
- back-to-wall WC fitting;
- compact basin installation;
- exposed chrome trap and valve installation;
- anthracite radiator installation;
- illuminated mirror installation;
- grouting;
- silicone;
- final bathroom fitting and finishing.
The room was completed in August 2026.
Part of the Same Hartlepool Bathroom Project
This downstairs WC was not an unrelated project at a different property.
It formed part of the same wider customer job as our larger upstairs Hartlepool bathroom.
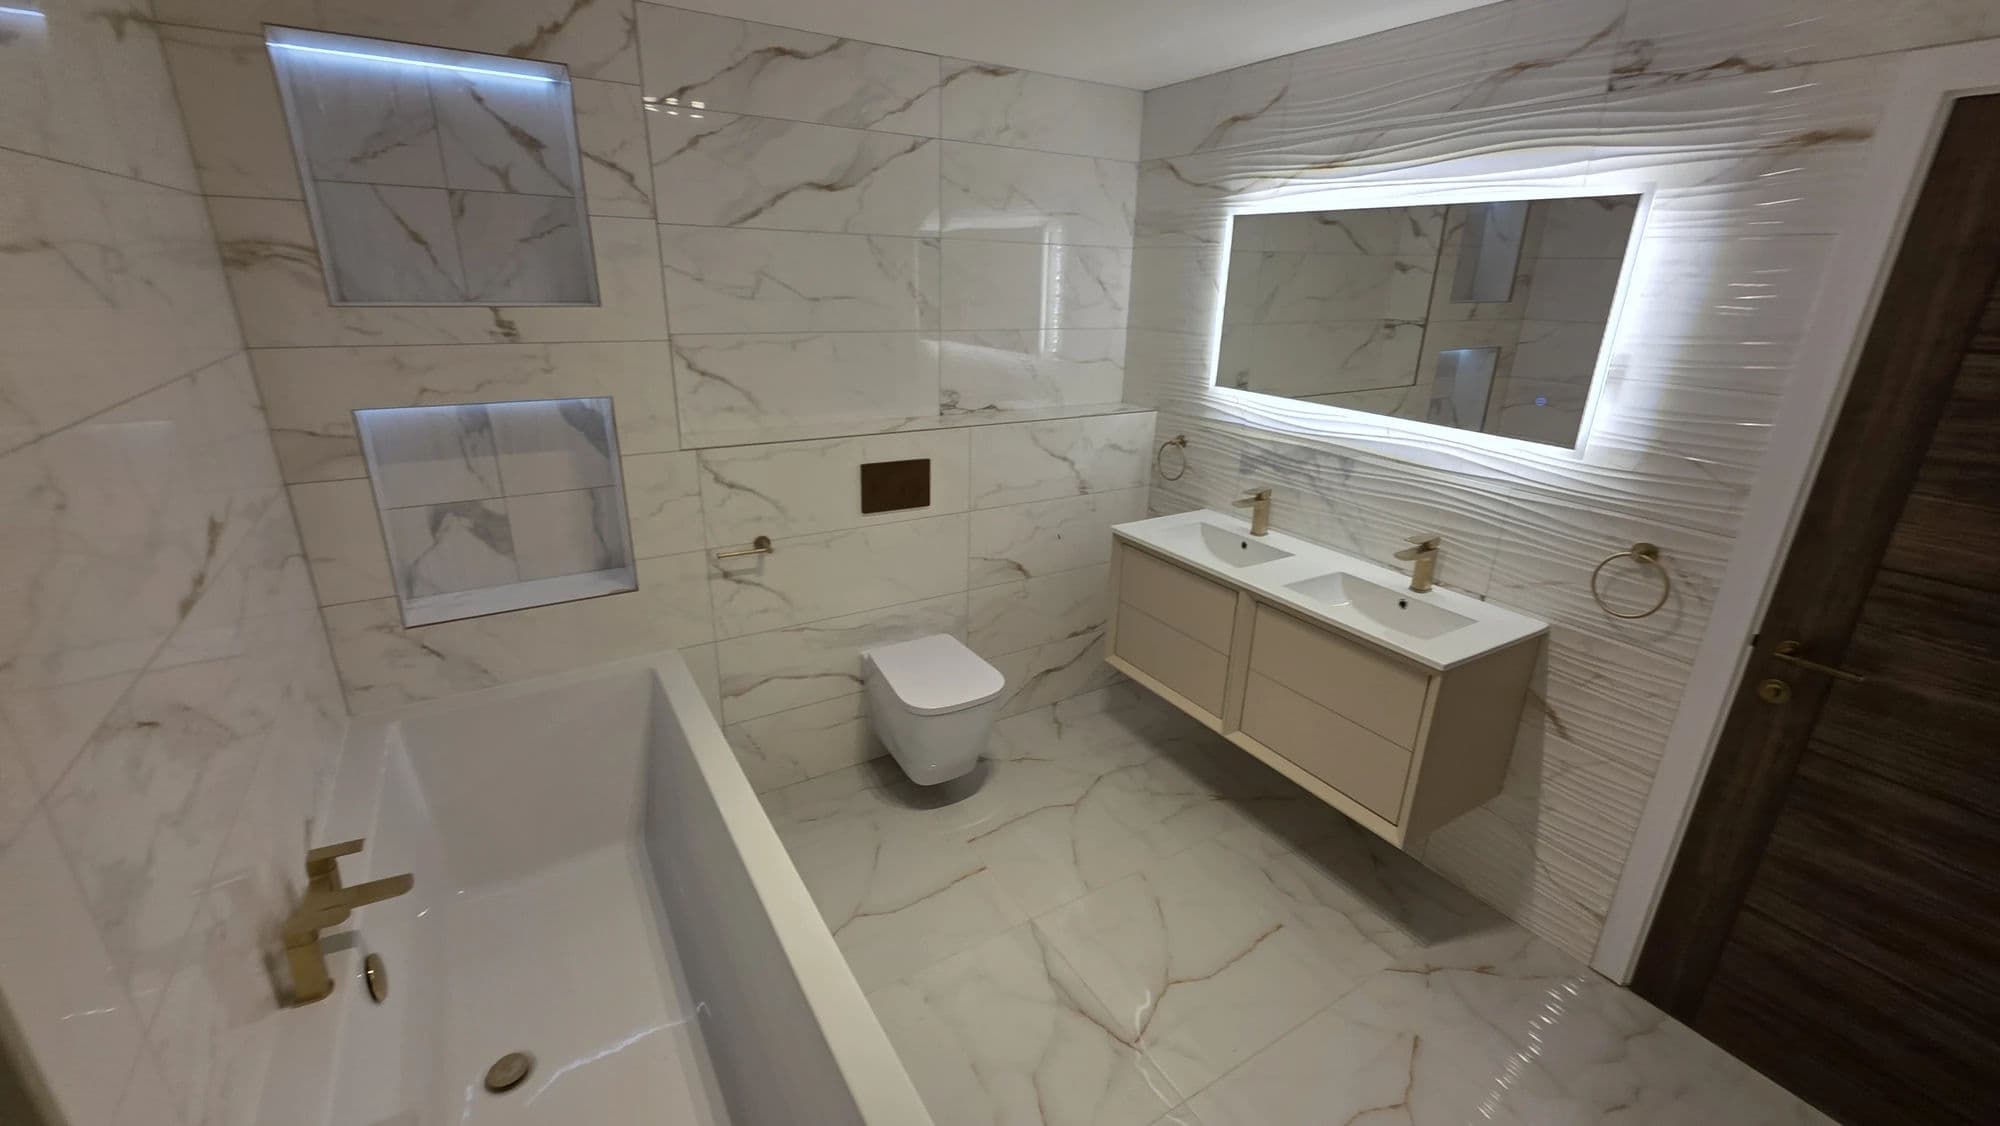
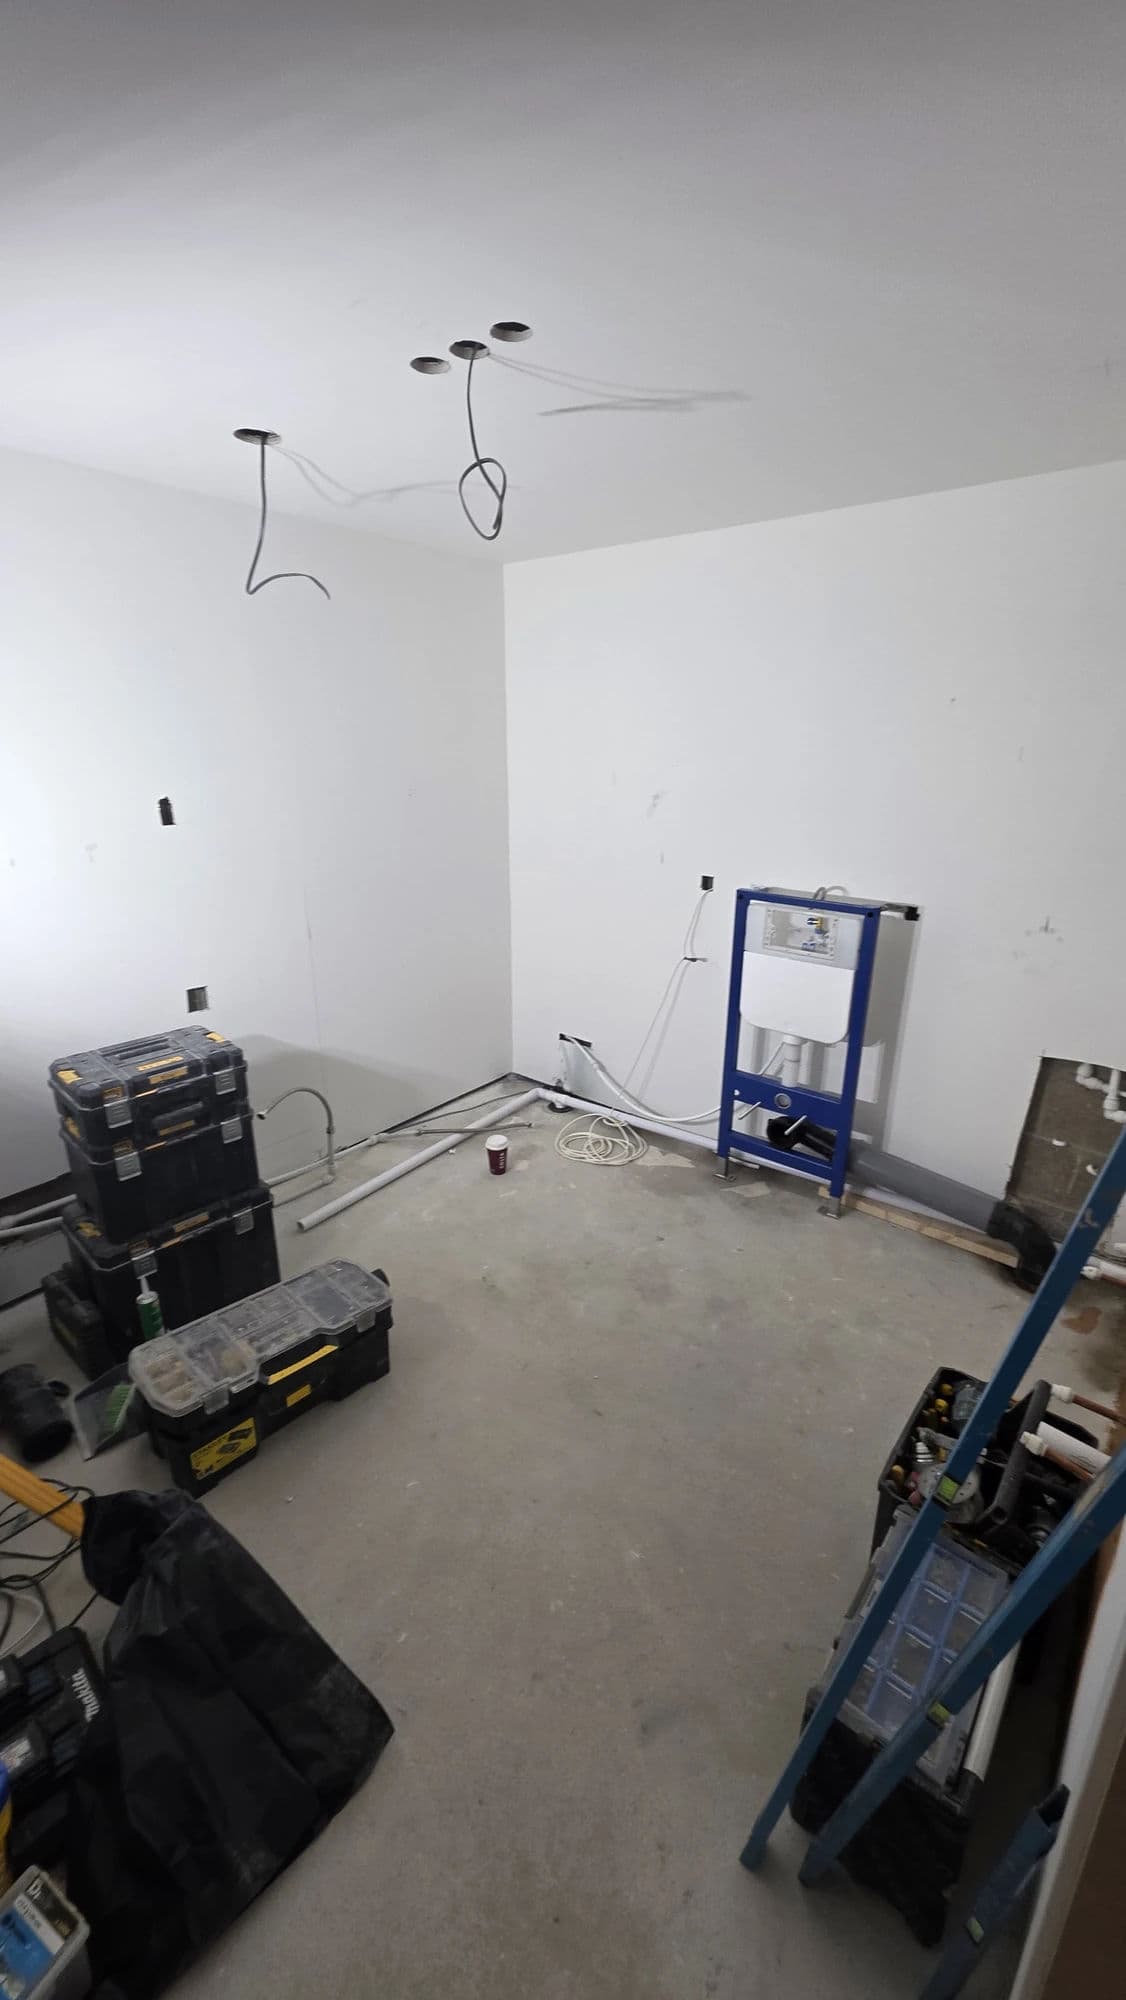
The main bathroom involved replacing the bath with a large walk-in shower, substantial plumbing alterations, porcelain tiling, bathroom furniture, flooring, lighting and upgraded ventilation.
You can read the complete project here:
Bathroom Installation Hartlepool with Walk-In Shower
The main bathroom accounted for ten working days across two working weeks, while this downstairs WC required approximately four additional working days.
Separating the two rooms into individual case studies allows the very different work involved in each space to be documented properly while keeping their relationship as one customer project completely clear.
Other Small WC and Cloakroom Projects
This Hartlepool downstairs WC also connects naturally with our wider experience working in compact toilets, cloakrooms and small bathroom spaces.
The dedicated Small Bathroom & Cloakroom Renovation service covers many of the same challenges found here: restricted space, concealed plumbing, practical storage, careful sanitaryware selection and detailed finishing.
Hartlepool Cloakroom with Wall-Hung WC
At another Hartlepool property, we completed a separate cloakroom involving substantial soil-pipe rerouting, metal-stud construction, concealed plumbing, a wall-hung WC and full-height tiling.
Cloakroom Installation Hartlepool with Wall-Hung WC
Yarm Cloakroom with Slatted Access Doors
Our Yarm cloakroom project required a different solution again, including the addition of a basin, concealed cistern, wall-hung WC, new drainage and bespoke slatted access doors around the adjoining service cupboard.
Yarm Cloakroom Installation with Slatted Access Doors
These projects demonstrate that a downstairs WC may be physically small, but the plumbing, setting-out, electrical work and finishing required to produce a clean result can be every bit as detailed as in a much larger bathroom.
Completed Hartlepool Downstairs WC
The completed refurbishment includes:
- floor-standing back-to-wall WC;
- approximately 1000 mm fitted WC furniture arrangement;
- 600 mm central WC unit;
- two approximately 200 mm storage cabinets;
- approximately 400 mm compact basin;
- chrome basin tap;
- chrome waste;
- exposed decorative chrome trap;
- modern chrome corner basin isolating valves;
- concealed hot and cold basin supplies;
- concealed basin waste;
- anthracite central-heating radiator;
- anthracite corner radiator valves;
- concealed radiator pipework;
- approximately 500 mm illuminated mirror;
- touch control and dimming;
- new concealed cable provision for the mirror;
- Vent-Axia 479089 humidity-and-timer extractor fan;
- repaired and plastered ceiling;
- two new ceiling spotlights;
- adjustable swivel spotlight to the sloping ceiling;
- full-height 600 × 600 mm porcelain wall tiling;
- previously untiled wall now fully tiled;
- 600 × 600 mm porcelain floor tiling;
- straight-bond wall and floor layouts;
- repaired and primed backgrounds;
- Excel Bond Slow Set Flexible Grey S1 adhesive;
- 2 mm Dakota tile-levelling system;
- BAL Micromax3 Eco grout in Ash;
- BAL Micromax Grout-Effect Silicone in Ash.
The most important improvement is not simply the new sanitaryware, lighting or porcelain finish.
The original room had been compromised by plumbing that was boxed beneath the basin or left visibly exposed.
By moving the hot and cold supplies, basin waste and radiator pipework into the wall, we were able to remove that unnecessary visual clutter and give the new fittings a much cleaner background.
The ceiling was treated with the same attention. Rather than retaining the original single light, the surface was repaired and plastered before two new spotlights were introduced, including an adjustable fitting on the sloping ceiling so the light could be directed correctly without uncomfortable glare.
The exposed chrome basin trap and corner valves then became deliberate finishing details rather than unavoidable pipework.
Combined with the fitted WC storage, large-format porcelain tiling, anthracite radiator, illuminated mirror and upgraded Vent-Axia ventilation, the result is a much more resolved downstairs WC while retaining the practical positions of the original fittings.
Together with the larger Hartlepool bathroom installation, this project documents the complete standard of work delivered across both bathroom spaces at the same property.